2015 Chevy Tahoe Headlight Bulb Replacement
The 2015 Chevrolet Tahoe, a staple of American roads, offers a robust blend of capability and comfort. However, like any vehicle, routine maintenance is key to its longevity and safety. One of the most critical aspects of safe driving is visibility, making properly functioning headlights essential. Replacing a headlight bulb on a 2015 Tahoe is a relatively straightforward process, often achievable in your own garage with a few basic tools. This guide provides a detailed, step-by-step walkthrough.
Understanding the Headlight System
Before diving in, it's important to understand the headlight system in your 2015 Tahoe. The Tahoe typically utilizes a combination of halogen and possibly LED bulbs, depending on the specific trim level and package. The low beams and high beams are usually separate bulbs within the headlight assembly. Identifying the correct bulb type is crucial; consult your owner's manual or a reputable parts supplier like NAPA Auto Parts or AutoZone to ensure you purchase the correct replacement.
Safety First! Always disconnect the negative terminal of your battery before working on any electrical components. This prevents accidental short circuits and potential damage to the vehicle's electrical system. Allow the headlight assembly to cool down completely before handling the bulbs, especially halogen bulbs, as they can become extremely hot.
Tools and Materials Required
- Replacement Headlight Bulb (Correct Type for Low Beam or High Beam)
- Socket Wrench Set
- Screwdrivers (Phillips and Flathead may be needed)
- Gloves (to protect the bulb and your hands)
- Clean Rags
- Safety Glasses
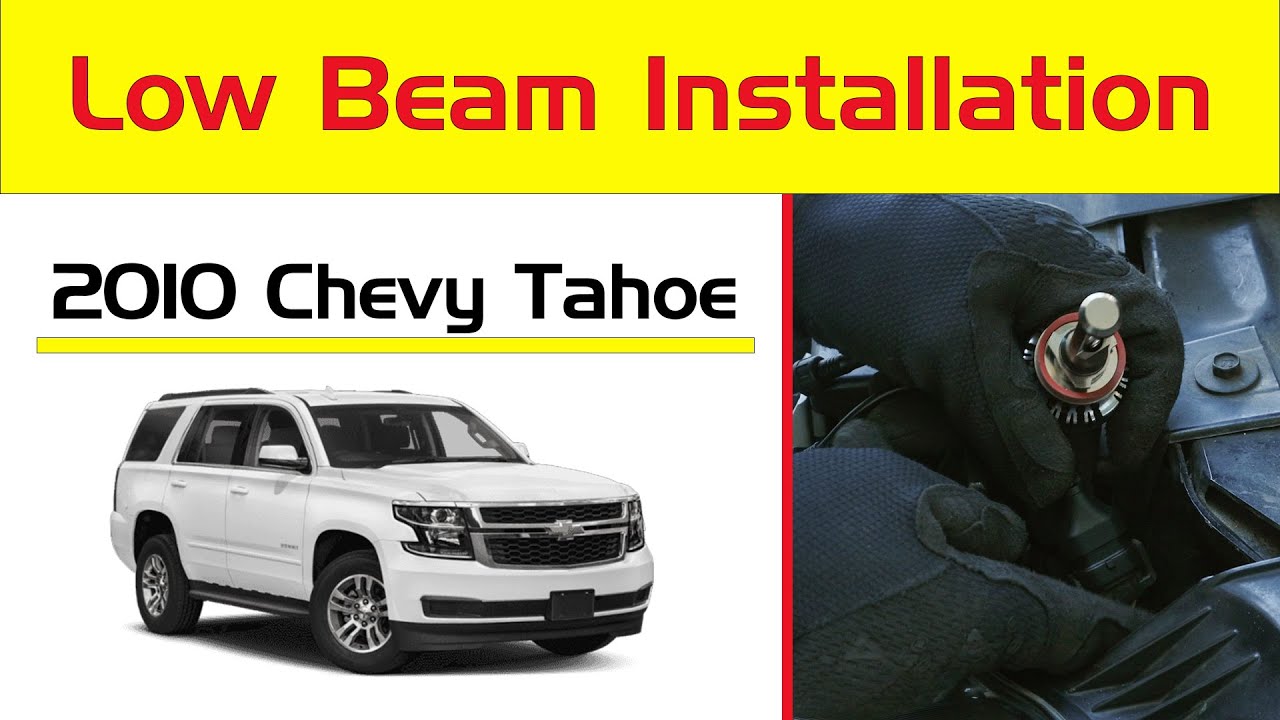
Step-by-Step Replacement Procedure
1. Accessing the Headlight Assembly: The procedure varies slightly depending on whether you're replacing the bulb on the driver's side or passenger's side. Generally, you'll need to access the back of the headlight assembly through the wheel well or by removing some components under the hood.
2. Removing Components (If Necessary): On some models, you may need to remove the air filter housing (passenger side) or the washer fluid reservoir (driver's side) to gain adequate access. This typically involves loosening a few bolts or clips. Be careful not to damage any of the components you remove. Remember how they were positioned for reinstallation.
3. Locating the Headlight Bulb Socket: Once you have access, locate the back of the headlight assembly. You'll see a wiring harness connected to a bulb socket. The socket is usually secured with a twist-lock mechanism or a retaining clip.
4. Disconnecting the Wiring Harness: Gently disconnect the wiring harness from the bulb socket. Avoid pulling on the wires directly; instead, grasp the connector itself. Some connectors may have a small release tab that needs to be pressed before disconnecting.
5. Removing the Old Bulb: Depending on the bulb type, you'll either twist the socket to release it from the headlight assembly (usually a quarter-turn counterclockwise) or you'll need to release a retaining clip. If it's a retaining clip, gently push it inwards or sideways to release the bulb. Be extremely careful not to damage the clip. Once the socket or clip is released, carefully remove the old bulb. Important: Avoid touching the glass portion of the new halogen bulb with your bare hands. The oils from your skin can create a hotspot and shorten the bulb's lifespan. Use gloves or a clean rag to handle the bulb.
6. Installing the New Bulb: Align the new bulb with the socket and insert it. If it's a twist-lock socket, twist it clockwise to secure it. If it's a retaining clip, carefully re-engage the clip to hold the bulb in place. Ensure the bulb is securely seated and locked in position.
7. Reconnecting the Wiring Harness: Reconnect the wiring harness to the bulb socket. Make sure it clicks into place, indicating a secure connection.
8. Reinstalling Components: If you removed any components (air filter housing, washer fluid reservoir, etc.) to access the headlight assembly, reinstall them in the reverse order of removal. Ensure all bolts and clips are securely fastened.
9. Testing the Headlight: Reconnect the negative terminal of your battery. Turn on the headlights to verify that the new bulb is working correctly. Check both the low beam and high beam functions.
Troubleshooting
If the new bulb doesn't illuminate, double-check the following:
- Ensure the bulb is the correct type.
- Verify the wiring harness is securely connected.
- Check the headlight fuse in the vehicle's fuse box. A blown fuse is a common cause of headlight failure.
- If neither headlight works, consider checking the headlight relay.
By following these steps carefully, you can successfully replace the headlight bulb on your 2015 Chevy Tahoe and maintain safe driving visibility. Remember to always prioritize safety and consult a qualified mechanic if you are unsure about any aspect of the procedure. Regular inspection of your vehicle's lights ensures optimal safety for you and other drivers on the road. Chevrolet recommends routine maintenance checks to keep your vehicle running smoothly.