2015 Gmc Terrain Headlight Bulb Replacement
Replacing a headlight bulb on a 2015 GMC Terrain is a relatively straightforward task that most DIY enthusiasts can tackle with a few basic tools. Whether you're upgrading to brighter bulbs, dealing with a burnt-out filament, or simply performing routine maintenance, this guide will walk you through the process step-by-step.
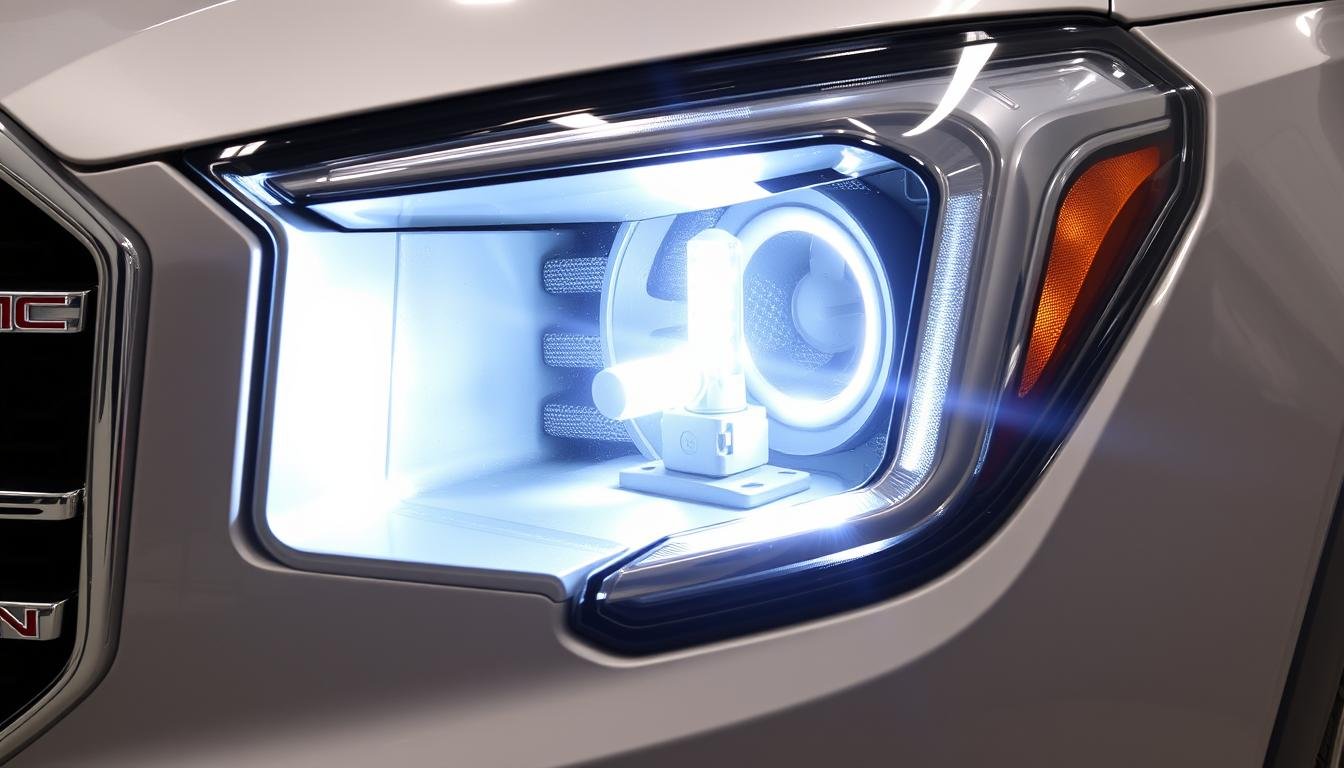
Identifying the Correct Bulb Type
Before you even think about touching your 2015 GMC Terrain, knowing the correct bulb type is crucial. The 2015 Terrain typically uses a high-intensity discharge (HID) bulb (D3S) for the low beams on models equipped with factory HID systems. Halogen models will typically use a 9005 (HB3) bulb for the high beam and H11 bulb for the low beam. Always consult your owner's manual or a reliable online parts retailer (like RockAuto or Amazon) to confirm the exact bulb type for your specific trim level and headlight configuration. Using the wrong bulb can lead to improper fitment, reduced visibility, and potentially damage to your vehicle's electrical system.
Tools and Materials Needed
Gathering the necessary tools and materials before starting the replacement process will save you time and frustration. You'll generally need:
- New Headlight Bulb(s) – Of the correct type!
- Gloves – To prevent oil from your skin contaminating the bulb.
- Socket Wrench or Nut Driver Set – For removing any necessary fasteners.
- Screwdriver Set – Both Phillips and flat-head may be needed.
- Flashlight or Headlamp – For better visibility, especially in low-light conditions.
- Optional: Trim Removal Tool – To help remove any plastic panels without causing damage.
Step-by-Step Replacement Procedure
Now, let's get to the actual replacement process. Remember to work in a well-lit area and take your time. Disconnect the negative terminal of your battery for added safety before beginning.
- Accessing the Headlight Assembly: This is where procedures can slightly differ based on the Terrain’s trim. Often, you'll need to remove several plastic clips or screws securing the plastic housing over the headlights. Refer to your owner's manual or online resources for specific instructions tailored to your model. Some models might require removing the entire headlight assembly for easier bulb access.
- Disconnecting the Electrical Connector: Once you have access to the back of the headlight assembly, locate the electrical connector attached to the bulb. Gently squeeze the connector's release tab (if present) and pull it straight back to disconnect it. Avoid pulling on the wires themselves, as this could damage the connector.
- Removing the Old Bulb: Depending on the bulb type, it will be held in place by a retaining clip or a twist-lock mechanism. For a twist-lock, rotate the bulb socket counterclockwise to release it from the housing. For a retaining clip, carefully release the clip by pressing or squeezing it, then pull the bulb straight out.
- Installing the New Bulb: Handle the new bulb with gloves to avoid transferring oils from your skin, which can shorten the bulb's lifespan. Insert the new bulb into the socket, ensuring it is properly aligned. If it's a twist-lock, rotate it clockwise to secure it. If it’s a retaining clip type, ensure the clip fully secures the bulb.
- Reconnecting the Electrical Connector: Plug the electrical connector back into the bulb, ensuring it clicks securely into place.
- Testing the New Bulb: Before reassembling everything, turn on your headlights to ensure the new bulb is working correctly. If it doesn't light up, double-check the connection and the bulb's seating.
- Reassembling the Headlight Assembly: Once you've confirmed the bulb is working, carefully reassemble the headlight assembly, ensuring all clips, screws, and fasteners are securely in place.
- Repeat for the Other Side: If you're replacing both bulbs, repeat the process for the other headlight.
Important Considerations and Troubleshooting
A few extra things to keep in mind:
- HID Bulb Handling: HID bulbs contain pressurized gas and should be handled with extra care. Avoid dropping or damaging them.
- Alignment: After replacing a headlight bulb, it's a good idea to check your headlight alignment to ensure proper beam projection. Misaligned headlights can reduce visibility and even blind oncoming drivers. Many auto shops offer headlight alignment services.
- "Flickering" HID Bulbs: If your Terrain has HID headlights and the new bulbs flicker, the ballast (the component that provides the high voltage to ignite the HID bulb) may be failing. Replacement of the ballast might be required. Ballast issues are common with older HID systems.
- Condensation: If you notice condensation inside the headlight housing after replacing the bulb, it may indicate a damaged or improperly sealed housing.
By following these steps, you can confidently replace the headlight bulb on your 2015 GMC Terrain and ensure safe and reliable visibility on the road. Remember to always prioritize safety and consult a professional mechanic if you encounter any difficulties or uncertainties. Proper lighting is essential for safe driving!