Catalytic Converter For 2012 Chevy Equinox
Alright, so you're looking into the catalytic converter for your 2012 Chevy Equinox. Maybe you're getting a P0420 code, maybe it's rattling, or maybe you're just planning some preemptive maintenance. Whatever the reason, let's break down what you need to know about this essential emission control device.
Understanding Your 2012 Equinox's Catalytic Converter
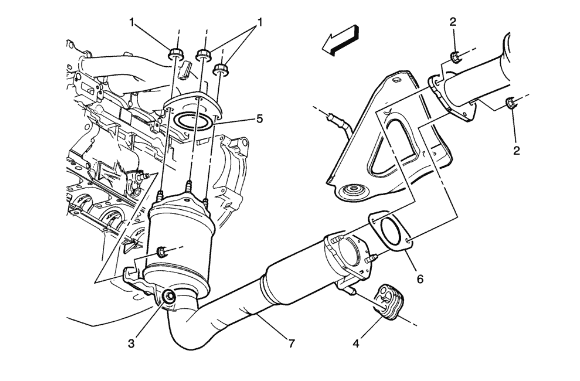
Your 2012 Equinox, depending on the engine (2.4L Ecotec or 3.0L V6), will have one or two catalytic converters. The 2.4L typically has a single unit, while the 3.0L V6 will often have two, one for each bank of cylinders. We'll focus primarily on the single converter setup common with the 2.4L for this discussion, but the principles apply to both.
Essentially, the catalytic converter is a crucial component of your Equinox's emission control system. It's designed to reduce harmful pollutants in your exhaust gases before they're released into the atmosphere. Think of it as a chemical reactor, using catalysts to transform bad stuff into less bad stuff.
The Chemistry Behind It
Here's a simplified breakdown of what happens inside a catalytic converter:
- Hydrocarbons (HC): Unburned fuel. The converter oxidizes (burns) these, converting them into water (H2O) and carbon dioxide (CO2).
- Carbon Monoxide (CO): A poisonous gas. The converter also oxidizes this into CO2.
- Nitrogen Oxides (NOx): These contribute to smog and acid rain. The converter reduces these back into nitrogen gas (N2) and oxygen (O2).
These reactions are facilitated by catalysts, typically platinum, palladium, and rhodium, coated onto a ceramic honeycomb or metallic foil structure inside the converter. This structure increases the surface area available for the chemical reactions.
It’s important to note that the catalytic converter relies on a specific air-fuel ratio to function optimally. This is where the oxygen sensors come in, which are usually located upstream and downstream of the converter. These sensors monitor the oxygen content in the exhaust and provide feedback to the engine control unit (ECU) to adjust the fuel mixture. A faulty oxygen sensor can lead to converter inefficiency or even damage.
Identifying a Faulty Catalytic Converter
Several symptoms can indicate a failing catalytic converter. Here are the most common:
- Check Engine Light (CEL): This is the most obvious sign. The P0420 code ("Catalyst System Efficiency Below Threshold") is a frequent culprit, indicating the converter isn't working as efficiently as the ECU expects. However, other codes related to oxygen sensors or fuel trim could also point towards a catalytic converter issue. Always diagnose the code properly before replacing the converter.
- Reduced Engine Performance: A clogged converter restricts exhaust flow, reducing horsepower and acceleration. You might notice the engine feels sluggish, especially when climbing hills or accelerating quickly.
- Poor Fuel Economy: A failing converter can disrupt the air-fuel ratio, leading to decreased fuel efficiency.
- Rattling Noise: The internal components of the converter can break down over time, causing a rattling sound, especially when the engine is cold or idling. This is a fairly obvious symptom of internal damage.
- Sulfur Smell (Rotten Eggs): A failing converter can sometimes emit a strong sulfur smell from the exhaust. This is caused by the converter's inability to properly process sulfur compounds in the fuel.
- Overheating: In rare cases, a severely clogged converter can overheat, potentially causing a fire hazard.
Diagnostic Steps Before Replacement
Before jumping to the conclusion that you need a new converter, perform some diagnostic checks:
- Check for exhaust leaks: Leaks before the converter can skew the oxygen sensor readings and trigger a P0420 code.
- Inspect the oxygen sensors: A faulty oxygen sensor can provide inaccurate readings, leading to incorrect fuel trim and reduced converter efficiency. Use a multimeter to check their functionality, or ideally a scan tool that can read live sensor data.
- Check for vacuum leaks: Vacuum leaks can also affect the air-fuel ratio and impact converter performance.
- Scan for other trouble codes: Address any other codes that might be affecting engine performance, such as misfire codes or fuel trim issues.
- Catalytic Converter Backpressure Test: This involves installing a pressure gauge in place of the upstream oxygen sensor to measure exhaust backpressure. Excessive backpressure indicates a clogged converter. A healthy system should have relatively low backpressure.
Choosing a Replacement Catalytic Converter
If your diagnosis confirms a faulty catalytic converter, you have a few options:
- OEM (Original Equipment Manufacturer): This is the most expensive option but guarantees a perfect fit and optimal performance. An OEM converter will meet all emission standards and is generally the most reliable choice.
- Aftermarket (Direct-Fit): These are designed to directly replace the original converter. Quality can vary significantly, so research the brand and read reviews before purchasing. Look for converters that meet EPA standards and are CARB (California Air Resources Board) compliant if you live in California or another state with similar emission regulations.
- Universal Catalytic Converter: These are less expensive but require welding and fabrication for installation. This option is only recommended if you have experience with welding and exhaust systems. Proper installation is critical to ensure proper sealing and prevent exhaust leaks.
Important Considerations:
- CARB Compliance: If you live in California or another state with CARB regulations, make sure the replacement converter is CARB-compliant. Using a non-compliant converter can result in failing a smog check and fines.
- Warranty: Check the warranty offered by the manufacturer. A longer warranty typically indicates a higher-quality product.
- Material: Look for converters made from durable materials like stainless steel, which offer better corrosion resistance.
Replacing the Catalytic Converter
While the replacement process can vary slightly depending on the specific converter and exhaust system design, here's a general overview:
- Safety First: Disconnect the negative battery terminal. Let the exhaust system cool down completely before starting work. Wear safety glasses and gloves.
- Raise the Vehicle: Use jack stands to safely support the vehicle.
- Loosen Fasteners: Apply penetrating oil to the bolts connecting the converter to the exhaust manifold and downstream exhaust pipe. Let it soak for a while before attempting to loosen them. These bolts can be notoriously difficult to remove due to rust and corrosion.
- Remove Oxygen Sensors: Disconnect the oxygen sensor wiring and carefully remove the sensors from the converter. It may be helpful to use an oxygen sensor socket.
- Remove the Old Converter: Unbolt the converter from the exhaust system. You may need to cut or separate the exhaust pipe if the fasteners are too corroded.
- Install the New Converter: Install the new converter in the reverse order of removal. Use new gaskets and hardware to ensure a proper seal. Tighten all fasteners to the manufacturer's specifications.
- Reinstall Oxygen Sensors: Reinstall the oxygen sensors. Apply anti-seize compound to the sensor threads to prevent them from seizing in the future.
- Reconnect Battery: Reconnect the negative battery terminal.
- Clear Diagnostic Codes: Use a scan tool to clear any diagnostic codes.
- Test Drive: Test drive the vehicle to ensure the repair was successful and that there are no exhaust leaks.
Torque Specifications: Always consult your vehicle's repair manual for the correct torque specifications for all fasteners. Overtightening can damage the threads, while undertightening can lead to leaks.
Welding (for Universal Converters): If you're using a universal converter, you'll need to cut the exhaust pipe and weld the converter in place. Ensure proper alignment and sealing to prevent leaks. This requires skill and specialized equipment.
Replacing a catalytic converter on a 2012 Chevy Equinox is a manageable task for an experienced DIYer, but it's crucial to diagnose the problem accurately, choose the right replacement part, and follow proper installation procedures. If you're unsure about any step, don't hesitate to consult a qualified mechanic.