Toyota Camry 2014 Transmission Fluid Change
The 2014 Toyota Camry, a paragon of reliability and practicality, often sees its transmission fluid overlooked during routine maintenance. While Toyota may suggest a "lifetime" fill for the transmission under normal driving conditions, the reality is that fluid degrades over time, impacted by heat, friction, and oxidation. Performing a transmission fluid change on your Camry can significantly extend its lifespan and maintain optimal performance. This guide will delve into the process, explaining not just the "how," but also the "why" behind each step.
Understanding Your Camry's Transmission
The 2014 Camry typically comes with either a 6-speed automatic transmission (U760E or U760F, depending on drivetrain - front-wheel drive or all-wheel drive, respectively) or a CVT (Continuously Variable Transmission). This guide focuses on the 6-speed automatic. While some principles overlap, CVT fluid changes require specialized knowledge and fluid types, and are best left to professionals. Identifying your transmission type is crucial; consult your owner's manual or a reliable online database based on your VIN.
The 6-speed automatic relies on hydraulic pressure generated by the transmission fluid to engage clutches and bands, facilitating gear changes. This fluid also lubricates moving parts and dissipates heat. Over time, the fluid loses its viscosity, accumulates debris from wear, and becomes contaminated with moisture. This leads to sluggish shifting, increased wear on internal components, and potentially, catastrophic transmission failure.
The Importance of the Right Fluid
Using the correct transmission fluid is paramount. The 2014 Camry's 6-speed automatic typically requires Toyota ATF WS (Automatic Transmission Fluid - World Standard). Using the wrong fluid can cause irreversible damage to the transmission. Consult your owner's manual for the definitive fluid specification. Generic "multi-vehicle" fluids may be compatible, but Toyota ATF WS is formulated specifically for your transmission's needs. We strongly recommend using the Toyota fluid.
Tools and Materials Required
Before you begin, gather the following tools and materials:
- New transmission fluid (Toyota ATF WS) – typically 3-4 quarts for a drain and refill.
- New drain plug gasket/washer.
- Socket set (typically a 14mm socket for the drain plug).
- Torque wrench.
- Drain pan.
- Funnel.
- Jack and jack stands (never work under a vehicle supported only by a jack).
- Wheel chocks.
- Gloves.
- Rags or shop towels.
- Measuring container (graduated cylinder or marked container).
- Protective eyewear.
Procedure: Drain and Refill
The following steps outline the drain and refill procedure. This method replaces a significant portion of the fluid, but not all of it (a complete flush requires specialized equipment and is beyond the scope of this guide). Regular drain and refills are more beneficial than infrequent flushes.
Step 1: Preparation
Park the vehicle on a level surface, engage the parking brake, and chock the rear wheels. Allow the engine to cool down slightly before starting. Hot exhaust components can cause severe burns. Raise the front of the vehicle using a jack and securely support it with jack stands.
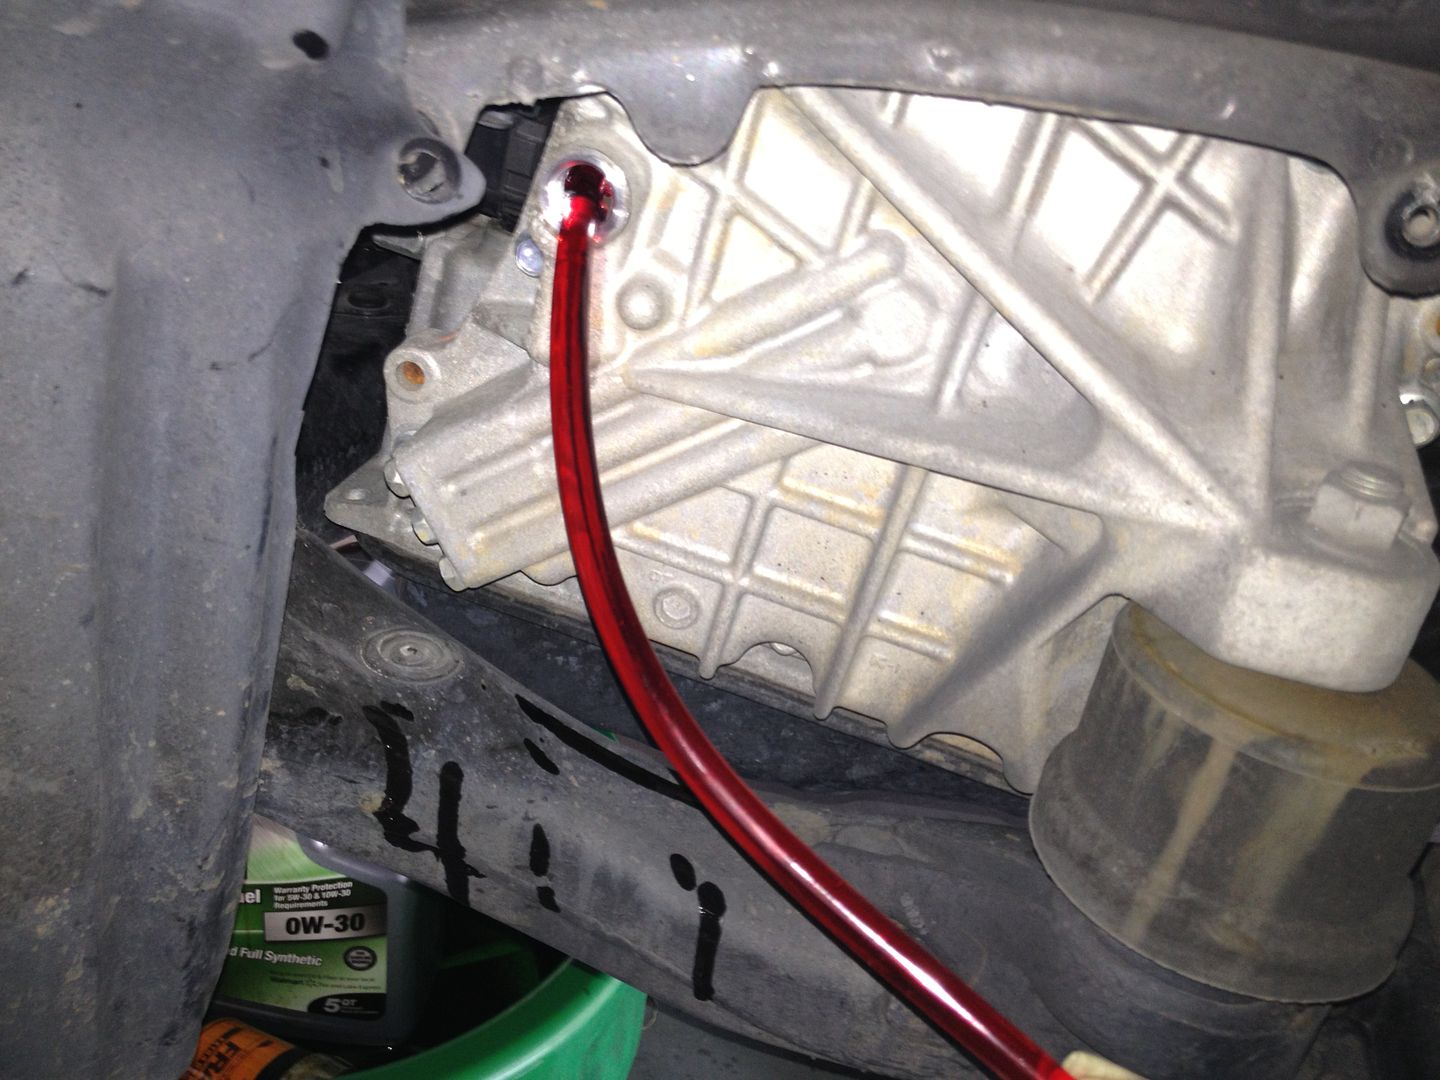
Step 2: Locating the Drain Plug
Locate the transmission drain plug. It's typically found on the bottom of the transmission pan. Consult your vehicle's repair manual or online resources for its precise location. Clean the area around the drain plug to prevent debris from entering the transmission.
Step 3: Draining the Fluid
Position the drain pan under the drain plug. Using the correct socket, carefully loosen the drain plug. Once loosened, remove the plug completely, allowing the fluid to drain into the pan. Be patient; the fluid may take some time to drain completely. Inspect the drained fluid for any signs of metal shavings or unusual debris, which could indicate internal transmission problems. This is a crucial step in diagnostics.
Step 4: Inspecting and Replacing the Drain Plug Gasket
While the fluid is draining, inspect the drain plug gasket. It's a small crush washer designed to seal the drain plug. If it's damaged or worn, replace it with a new one. Using a new gasket is essential to prevent leaks.
Step 5: Reinstalling the Drain Plug
Once the fluid has completely drained, clean the drain plug and install the new gasket (if applicable). Thread the drain plug back into the transmission pan by hand to avoid cross-threading. Tighten the drain plug to the specified torque using a torque wrench. The correct torque specification is crucial; over-tightening can damage the transmission pan, while under-tightening can lead to leaks. Consult your vehicle's repair manual for the correct torque value. Typically it is around 30-35 ft-lbs.
Step 6: Measuring the Drained Fluid
Carefully measure the amount of fluid that was drained. This will give you an approximate idea of how much new fluid to add. Using a graduated container, accurately measure the volume. Note that the actual amount needed may vary slightly due to variations in fluid level and drain time.
Step 7: Adding New Fluid
Locate the transmission fill plug. It's usually located on the side of the transmission. Consult your vehicle's repair manual or online resources for its precise location. Remove the fill plug. Using a funnel, carefully pour the new transmission fluid into the fill hole. Add approximately the same amount of fluid that was drained. It's always better to add slightly less than too much; you can always add more later.
Step 8: Checking the Fluid Level
This step requires the engine to be running and the transmission to be at operating temperature. With the vehicle safely on jack stands, start the engine and allow it to warm up. Cycle through each gear (P, R, N, D) for a few seconds each to allow the fluid to circulate. Return the transmission to park (P). With the engine still running, remove the fill plug again. There is typically an overflow tube inside. If fluid drips out, it is at the correct level. If no fluid drips out, add small amounts of fluid until it does.
Step 9: Final Steps
Once the fluid level is correct, reinstall the fill plug. Ensure it's properly tightened. Lower the vehicle from the jack stands. Take the vehicle for a short test drive, paying attention to how it shifts. Check for any leaks around the drain plug and fill plug. Re-check the fluid level after the test drive. Dispose of the used transmission fluid properly at a recycling center or auto parts store.
Important Considerations
- Safety First: Always prioritize safety. Use jack stands, wear protective eyewear and gloves, and be careful when working around hot components.
- Cleanliness: Keep everything clean to prevent contamination of the transmission fluid.
- Torque Specifications: Use a torque wrench and adhere to the specified torque values to avoid damaging components.
- Regular Maintenance: Consider performing transmission fluid drain and refills every 30,000 to 60,000 miles, depending on driving conditions. Heavy towing, stop-and-go traffic, and extreme temperatures can shorten the fluid's lifespan.
- Professional Assistance: If you're unsure about any aspect of this procedure, consult a qualified mechanic. Improperly performed transmission work can lead to costly repairs.
By following these steps and understanding the principles behind them, you can confidently perform a transmission fluid drain and refill on your 2014 Toyota Camry, contributing to its long-term reliability and performance.