Toyota Tacoma Cabin Air Filter Replacement
The Toyota Tacoma, a perennial favorite for its ruggedness and reliability, requires routine maintenance to keep it running smoothly. While oil changes and tire rotations often take center stage, the cabin air filter is a crucial component that's frequently overlooked. A clean cabin air filter ensures that the air circulating inside your Tacoma is free from dust, pollen, and other pollutants, contributing to a healthier and more comfortable driving experience. This article provides a detailed guide to replacing the cabin air filter in your Toyota Tacoma, empowering you to tackle this maintenance task with confidence.
Understanding the Cabin Air Filter
Before diving into the replacement process, let's clarify the purpose of the cabin air filter. Unlike the engine air filter, which protects the engine from contaminants, the cabin air filter is designed to purify the air entering the vehicle's passenger compartment. It sits within the HVAC (Heating, Ventilation, and Air Conditioning) system and traps airborne particles, improving air quality and reducing allergens.
There are primarily two types of cabin air filters: particulate filters and activated carbon filters. Particulate filters, typically made of pleated paper or synthetic fibers, effectively remove dust, pollen, and other solid particles. Activated carbon filters, in addition to particulate filtration, incorporate activated carbon to absorb odors and gases, such as exhaust fumes and volatile organic compounds (VOCs). Choosing the right type depends on your specific needs and environment.
A clogged cabin air filter can significantly impact your Tacoma's HVAC performance. It can restrict airflow, reducing heating and cooling efficiency. This, in turn, can strain the blower motor, potentially leading to premature failure. Furthermore, a dirty filter can harbor mold and bacteria, contributing to unpleasant odors inside the cabin. Ignoring regular replacement can also affect people with allergies or respiratory problems.
Tools and Materials Required
Fortunately, replacing the cabin air filter in a Toyota Tacoma is a straightforward process that requires minimal tools. Here's a list of what you'll need:
- New Cabin Air Filter: Ensure you purchase the correct filter for your Tacoma's year and model. Check your owner's manual or consult with an auto parts store.
- Phillips Head Screwdriver: For removing the glove box retaining screws (if applicable).
- Optional: Small Flathead Screwdriver: May be helpful for releasing retaining clips.
- Optional: Shop Vacuum: For cleaning out any debris from the filter housing.
- Gloves (Optional): To keep your hands clean.
Step-by-Step Replacement Procedure
Now, let's proceed with the replacement process. The cabin air filter is typically located behind the glove box. Follow these steps carefully:
1. Prepare the Glove Box
Empty the glove box completely. This will make it easier to access the filter housing and prevent items from falling out.
2. Disconnect the Glove Box Damper (If Equipped)
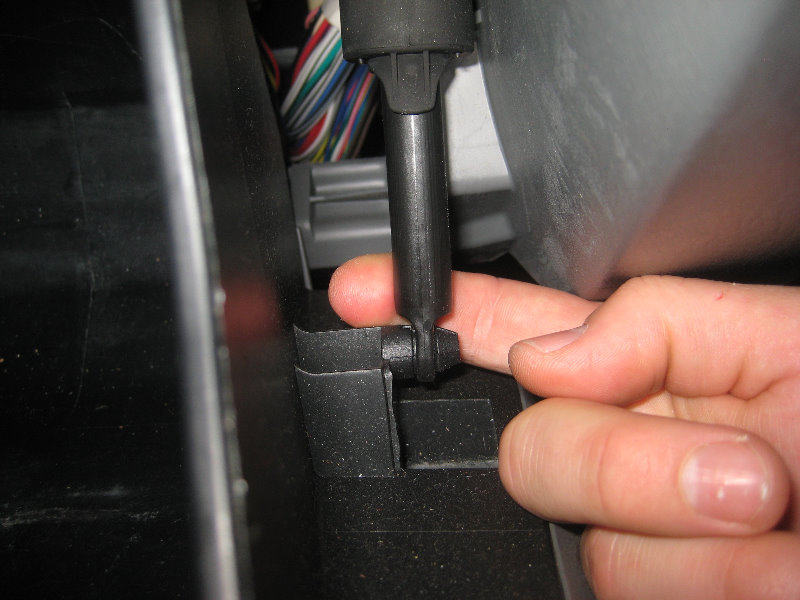
Many Tacoma models feature a damper mechanism that slows the opening of the glove box. This damper needs to be disconnected. Locate the damper arm on the right side of the glove box. Gently detach the damper arm from its retaining clip. This might involve squeezing the clip or using a small flathead screwdriver to carefully pry it loose. Avoid excessive force to prevent damage.
3. Release the Glove Box Retainers
The glove box is typically held in place by two retainers, one on each side. These retainers can be released in a few different ways, depending on the model year:
- Squeeze Retainers: Some models have retainers that can be squeezed inward to release the glove box. Apply gentle pressure to the sides of the glove box while simultaneously pushing inward on the retainers.
- Rotating Retainers: Other models have rotating retainers. Rotate these retainers (usually 90 degrees) until they align with the slot, allowing the glove box to swing down.
- Screw Retainers: Some older models may use screws to hold the glove box in place. Use a Phillips head screwdriver to remove these screws.
Once the retainers are released, the glove box should swing down, exposing the cabin air filter housing.
4. Locate and Open the Filter Housing
The cabin air filter housing is a rectangular plastic box, usually white or black, located behind where the glove box was. It has a cover that needs to be removed to access the filter.
The cover is typically secured by one or two clips or latches. Carefully release these clips or latches to remove the cover. Some covers might slide to the side or pull straight out.
5. Remove the Old Filter
With the cover removed, you'll see the old cabin air filter. Gently pull the old filter straight out of the housing. Note the orientation of the filter (the direction of airflow) before removing it. This will help you install the new filter correctly. A small arrow on the filter usually indicates the airflow direction.
6. Clean the Filter Housing
Before installing the new filter, take the opportunity to clean out any debris from the filter housing. Use a shop vacuum to remove dust, leaves, or other particles that may have accumulated inside.
7. Install the New Filter
Insert the new cabin air filter into the housing, ensuring that it's oriented correctly (matching the airflow direction of the old filter). The filter should slide in snugly.
8. Reinstall the Filter Housing Cover
Replace the filter housing cover, making sure the clips or latches are securely fastened.
9. Reassemble the Glove Box
Reverse the steps you took to disassemble the glove box:
- Swing the glove box back into position.
- Re-engage the retainers (squeeze, rotate, or screw them back in place).
- Reattach the glove box damper arm (if equipped).
10. Test the System
Start your Tacoma and turn on the HVAC system to test the airflow and temperature. You should notice an improvement in air quality and system performance.
Maintenance Schedule
Toyota recommends replacing the cabin air filter every 12,000 to 15,000 miles, or once a year, whichever comes first. However, if you live in a dusty or polluted area, you may need to replace it more frequently. Regularly checking your filter will help determine the optimal replacement interval for your specific driving conditions.
Troubleshooting Tips
Here are some common issues you might encounter and how to address them:
- Difficulty Removing the Glove Box: Double-check that you've released all retainers and disconnected the damper arm (if applicable). Applying excessive force can damage the glove box.
- Incorrect Filter Size: Ensure you've purchased the correct filter for your Tacoma's year and model.
- Reduced Airflow After Replacement: Double-check that the filter is installed correctly and that the filter housing cover is securely fastened. A pinched or misaligned filter can restrict airflow.
Conclusion
Replacing the cabin air filter in your Toyota Tacoma is a simple yet essential maintenance task that can significantly improve your driving experience. By following these detailed instructions, you can save money on labor costs and ensure that you and your passengers are breathing clean, healthy air. Remember to consult your owner's manual for specific recommendations and always prioritize safety when working on your vehicle.