2004 Toyota Sequoia Water Pump Replacement
The 2004 Toyota Sequoia, a robust and reliable SUV, is known for its longevity. However, like any vehicle, preventative maintenance and occasional repairs are crucial to keeping it running smoothly. One common maintenance task is replacing the water pump. This article provides a comprehensive guide to replacing the water pump on a 2004 Toyota Sequoia, focusing on the 4.7L 2UZ-FE V8 engine, a staple of Toyota reliability.
Why Replace the Water Pump?
The water pump is a critical component of the engine's cooling system. It circulates coolant throughout the engine block, radiator, and heater core, preventing overheating. Over time, the water pump can fail due to wear and tear, corrosion, or bearing failure. Common symptoms of a failing water pump on a 2004 Sequoia include:
- Overheating: This is the most obvious sign. If your temperature gauge is consistently high or the engine is overheating, the water pump could be the culprit.
- Coolant Leaks: Look for coolant (usually green, pink, or orange) pooling under the front of the vehicle, near the water pump area.
- Noisy Operation: A failing water pump bearing can produce a whining, grinding, or squealing noise, especially when the engine is cold.
- Loose or Wobbly Pulley: A worn bearing can cause the water pump pulley to wobble, which can damage the serpentine belt.
Ignoring these symptoms can lead to severe engine damage. A seized water pump can cause catastrophic engine failure, resulting in costly repairs. Replacing the water pump at the first sign of trouble is always recommended.
Tools and Materials Needed
Before starting the replacement, gather the necessary tools and materials:
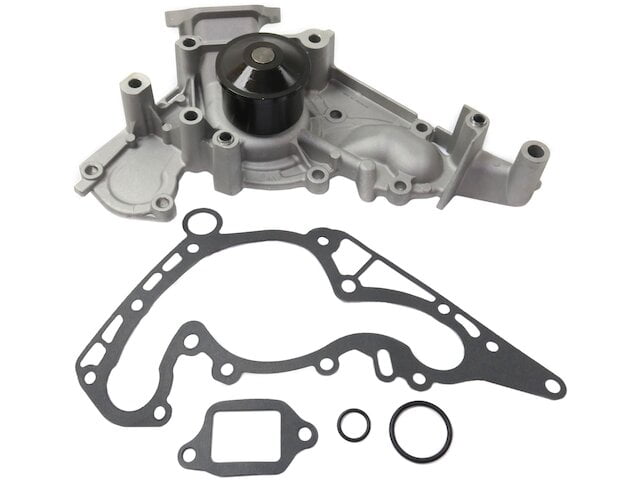
- New water pump for a 2004 Toyota Sequoia 4.7L 2UZ-FE (ensure it includes a new gasket). Aisin is the OEM supplier and highly recommended.
- New coolant (Toyota Red or equivalent).
- Distilled water for mixing coolant.
- Socket set and wrenches (10mm, 12mm, 14mm, primarily).
- Torque wrench.
- Pliers.
- Screwdrivers (Phillips and flathead).
- Drain pan.
- Funnel.
- Jack and jack stands.
- Wheel chocks.
- Serpentine belt tool (optional, but highly recommended for ease of belt removal).
- Gasket scraper or putty knife.
- Shop towels or rags.
- Safety glasses and gloves.
Step-by-Step Replacement Procedure
- Safety First: Disconnect the negative battery cable. Chock the rear wheels and lift the front of the Sequoia using a jack. Securely support the vehicle with jack stands.
- Drain the Coolant: Locate the radiator drain cock (usually at the bottom of the radiator). Place the drain pan underneath and open the drain cock to drain the coolant. Consider also removing the engine block drain plugs to completely drain the coolant system.
- Remove the Serpentine Belt: Use a serpentine belt tool or wrench to relieve tension on the belt tensioner. Carefully remove the serpentine belt, noting its routing for reinstallation.
- Remove Fan Shroud and Fan Clutch Assembly: Unbolt and remove the fan shroud. The fan clutch is often reverse-threaded. Secure the water pump pulley with a strap wrench to remove the fan clutch.
- Remove Timing Belt Covers (If Applicable): The 2UZ-FE is an interference engine. While the water pump replacement itself doesn't directly require timing belt removal, it is strongly recommended to replace the timing belt, tensioner, and idler pulleys concurrently, especially if they haven't been replaced within the last 90,000 miles. This will save you labor in the long run. If not replacing the timing belt, remove the necessary upper timing belt cover to access the water pump.
- Remove the Water Pump: Disconnect any hoses connected to the water pump. Unbolt the water pump from the engine block. It may be necessary to gently tap the pump to break it free.
- Clean the Mounting Surface: Thoroughly clean the water pump mounting surface on the engine block using a gasket scraper or putty knife. Ensure no old gasket material remains.
- Install the New Water Pump: Install the new water pump with the provided gasket. Torque the bolts to the manufacturer's specifications (typically around 15 ft-lbs). Use a torque wrench to ensure proper tightening.
- Reassemble: Reinstall all components in the reverse order of removal. Ensure all hoses are securely connected.
- Refill Coolant: Refill the cooling system with a 50/50 mixture of new coolant and distilled water. Use a funnel to avoid spills.
- Bleed the System: Start the engine and allow it to warm up. Monitor the temperature gauge and check for leaks. Bleed the cooling system to remove any air pockets. There is usually a bleeder valve on the thermostat housing.
- Final Check: Check the coolant level after the engine has cooled down and top off as needed.
Tips and Considerations
- Timing Belt Service: As mentioned, consider replacing the timing belt, tensioner, and idler pulleys concurrently with the water pump. This is a preventative measure that can save you time and money in the future.
- Coolant Type: Always use the correct type of coolant specified for your vehicle (Toyota Red or equivalent). Mixing different types of coolant can cause corrosion and damage to the cooling system.
- Torque Specifications: Always use a torque wrench and torque all bolts to the manufacturer's specifications. Over-tightening can damage the components, while under-tightening can lead to leaks.
- Professional Assistance: If you are not comfortable performing this repair, seek professional assistance from a qualified mechanic.