2005 Ford Focus Zx4 Alternator Replacement
So, your 2005 Ford Focus ZX4 is acting up, and you suspect it might be the alternator. Don't worry, it's a common issue with cars of this age, and while it might seem daunting, it's often a repair you can tackle yourself with the right tools and a bit of patience. This article will guide you through the process, help you diagnose the problem for sure, and give you an idea of what to expect if you choose to have a professional handle it.
Is It *Really* the Alternator?
Before you start tearing things apart, let's make sure we're on the right track. A faulty alternator can mimic other problems, so accurate diagnosis is key. Here are some telltale signs:
- Dimming Headlights: This is a classic symptom. The alternator isn't providing enough power, so your headlights appear weaker than usual, especially at idle.
- Warning Lights: Keep an eye on your dashboard. The battery light (shaped like a battery) or the "ALT" (alternator) light illuminating are strong indicators of an issue.
- Slow or No Start: While often attributed to a bad battery, a failing alternator can drain the battery while the car is off, leading to starting problems.
- Electrical Issues: Random electrical glitches, like the radio cutting out or power windows acting strangely, could point to the alternator struggling to provide consistent power.
- Strange Noises: A whining or grinding noise coming from the engine area, particularly near the alternator, can indicate worn bearings or other internal damage.
- The *Sniff* Test: A burning rubber smell can sometimes indicate a failing alternator, caused by the belt slipping due to a seized or struggling pulley.
If you're experiencing several of these symptoms, the alternator is a prime suspect. However, a proper diagnostic test is recommended.
Testing Your Alternator
The best way to confirm your suspicions is with a multimeter. Here's a simple test you can perform:
- Safety First: Make sure your car is in park (or neutral for manual transmissions) with the parking brake engaged.
- Check the Battery: Use the multimeter to test the battery voltage with the engine off. It should read around 12.6 volts.
- Start the Engine: Start your car and let it idle.
- Test Again: With the engine running, test the voltage at the battery terminals again. The multimeter should now read between 13.5 and 14.5 volts. A reading below 13.5 volts indicates the alternator isn't charging the battery properly. A reading significantly higher than 14.5 volts can indicate a faulty voltage regulator within the alternator, which can also damage your battery.
Auto parts stores like AutoZone, Advance Auto Parts, and O'Reilly often offer free alternator testing. They have specialized equipment to assess the alternator's performance under load, providing a more definitive diagnosis.
Replacing the Alternator: A Step-by-Step Guide
If you've confirmed the alternator is the culprit, here's how to replace it. Always disconnect the negative battery cable before working on any electrical components.
Tools You'll Need:
- Socket set (metric) - You'll likely need 10mm, 13mm, and 15mm sockets.
- Wrench set (metric) - Same sizes as the sockets.
- Screwdrivers (Phillips and flathead)
- Torque wrench
- Belt tensioner tool (or a suitable wrench to relieve tension on the serpentine belt)
- Multimeter (for testing before and after)
- Safety glasses
- Gloves
- Penetrating oil (if bolts are rusted)
- A shop towel or rag
The Replacement Process:
- Disconnect the Battery: Disconnect the negative (-) battery cable using a wrench. Secure it away from the battery terminal to prevent accidental contact.
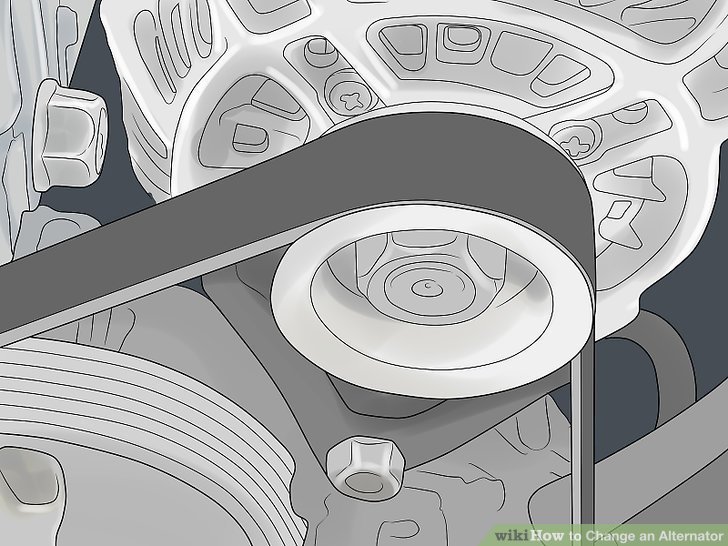
- Locate the Alternator: On the 2005 Ford Focus ZX4, the alternator is typically located on the front of the engine, driven by the serpentine belt.
- Remove the Serpentine Belt: Use the belt tensioner tool (or a wrench) to relieve tension on the serpentine belt. Carefully remove the belt from the alternator pulley. It's a good idea to take a picture or make a diagram of the belt's routing for easy reinstallation.
- Disconnect the Wiring: Disconnect the electrical connectors attached to the alternator. There will typically be a large wire connected with a nut (the B+ terminal) and a smaller connector. Note their positions before disconnecting them.
- Remove the Mounting Bolts: Use your socket set to remove the bolts that secure the alternator to the engine bracket. These can sometimes be tight, so penetrating oil can be helpful if they're rusted.
- Remove the Alternator: Carefully remove the alternator from the engine compartment. You may need to maneuver it around other components.
- Install the New Alternator: Install the new alternator in the reverse order of removal.
- Line up the mounting holes and install the mounting bolts. Tighten them to the manufacturer's specified torque (refer to your vehicle's repair manual).
- Reconnect the electrical connectors. Ensure they are securely attached.
- Reinstall the serpentine belt, making sure it's properly routed around all the pulleys.
- Double-check all connections and bolt tightness.
- Reconnect the Battery: Reconnect the negative (-) battery cable.
- Start the Engine: Start the engine and check for any unusual noises or warning lights.
- Test the Alternator: Use your multimeter to test the alternator's output voltage, as described earlier. It should be within the range of 13.5 to 14.5 volts.
Important Tips:
- Take Pictures: Before disconnecting any wires or removing any components, take pictures with your phone. This will help you remember how everything goes back together.
- Label Everything: Label wires and connectors with masking tape and a pen. This will prevent confusion during reassembly.
- Don't Over-Tighten: Over-tightening bolts can strip threads or damage components. Use a torque wrench to tighten bolts to the manufacturer's specifications.
- Inspect the Serpentine Belt: While you have the serpentine belt off, inspect it for cracks, wear, or damage. If it's in poor condition, replace it along with the alternator.
Cost Considerations
The cost of replacing an alternator can vary depending on several factors, including:
- The Alternator Itself: Prices range from around $100 for a remanufactured alternator to $300 or more for a brand new unit.
- Labor Costs: If you choose to have a professional mechanic do the job, labor costs can range from $100 to $300, depending on the shop's hourly rate and the complexity of the repair.
- Additional Parts: You may also need to replace the serpentine belt or other related components, which will add to the overall cost.
So, expect to pay anywhere from $200 to $600 total if you have a shop do it. DIY will obviously save you on the labor cost.
When to Seek Professional Help
While replacing an alternator is a manageable DIY project for many car owners, there are situations where it's best to seek professional help:
- Lack of Experience: If you're not comfortable working on cars or don't have the necessary tools, it's best to leave the job to a professional.
- Complex Electrical Issues: If you suspect there are underlying electrical problems contributing to the alternator failure, a professional mechanic can diagnose and address those issues.
- Time Constraints: If you're short on time or need your car back on the road quickly, having a professional handle the repair can save you time and hassle.
- Stripped Bolts or Difficult Access: Sometimes the alternator bolts can be extremely difficult to remove due to rust or tight spaces. A professional shop will have the right tools and techniques to deal with these situations.
Remember, safety is paramount. If you're unsure about any part of the process, it's always best to consult with a qualified mechanic.
Good luck with your alternator replacement! Hopefully, this guide has given you the confidence to tackle the job or at least understand what's involved if you choose to have a professional handle it. Drive safe!