2006 Acura Tl Serpentine Belt Replacement
The serpentine belt, a seemingly simple component, plays a vital role in the operation of your 2006 Acura TL. It's the unsung hero responsible for powering essential systems like the alternator, power steering pump, air conditioning compressor, and sometimes even the water pump. When it fails, the consequences can range from inconvenient to downright dangerous. This article provides a comprehensive guide to understanding and replacing the serpentine belt on your 2006 Acura TL, catering to car enthusiasts and DIY mechanics of varying skill levels.
Understanding the Serpentine Belt System
Think of the serpentine belt as a power cord for your engine's accessories. Unlike older cars that used multiple V-belts for individual components, the serpentine belt is a single, continuous belt that snakes its way around various pulleys connected to the engine's crankshaft. The crankshaft pulley is the engine's main power output, and the serpentine belt transfers that power to the other pulleys, thereby driving the accessories.
The "serpentine" name comes from the belt's winding path. This design allows a single belt to drive multiple accessories, making the engine bay more compact and efficient. The belt is typically made of a durable rubber compound reinforced with cords for strength and longevity. A tensioner pulley is crucial in this system. It's a spring-loaded pulley that automatically maintains the correct tension on the belt. Without proper tension, the belt can slip, leading to reduced performance or complete failure of the accessories.
Consider a classic car like a 1960s Mustang. Back then, you'd likely find separate V-belts for the alternator, power steering (if equipped), and water pump. Each belt required individual adjustment and maintenance. Modern cars, including your 2006 Acura TL, simplify this with the serpentine belt. It's a more reliable and efficient system, but it does mean that a single belt failure can disable multiple crucial systems.
Signs of a Failing Serpentine Belt
Recognizing the early warning signs of a failing serpentine belt can save you from a roadside breakdown. Here are some common indicators:
- Squealing or Chirping Noises: This is often the first and most noticeable sign. The noise is usually loudest when the engine is first started or when the engine is under load (e.g., accelerating or turning the steering wheel). The sound is caused by the belt slipping on the pulleys due to wear, contamination (oil or coolant), or a loose tensioner.
- Cracked or Frayed Belt: A visual inspection can reveal cracks, fraying, or chunks missing from the belt. These are signs of deterioration and indicate that the belt is nearing the end of its life.
- Glazed or Shiny Belt: A shiny or glazed appearance indicates that the belt has hardened and lost its grip. This can be caused by heat, age, or contamination.
- Power Steering Failure: If the belt is slipping, the power steering pump may not receive enough power, resulting in stiff or difficult steering.
- Alternator Problems: A slipping belt can also affect the alternator's ability to charge the battery, leading to a dead battery or other electrical issues.
- Air Conditioning Malfunction: Insufficient power to the AC compressor can result in weak or no cold air.
- Overheating: In some cases, the serpentine belt also drives the water pump. If the belt fails completely, the water pump will stop circulating coolant, leading to engine overheating. This is a critical failure that can cause severe engine damage.
Think of it like this: imagine the drive belt on a washing machine starting to fray. You know it's only a matter of time before it breaks, leaving you with a pile of wet clothes. The same principle applies to your serpentine belt. Ignoring these warning signs is like ignoring a check engine light – it's likely to lead to bigger problems down the road.
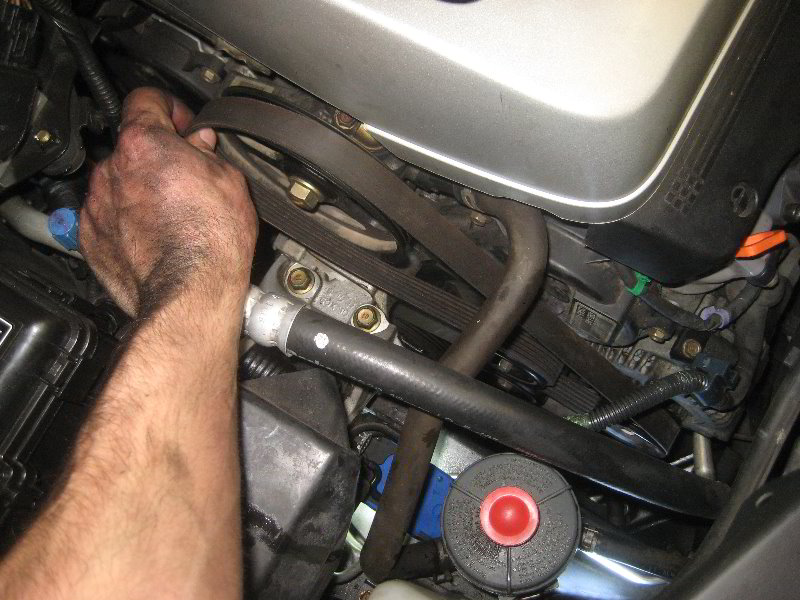
Serpentine Belt Replacement Procedure for 2006 Acura TL
Replacing the serpentine belt on a 2006 Acura TL is a straightforward task that most DIY mechanics can handle with basic tools and some patience. Here's a step-by-step guide:
- Gather Your Tools and Materials: You'll need a new serpentine belt (ensure it's the correct part number for your 2006 Acura TL), a socket set (including a breaker bar for loosening the tensioner), a wrench set, a serpentine belt tool (optional, but highly recommended), a diagram of the belt routing (usually found on a sticker under the hood), and gloves.
- Safety First: Disconnect the negative battery cable to prevent accidental electrical shocks. Allow the engine to cool completely before starting the procedure.
- Locate the Serpentine Belt Tensioner: The tensioner is a spring-loaded pulley that maintains tension on the belt. It's usually located near the alternator or air conditioning compressor.
- Relieve the Tension: Use a socket or wrench to rotate the tensioner pulley. Most tensioners have a square opening specifically designed for this purpose. Rotating the tensioner will relieve the tension on the belt, allowing you to remove it. A serpentine belt tool makes this step much easier, as it provides better leverage and access in tight engine bays.
- Remove the Old Belt: Carefully slip the old belt off each of the pulleys, starting with the smoothest pulleys (those without grooves). Take note of the belt's routing path. It's helpful to take a picture or draw a diagram before removing the belt.
- Inspect the Pulleys: While the belt is off, inspect all the pulleys for signs of wear, damage, or looseness. Spin each pulley by hand to check for smooth rotation. If any pulleys feel rough or make noise, they should be replaced.
- Install the New Belt: Following your diagram or the sticker under the hood, route the new belt around all the pulleys. Make sure the belt is properly seated in the grooves of each pulley.
- Release the Tensioner: Once the new belt is in place, slowly release the tensioner. The tensioner will automatically adjust the belt tension.
- Double-Check the Routing: Carefully inspect the belt routing to ensure it's correct and that the belt is properly seated on all pulleys.
- Start the Engine: Reconnect the negative battery cable and start the engine. Listen for any unusual noises or slipping. If everything sounds normal, let the engine run for a few minutes and then recheck the belt tension and routing.
Consider this: replacing the serpentine belt is like replacing the chain on a bicycle. If you put the chain on incorrectly, it will either fall off or not function properly. The same applies to the serpentine belt. Careful attention to detail and proper routing are essential for a successful replacement.
Tools and Parts
Having the right tools will make the job significantly easier. A serpentine belt tool is a worthwhile investment, as it allows you to reach the tensioner in tight spaces and provides better leverage. A good socket set, a wrench set, and a breaker bar are also essential. Don't skimp on the quality of the replacement belt. Choose a reputable brand like Gates, Dayco, or Continental. These belts are made from higher-quality materials and are designed to last longer.
Think of buying a cheap serpentine belt like buying cheap tires. You might save a few dollars upfront, but you'll likely end up replacing them sooner and potentially compromising safety. Invest in a quality belt for peace of mind and longevity.
Practical Takeaways
- Regular Inspection: Inspect your serpentine belt every 6 months or 12,000 miles for signs of wear, cracks, or fraying.
- Early Replacement: Don't wait for the belt to break completely. Replace it proactively when you notice signs of deterioration. A preventative approach can save you from costly breakdowns and potential engine damage.
- Correct Belt Routing: Always double-check the belt routing diagram before and after replacing the belt. Incorrect routing can lead to component damage and belt failure.
- Tensioner Check: Inspect the tensioner pulley for smooth operation and proper tension. A worn or faulty tensioner can cause premature belt wear and slipping.
- Professional Help: If you're not comfortable performing this task yourself, don't hesitate to seek help from a qualified mechanic.
In conclusion, understanding the serpentine belt system and performing regular maintenance can significantly extend the life of your 2006 Acura TL and prevent unexpected breakdowns. By following the steps outlined in this guide, you can confidently tackle this DIY project and keep your Acura TL running smoothly for years to come. Remember, preventative maintenance is always cheaper than reactive repairs.