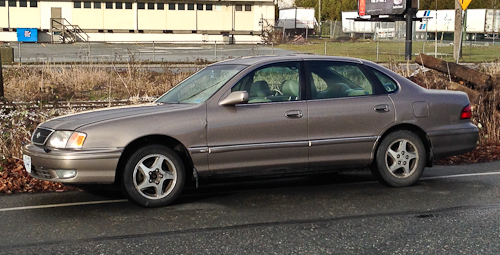
2006 Toyota Avalon Rear Strut Replacement

The 2006 Toyota Avalon, a flagship sedan known for its smooth ride and reliability, can eventually suffer from the common ailment of worn-out rear struts. Replacing these struts is a task that can be undertaken by experienced DIYers or, more commonly, by professional mechanics. This article provides a detailed overview of the rear strut replacement process for the 2006 Toyota Avalon, aimed at enthusiasts, car owners, and professionals alike.
Understanding the Rear Strut Assembly
Before diving into the replacement procedure, it's crucial to understand what the rear strut assembly comprises. A strut is more than just a shock absorber; it's a complete suspension component that combines the function of a shock absorber with a coil spring, and often, a spring seat, and bump stop. In the 2006 Avalon, the rear struts play a critical role in maintaining ride comfort, handling stability, and overall vehicle safety. When struts wear out, you might experience symptoms such as excessive bouncing, poor handling, uneven tire wear, and a generally uncomfortable ride. A leaking strut is also a clear indicator of failure.
Tools and Materials Required
To tackle a 2006 Avalon rear strut replacement, you'll need the following tools and materials:
- New rear strut assemblies (OEM or reputable aftermarket brand – KYB is a common choice)
- Jack and jack stands
- Wheel chocks
- Socket set (metric) including a deep socket for the strut nut
- Wrench set (metric)
- Torque wrench
- Spring compressors (essential for safely disassembling old struts if reusing springs)
- Penetrating oil (e.g., PB Blaster)
- Safety glasses
- Gloves
- Optional: Impact wrench, breaker bar
Step-by-Step Replacement Procedure
Safety First: Always prioritize safety. Use wheel chocks, engage the parking brake, and support the vehicle securely with jack stands on a level surface before commencing any work.
- Loosen Lug Nuts: With the vehicle on the ground, loosen the lug nuts on the rear wheels.
- Raise and Secure the Vehicle: Use a jack to raise the rear of the vehicle and securely place jack stands under the frame rails. Never work under a vehicle supported only by a jack.
- Remove the Wheel: Remove the lug nuts completely and take off the wheel.
- Disconnect ABS Wire (if applicable): On some models, the ABS (Anti-lock Braking System) sensor wire is attached to the strut assembly. Carefully disconnect it to avoid damage.
- Spray Penetrating Oil: Apply penetrating oil to the strut mounting bolts (both upper and lower) to help loosen them. Let it sit for a few minutes.
- Remove Lower Strut Bolt: Use a socket and wrench (or an impact wrench if available) to remove the lower strut bolt. This bolt connects the strut to the wheel hub assembly.
- Access Upper Strut Mounts: The upper strut mounts are typically accessed from inside the trunk. Remove any trim or carpeting necessary to expose the mounting bolts.
- Remove Upper Strut Mount Bolts: Loosen and remove the upper strut mount bolts. Be prepared to support the strut as the last bolt is removed to prevent it from falling.
- Remove the Strut Assembly: Carefully remove the entire strut assembly from the wheel well.
- (Optional) Disassemble Old Strut (If Reusing Springs): This step requires extreme caution. Use spring compressors to safely compress the coil spring before removing the top strut nut. Once the spring is compressed, you can safely remove the top nut and disassemble the strut. Never attempt to disassemble a strut without using spring compressors; the compressed spring can cause serious injury or death. If you purchased a complete strut assembly (with a new spring), skip this step.
- Install New Strut Assembly: If you disassembled the old strut, carefully assemble the new strut into the spring, ensuring the spring is properly seated. Align the new strut assembly with the mounting points in the wheel well.
- Install Upper Strut Mount Bolts: Install the upper strut mount bolts and tighten them to the manufacturer's specified torque.
- Install Lower Strut Bolt: Install the lower strut bolt and tighten it to the manufacturer's specified torque.
- Reconnect ABS Wire (if applicable): Reconnect the ABS sensor wire to the strut assembly.
- Reinstall Wheel: Reinstall the wheel and tighten the lug nuts by hand.
- Lower Vehicle: Lower the vehicle to the ground and torque the lug nuts to the manufacturer's specified torque in a star pattern.
- Repeat for Other Side: Repeat the entire process for the other rear strut.
- Test Drive: After completing the installation, take the vehicle for a test drive to ensure proper operation and handling.
- Wheel Alignment: It is highly recommended to get a wheel alignment after replacing struts, as it can affect tire wear and handling.
Torque Specifications
Refer to a repair manual specific to the 2006 Toyota Avalon for accurate torque specifications for all bolts. Using a torque wrench is critical for ensuring proper tightening and preventing damage to the components.
Troubleshooting and Common Issues
Some common issues you might encounter include:
- Stuck Bolts: Use penetrating oil and a breaker bar to loosen stubborn bolts. Heat can also be used sparingly, but be cautious around brake lines and fuel lines.
- Incorrect Strut Orientation: Ensure the strut is installed in the correct orientation. Check the markings on the strut or refer to the repair manual.
- Noisy Suspension: If you hear noises after the installation, double-check all bolts for proper tightness.
Replacing the rear struts on a 2006 Toyota Avalon can significantly improve ride quality and handling. By following these steps and adhering to safety precautions, you can successfully complete this repair. Remember to consult a qualified mechanic if you are unsure about any aspect of the procedure.
