2008 Buick Lucerne Water Pump Replacement
The 2008 Buick Lucerne, a comfortable and often overlooked member of GM's full-size sedan lineup, shares its underpinnings with other well-known vehicles. While generally reliable, like any car approaching its second decade, certain maintenance items become critical. One such item is the water pump. A failing water pump in your Lucerne can lead to overheating, potentially causing significant and costly engine damage. This article details the replacement procedure for the 2008 Buick Lucerne, focusing on both the 3.8L V6 (VIN K) and the 4.6L Northstar V8 (VIN Y, depending on the specific trim).
Identifying a Failing Water Pump
Before diving into the replacement, it's crucial to correctly diagnose a failing water pump. Common symptoms include: a high-pitched whining noise emanating from the front of the engine, coolant leaks around the water pump pulley area, overheating, and a loss of coolant without any visible external leaks (indicating internal leakage into the engine). You might also notice the temperature gauge creeping higher than normal, especially under load or during hot weather. Pay close attention to the coolant level; frequent topping-off could be another red flag.
Tools and Materials Required
Gathering the necessary tools and materials beforehand will streamline the repair process. You'll need: a new water pump (ensure it's the correct part for your engine), new coolant (compatible with GM's Dex-Cool specifications), a socket set (metric sizes are essential), a wrench set, pliers, a screwdriver set (including both flathead and Phillips head), a torque wrench, a coolant drain pan, safety glasses, gloves, and a shop rag. For the Northstar V8, you may also require a special tool to remove the serpentine belt due to the limited space. Always consult your vehicle's repair manual for specific torque specifications.
Water Pump Replacement Procedure (3.8L V6)
1. **Safety First:** Disconnect the negative battery cable. Allow the engine to cool completely before beginning the procedure.
2. **Drain the Coolant:** Locate the radiator drain petcock (usually at the bottom corner of the radiator) and place the drain pan underneath. Open the petcock to drain the coolant. You may need to remove the radiator cap to facilitate draining.
3. **Remove the Serpentine Belt:** Using a wrench or serpentine belt tool, relieve the tension on the belt tensioner and remove the serpentine belt from the water pump pulley.
4. **Disconnect Hoses:** Carefully disconnect the coolant hoses attached to the water pump. Be prepared for some residual coolant spillage.
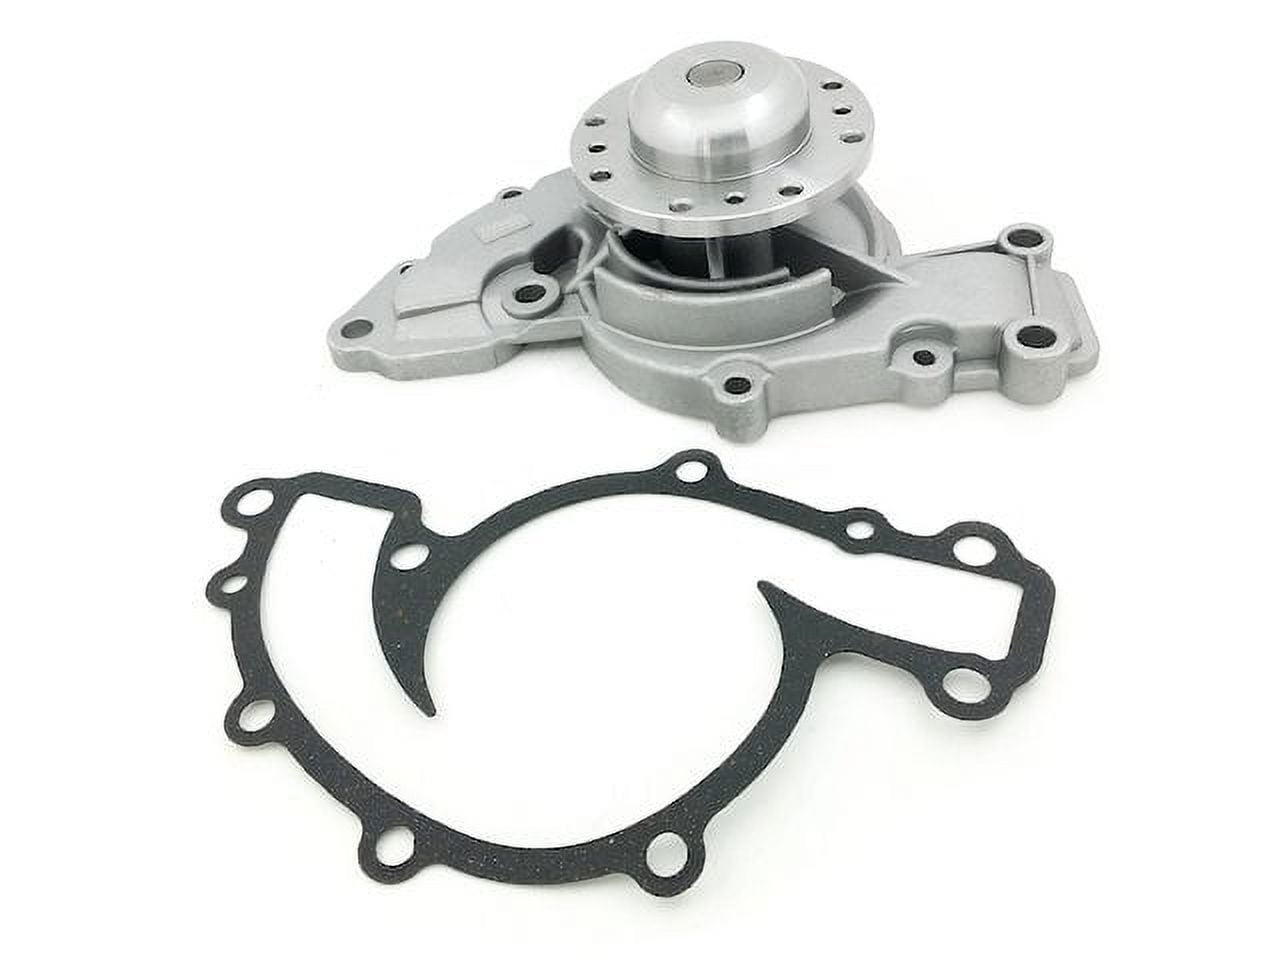
5. **Remove the Water Pump:** Remove the bolts securing the water pump to the engine block. Note the location of each bolt, as they may be of different lengths. Gently tap the water pump to break it free from the gasket surface. Remove the old water pump.
6. **Clean the Mating Surface:** Thoroughly clean the water pump mounting surface on the engine block. Use a scraper to remove any old gasket material and ensure a clean, smooth surface for the new gasket.
7. **Install the New Water Pump:** Install the new water pump with a new gasket. Torque the bolts to the manufacturer's specifications, following a crisscross pattern to ensure even pressure.
8. **Reconnect Hoses:** Reconnect the coolant hoses to the water pump.
9. **Reinstall the Serpentine Belt:** Reinstall the serpentine belt, ensuring it's properly routed around all pulleys.
10. **Refill Coolant:** Refill the cooling system with the appropriate type and amount of coolant. Burp the system to remove any air pockets.
11. **Reconnect Battery:** Reconnect the negative battery cable.
12. **Test Drive:** Start the engine and allow it to warm up. Check for leaks and monitor the temperature gauge. Take the vehicle for a short test drive to ensure proper cooling system operation.
Water Pump Replacement Procedure (4.6L Northstar V8)
The Northstar V8 procedure is similar but presents a few key differences. Access to the water pump is more restricted, requiring more disassembly. The serpentine belt tensioner is often harder to reach. Carefully observe the routing of the belt before removal. Also, be extremely careful when disconnecting the coolant hoses, as they can be brittle with age. The water pump itself may be more difficult to remove due to corrosion. Patience and penetrating oil can be your best friends here.
Important Considerations
Always use the correct type of coolant (Dex-Cool) to avoid corrosion and damage to the cooling system. Over-tightening the water pump bolts can damage the housing, leading to leaks. Similarly, under-tightening will also result in leaks. Always use a torque wrench and adhere to the manufacturer's specifications. After completing the repair, monitor the coolant level for the first few days and top it off as needed. If you're not comfortable performing this repair yourself, it's best to entrust it to a qualified mechanic. Properly installed and maintained, a new water pump should provide years of reliable service.