2008 Dodge Ram 1500 Fuel Pump Replacement
The 2008 Dodge Ram 1500, a stalwart of the American truck market, is known for its robust design and workhorse capabilities. However, like any vehicle, it's not immune to the wear and tear of time. A common issue that can sideline even the toughest Ram is a failing fuel pump. This article provides a detailed guide to replacing the fuel pump in a 2008 Dodge Ram 1500, aimed at experienced DIYers and professional mechanics alike.
Understanding the Fuel Pump and Its Failure
The fuel pump's primary role is to deliver fuel from the tank to the engine at the correct pressure and volume. A failing pump can manifest in several ways: difficulty starting, sputtering or stalling, reduced fuel economy, and a noticeable lack of power, especially under load. Ignoring these symptoms can lead to a complete failure, leaving you stranded. Diagnosis typically involves checking fuel pressure with a gauge connected to the fuel rail. A reading significantly below the manufacturer's specification (usually around 58 psi for the 2008 Dodge Ram 1500) points towards a faulty pump or a related issue in the fuel system.
Tools and Materials Required
Before starting the replacement, gather the necessary tools and materials:
- New fuel pump module (ensure it's the correct part for your specific Ram configuration)
- Fuel tank strap wrench or appropriate substitute
- Various socket sizes (metric)
- Wrenches (metric)
- Screwdrivers (Phillips and flathead)
- Jack and jack stands
- Wheel chocks
- Safety glasses
- Gloves
- Fuel-approved container to drain fuel (if necessary)
- Penetrating oil
- Shop towels
- Fuel line disconnect tool
- Multimeter (optional, for testing)
Step-by-Step Replacement Procedure
- Safety First: Disconnect the negative battery cable. Chock the rear wheels and engage the parking brake.
- Accessing the Fuel Tank: The fuel pump is located inside the fuel tank. You'll need to lower the tank to access it. The tank is typically located under the rear of the truck, between the frame rails.
- Fuel Level Assessment: Ideally, the fuel tank should be as empty as possible to minimize the weight you'll be dealing with. If the tank is full or nearly full, you'll need to siphon off the fuel into an approved container using a suitable pump or siphon hose. Never attempt to siphon fuel by mouth.
- Disconnect Electrical Connections: Locate and disconnect the electrical connector(s) connected to the fuel pump module on top of the fuel tank.
- Disconnect Fuel Lines: Use the fuel line disconnect tool to carefully disconnect the fuel lines connected to the fuel pump module. Be prepared for some fuel spillage, so have shop towels handy.
- Support the Fuel Tank: Position a jack under the fuel tank to support its weight before removing the straps.
- Lower the Fuel Tank: Use the fuel tank strap wrench (or a suitable substitute) to loosen and remove the fuel tank straps. Slowly lower the jack, allowing the tank to descend gradually. Watch for any remaining hoses or wires that may still be connected.
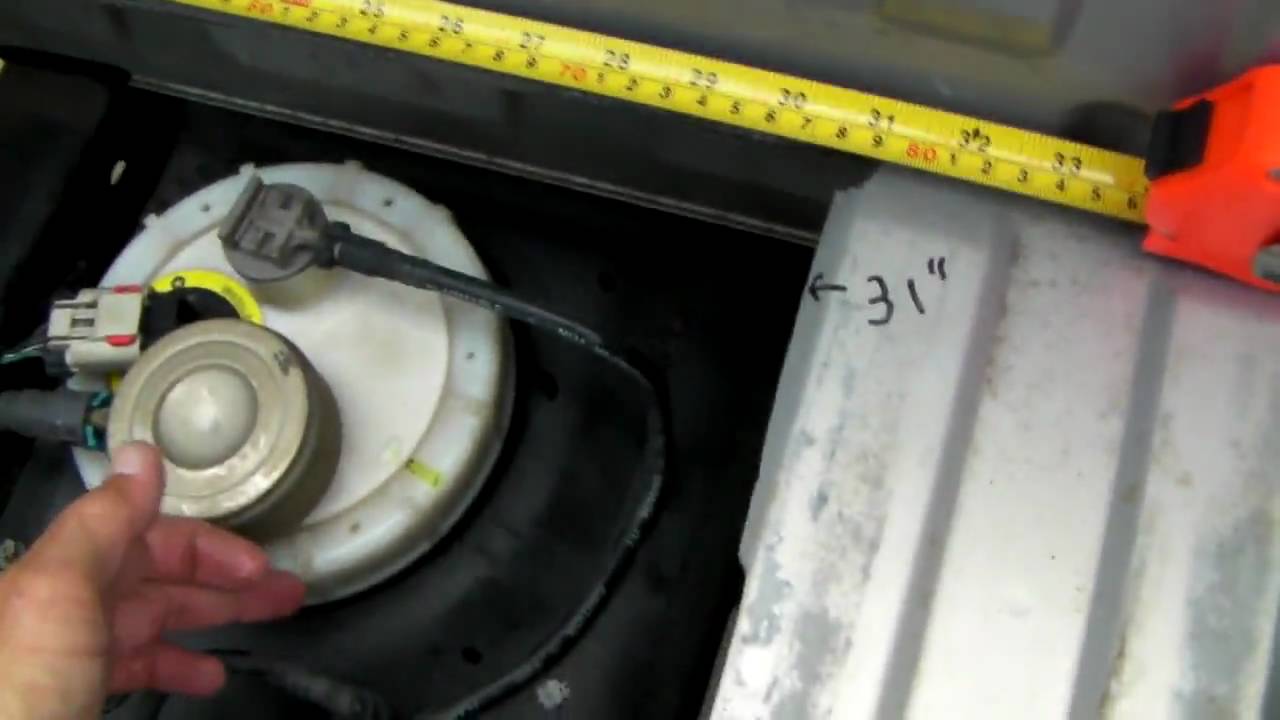
- Access the Fuel Pump Module: Once the tank is lowered, you should be able to access the fuel pump module on top of the tank.
- Remove the Old Fuel Pump Module: Carefully remove the retaining ring that secures the fuel pump module to the tank. You may need a specialized tool for this, but a brass punch and hammer can work carefully. Rotate the retaining ring counterclockwise to release it. Lift the fuel pump module out of the tank, being mindful of any fuel remaining inside.
- Install the New Fuel Pump Module: Install the new fuel pump module into the tank, ensuring the O-ring seal is properly seated. Secure the retaining ring, rotating it clockwise until it locks into place.
- Reinstall the Fuel Tank: Carefully raise the fuel tank back into position using the jack. Reinstall the fuel tank straps and tighten them securely.
- Reconnect Fuel Lines and Electrical Connections: Reconnect the fuel lines and electrical connector(s) to the fuel pump module. Ensure they click into place securely.
- Final Checks: Double-check all connections and ensure no hoses or wires are pinched or damaged.
- Reconnect Battery: Reconnect the negative battery cable.
- Test the System: Turn the ignition key to the "on" position (without starting the engine) several times to allow the fuel pump to prime the fuel system. Check for any fuel leaks at the fuel lines and around the fuel pump module.
- Start the Engine: Start the engine and let it idle for several minutes. Again, check for any fuel leaks.
- Road Test: Take the Dodge Ram 1500 for a test drive to ensure the new fuel pump is functioning correctly.
Important Considerations
Fuel systems are under pressure and flammable. Always work in a well-ventilated area and avoid any sources of ignition (sparks, open flames, smoking). If you are not comfortable working on the fuel system, it is best to have a qualified mechanic perform the replacement. Improper installation can lead to fuel leaks and potentially dangerous situations. Always dispose of old fuel and used parts properly, following local regulations.