2008 Saturn Vue Headlight Bulb Replacement
Replacing a headlight bulb might seem like a trivial task, but for the inquisitive mind, it's a small window into the larger world of automotive design and electrical systems. This guide delves into the replacement of a headlight bulb on a 2008 Saturn Vue, not just providing the steps, but also explaining the rationale behind each action and the potential pitfalls to avoid. The 2008 Vue, part of Saturn's second generation, offers a relatively straightforward process, but understanding the nuances is key to a successful outcome.
Understanding the Headlight System
Before diving into the replacement, let's briefly explore the headlight system itself. The 2008 Vue uses halogen bulbs, a common technology that relies on a tungsten filament sealed within a gas-filled envelope. When electricity passes through the filament, it heats up and emits light. Halogen gases, like iodine or bromine, are added to prolong the filament's life by redepositing vaporized tungsten back onto it. This process allows the bulb to operate at a higher temperature, resulting in brighter light.
Modern vehicles often use a complex system of relays, fuses, and wiring to control the headlights. The headlight switch in the cabin sends a signal to a relay, which then closes a circuit to supply power to the bulbs. A fuse is included in the circuit as a safety measure, protecting the system from overcurrents that could damage components or even cause a fire. The 2008 Vue's headlight system is designed with ease of access and maintenance in mind, though a systematic approach is still essential.
Tools and Materials Required
Gathering the necessary tools and materials is the first crucial step. Attempting the replacement without the proper equipment can lead to frustration and potential damage to the vehicle.
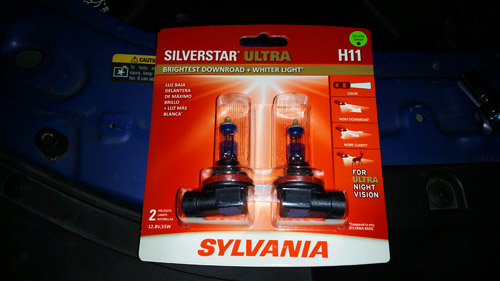
- Replacement Headlight Bulb: The correct bulb type is critical. Refer to the owner's manual or a reliable parts website (like those from auto parts stores) to determine the specific bulb designation for your 2008 Vue (typically an H11 or 9005 depending on whether it's the low beam or high beam). Ensure the replacement bulb is of reputable brand for reliable performance and lifespan.
- Gloves: Clean gloves (nitrile or similar) are essential to prevent oil from your skin from contaminating the new bulb. Oil residue can create hotspots on the bulb's surface, significantly reducing its lifespan.
- Small Flathead Screwdriver or Trim Tool: This might be required to release retaining clips on the headlight assembly or bulb connector.
- Socket Set or Wrench Set (Optional): Depending on the specific configuration, you *might* need a socket or wrench to remove a panel or access the headlight assembly.
- Work Light or Flashlight: Adequate lighting is essential, especially if working in a dimly lit garage.
- Owner's Manual: While this guide provides detailed instructions, consulting the owner's manual can offer vehicle-specific information and diagrams.
Step-by-Step Bulb Replacement Procedure
Follow these steps carefully to ensure a safe and successful headlight bulb replacement on your 2008 Saturn Vue.
- Safety First: Begin by turning off the engine and engaging the parking brake. Disconnect the negative battery terminal to prevent any accidental electrical shocks or short circuits. This step is crucial for your safety and the integrity of the vehicle's electrical system.
- Accessing the Headlight Assembly: The 2008 Vue's headlight assemblies are typically accessible from behind the headlight housing, within the engine bay. Depending on the side (driver or passenger), you may need to remove or reposition other components, such as the air intake duct or windshield washer fluid reservoir filler neck, to gain clear access. This might involve unscrewing a few fasteners or disengaging some clips.
- Locating the Bulb Connector: Once you have access to the headlight assembly, locate the electrical connector attached to the back of the bulb. This connector supplies power to the bulb.
- Disconnecting the Bulb Connector: Carefully disconnect the electrical connector from the bulb. Most connectors have a locking mechanism that needs to be released before the connector can be pulled off. This might involve pressing a tab or sliding a clip. Avoid pulling on the wires themselves, as this can damage the connector or the wiring harness. Apply gentle, even pressure to the connector body to disengage it.
- Removing the Old Bulb: With the connector disconnected, you can now remove the old bulb. The bulb is typically held in place by a retaining clip or a twist-lock mechanism. The specific mechanism will vary depending on the bulb type and headlight assembly design. If it's a retaining clip, carefully unclip it. If it's a twist-lock, rotate the bulb counterclockwise (usually about a quarter turn) until it releases. Be patient and avoid forcing anything. Forcing the mechanism can break the retaining clip or damage the headlight assembly.
- Installing the New Bulb: Take the new headlight bulb, being careful not to touch the glass portion with your bare fingers (use gloves!). Align the bulb's base with the opening in the headlight assembly. If it's a twist-lock type, insert the bulb and rotate it clockwise to lock it in place. If it's a retaining clip type, carefully secure the clip over the bulb's base. Ensure the bulb is seated correctly and securely in the headlight assembly.
A properly seated bulb is crucial for optimal beam pattern and light output.
- Reconnecting the Bulb Connector: Reattach the electrical connector to the new bulb. Ensure the connector clicks into place, indicating a secure connection.
- Testing the New Bulb: Before reassembling everything, reconnect the negative battery terminal and turn on the headlights to test the new bulb. If the bulb doesn't light up, double-check the connection to the bulb and the fuse for the headlights. A blown fuse is a common cause of headlight failure.
- Reassembling the Headlight Assembly: If the new bulb is working correctly, turn off the headlights and disconnect the negative battery terminal again. Carefully reassemble any components that were removed to access the headlight assembly, such as the air intake duct or windshield washer fluid reservoir filler neck.
- Final Check: Reconnect the negative battery terminal. Turn on the headlights and visually inspect the beam pattern to ensure it's properly aligned. If the beam is misaligned, you may need to adjust the headlight aiming. Refer to your owner's manual or consult a qualified mechanic for instructions on headlight aiming.
Common Problems and Solutions
Even with careful execution, you might encounter some common problems during the headlight bulb replacement process.
- Difficulty Removing the Bulb Connector: If the connector is difficult to remove, try using a small flathead screwdriver to gently pry it loose. Be careful not to damage the connector or the wiring. Apply a small amount of dielectric grease to the connector terminals to prevent corrosion and make future removals easier.
- Broken Retaining Clip: If the retaining clip breaks, you may need to purchase a replacement clip from an auto parts store. Alternatively, you can use a zip tie to secure the bulb in place, but this is a temporary solution and should be replaced with a proper clip as soon as possible.
- Bulb Doesn't Light Up: If the new bulb doesn't light up, check the following:
- Ensure the bulb is properly seated and the connector is securely attached.
- Check the headlight fuse. Replace the fuse if it's blown.
- Verify that the headlight switch is in the "on" position.
- Inspect the wiring for any damage or corrosion.
- Headlight Aiming: If the headlight beam is misaligned, you may need to adjust the headlight aiming. Most vehicles have adjustment screws located on the headlight assembly. Refer to your owner's manual or consult a qualified mechanic for instructions on headlight aiming.
Conclusion
Replacing a headlight bulb on a 2008 Saturn Vue is a manageable task for the informed and prepared individual. By understanding the underlying principles of the headlight system, carefully following the step-by-step procedure, and troubleshooting common problems, you can save money on labor costs and gain a deeper appreciation for the inner workings of your vehicle. Remember to always prioritize safety and consult a qualified mechanic if you encounter any difficulties or are unsure about any aspect of the procedure. This seemingly simple task is not just about replacing a bulb; it's about understanding and maintaining your vehicle, empowering you to be a more knowledgeable and self-sufficient owner. Furthermore, properly functioning headlights are critical for safe driving, especially at night or in adverse weather conditions.
Disclaimer
This guide is for informational purposes only and should not be considered a substitute for professional mechanical advice. Always consult with a qualified mechanic if you are unsure about any aspect of vehicle repair or maintenance. The author and publisher are not responsible for any damage or injury resulting from the use of this guide.