
2010 Lexus Rx 350 Alternator Replacement
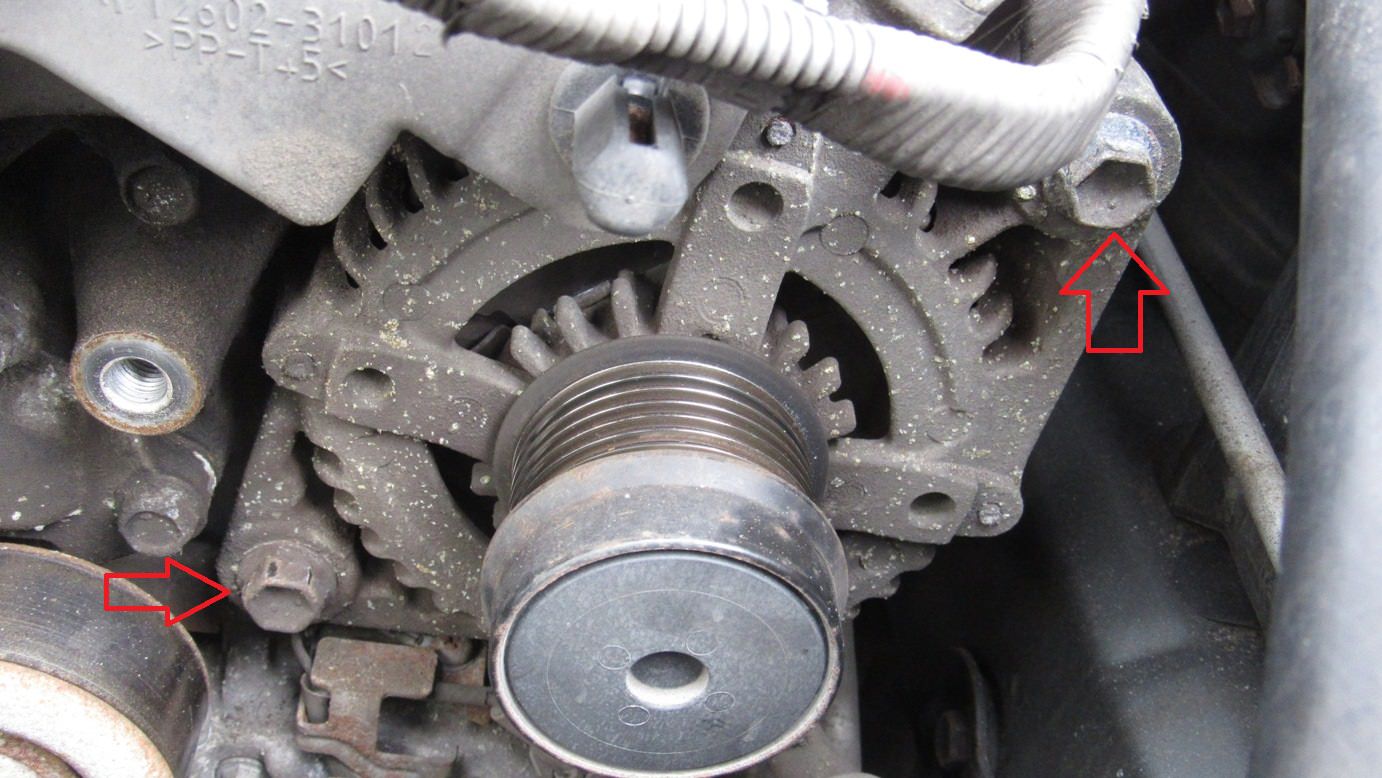
The 2010 Lexus RX 350 is renowned for its reliability and luxurious ride, but like any vehicle, components eventually require replacement. A common culprit, often overlooked until failure, is the alternator. This article provides a comprehensive guide to replacing the alternator on a 2010 Lexus RX 350, catering to both DIY enthusiasts and professional mechanics.
Understanding the Alternator's Role
Before diving into the replacement procedure, it's crucial to understand the alternator's function. The alternator, driven by the engine's serpentine belt, is responsible for converting mechanical energy into electrical energy. This energy powers the vehicle's electrical system (lights, radio, AC) and, critically, recharges the battery. A failing alternator can lead to a dead battery, dimming lights, and eventual stalling. Common symptoms include a warning light (usually a battery icon) on the dashboard, unusual noises (whining or grinding) from the engine bay, and flickering headlights.
Tools and Materials Required
Gathering the necessary tools and materials before starting the job will ensure a smooth and efficient replacement. You'll need:
- New alternator for a 2010 Lexus RX 350 (ensure correct amperage rating)
- Socket set (typically 10mm, 12mm, 14mm)
- Wrench set (matching sizes to socket set)
- Screwdrivers (Phillips and flathead)
- Multimeter (for testing voltage)
- Serpentine belt tool or breaker bar with appropriate socket
- Gloves
- Safety glasses
- Jack and jack stands (for accessibility, optional)
- Penetrating oil (for stubborn bolts)
- Battery terminal cleaner
Step-by-Step Replacement Procedure
Safety First! Disconnect the negative battery cable before starting any electrical work. This prevents accidental shorts and potential injury.
- Access the Alternator: The alternator is typically located at the front of the engine. You may need to remove the engine cover and possibly a splash shield underneath the vehicle to gain clear access. Using a jack and jack stands to lift the vehicle can significantly improve accessibility.
- Disconnect Electrical Connectors: Carefully disconnect all electrical connectors attached to the alternator. There will typically be a large battery wire (B+ terminal) and a smaller connector for the voltage regulator. Ensure you note their positions for reassembly.
- Remove the Serpentine Belt: Use a serpentine belt tool or a breaker bar with the correct socket to relieve tension on the belt tensioner. Carefully remove the serpentine belt from the alternator pulley. It's a good idea to note the belt's routing for easier reinstallation.
- Remove the Alternator Mounting Bolts: Locate and remove the bolts securing the alternator to the engine bracket. These can sometimes be tight or corroded, so penetrating oil might be necessary. Support the alternator while removing the final bolt to prevent it from dropping.
- Remove the Old Alternator: Carefully maneuver the old alternator out of the engine bay.
- Install the New Alternator: Position the new alternator in the bracket and secure it with the mounting bolts. Tighten the bolts to the manufacturer's recommended torque specifications.
- Reinstall the Serpentine Belt: Route the serpentine belt around the alternator pulley and all other pulleys according to your noted diagram. Use the tensioner to apply tension and ensure the belt is properly seated.
- Reconnect Electrical Connectors: Reconnect all electrical connectors to the alternator, ensuring they are securely fastened. Double-check that the battery wire (B+) is properly connected and tightened.
- Reconnect the Battery: Reconnect the negative battery cable.
- Test the System: Start the engine and use a multimeter to check the charging voltage at the battery terminals. A healthy charging system should read between 13.5 and 14.5 volts. Also, check for any warning lights on the dashboard.
- Final Checks: Ensure all tools and materials are accounted for. Reinstall any removed engine covers or splash shields.
Common Issues and Troubleshooting
During the replacement process, you might encounter a few common issues:
- Stuck Bolts: Apply penetrating oil and allow it to soak for a few minutes before attempting to loosen stubborn bolts.
- Incorrect Belt Routing: Refer to a diagram or take a picture of the belt routing before removal to ensure proper reinstallation.
- Charging System Issues After Replacement: Double-check all electrical connections. If the charging system still isn't working correctly, the new alternator might be faulty, or there could be a problem with the wiring harness.
Professional Considerations
For professional mechanics, proper diagnostics before and after alternator replacement are crucial. This includes checking for parasitic draws, performing a voltage drop test on the charging circuit, and verifying proper communication with the vehicle's computer system. Using a scan tool to clear any diagnostic trouble codes (DTCs) related to the charging system is also recommended.
Replacing the alternator on a 2010 Lexus RX 350 is a manageable task for experienced DIYers and a routine job for professional mechanics. By following these steps and taking necessary precautions, you can ensure a successful and long-lasting repair.