2014 Honda Crv Headlight Lens Replacement
The 2014 Honda CR-V, a staple in the compact SUV segment, offers a blend of practicality and reliability. However, like all vehicles, it's susceptible to wear and tear, particularly concerning its exterior lighting. One common issue facing CR-V owners is headlight lens clouding or damage, necessitating a replacement. This article delves into the technical aspects of headlight lens replacement for the 2014 CR-V, comparing available options, highlighting their pros and cons, and providing insights into long-term maintenance and future trends.
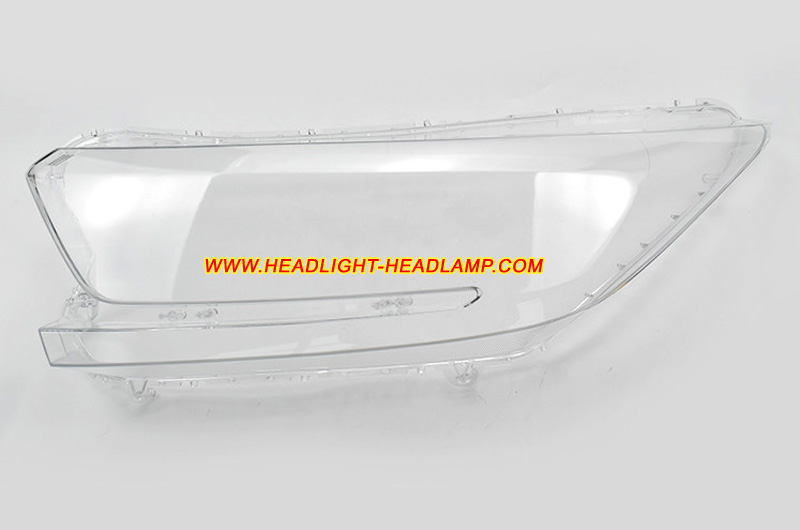
Understanding the 2014 CR-V Headlight Assembly
The 2014 CR-V utilizes a composite headlight assembly, meaning the lens is a separate, replaceable component. The lens itself is typically made of polycarbonate plastic, chosen for its impact resistance, light transmission properties, and moldability. The lens is treated with a UV protectant coating to prevent yellowing and clouding from prolonged sun exposure. However, this coating degrades over time, leading to a hazy or foggy appearance that reduces headlight output and potentially compromises safety.
The assembly also includes the reflector, housing the bulb (typically halogen, though aftermarket LED options are readily available), and aiming mechanisms. Replacing the lens alone addresses the clarity issue without necessarily disturbing the bulb or aiming adjustments, unless the assembly has been physically damaged.
Replacement Options: Aftermarket vs. OEM
When replacing the headlight lens, two primary options exist: aftermarket lenses and Original Equipment Manufacturer (OEM) lenses.
Aftermarket Lenses:
Pros: Typically more affordable than OEM options. Wider variety of styles and designs may be available. Can be sourced quickly through online retailers or local auto parts stores.
Cons: Quality can vary significantly between brands. Fitment may not be as precise as OEM, potentially leading to gaps or water leaks. UV coating may be inferior, resulting in faster yellowing. May not meet DOT (Department of Transportation) regulations in all regions, potentially impacting legality.
OEM Lenses:
Pros: Guaranteed fitment and compatibility. Constructed to meet Honda's original quality standards. UV coating is typically more durable, offering better resistance to yellowing. Compliance with DOT regulations is assured.
Cons: More expensive than aftermarket options. May require ordering from a Honda dealership, potentially leading to longer lead times.
Engineering Choices and Performance: The engineering choice of using polycarbonate and a UV coating is a compromise between durability, weight, and cost. While polycarbonate offers good impact resistance, it's inherently susceptible to UV degradation. OEM lenses are generally designed with a specific UV coating thickness and composition to optimize longevity. Aftermarket lenses, in their effort to reduce cost, might skimp on the coating, leading to quicker deterioration. Real-world performance differences are evident in headlight output and clarity over time. A high-quality OEM lens will typically maintain better light transmission for a longer period compared to a cheap aftermarket alternative.
Step-by-Step Lens Replacement Process
While specific steps may vary slightly depending on the exact lens and assembly design, the general process for replacing a 2014 CR-V headlight lens involves:
- Preparation: Disconnect the negative battery terminal. Gather necessary tools, including screwdrivers, plastic trim removal tools, and a heat gun or oven (depending on the bonding method).
- Assembly Removal: Remove the headlight assembly from the vehicle. This usually involves unbolting it from the frame after removing any surrounding trim pieces. Refer to the vehicle's service manual for specific instructions.
- Lens Separation: Soften the adhesive bonding the lens to the housing. This can be done using a heat gun to carefully warm the perimeter of the lens or by baking the entire assembly in an oven at a low temperature (typically around 200°F/93°C).
- Lens Removal: Once the adhesive is softened, carefully pry the lens away from the housing using plastic trim removal tools. Avoid using metal tools, as they can scratch or damage the housing.
- Cleaning: Thoroughly clean the housing to remove any residual adhesive.
- Lens Installation: Apply a new bead of headlight sealant around the perimeter of the housing. Align the new lens and press it firmly into place.
- Curing: Allow the sealant to cure completely according to the manufacturer's instructions.
- Assembly Reinstallation: Reinstall the headlight assembly onto the vehicle. Reconnect the wiring harness and battery terminal.
- Alignment: Aim the headlights according to the vehicle's specifications.
Important Note: This process requires patience and careful attention to detail. Improper heating or prying can damage the housing, rendering the entire assembly unusable. Consider seeking professional assistance if you are not comfortable performing this task.
Reliability Aspects and Maintenance Tips
The reliability of the headlight lens replacement hinges on the quality of the replacement lens and the skill of the installer. Using a high-quality OEM or reputable aftermarket lens will ensure better longevity and resistance to yellowing. Proper installation is crucial to prevent water leaks and ensure a secure seal. Regular cleaning of the headlight lenses can also help prolong their lifespan. Use a mild soap and water solution and a soft cloth to remove dirt and debris. Avoid using abrasive cleaners or harsh chemicals, as they can damage the UV coating.
Future Trends in Automotive Lighting
The automotive industry is rapidly evolving, with advancements in lighting technology playing a significant role. LED (Light Emitting Diode) headlights are becoming increasingly common, offering superior brightness, efficiency, and lifespan compared to halogen bulbs. Laser headlights are also emerging, providing even greater range and intensity. Furthermore, adaptive headlight systems, which automatically adjust the beam pattern based on driving conditions, are gaining popularity. In the future, we can expect to see even more sophisticated lighting technologies, such as OLED (Organic Light Emitting Diode) and digital headlights, which offer greater control over light distribution and customization.
From a repair perspective, the trend is moving towards sealed LED units. While offering long life and reliability, these units often require complete replacement in case of damage, making repair more expensive. The independent aftermarket will need to adapt and develop solutions for these newer technologies, including specialized diagnostic tools and repair procedures.
Conclusion
Replacing a 2014 Honda CR-V headlight lens is a relatively straightforward process that can significantly improve visibility and safety. Choosing between OEM and aftermarket options requires careful consideration of factors such as cost, quality, and fitment. Proper installation and regular maintenance are essential for maximizing the lifespan of the replacement lens. As automotive lighting technology continues to advance, automotive professionals will need to stay abreast of the latest trends and developments to effectively service and repair these systems.