
2015 Dodge Durango Fuel Pump Relay Bypass
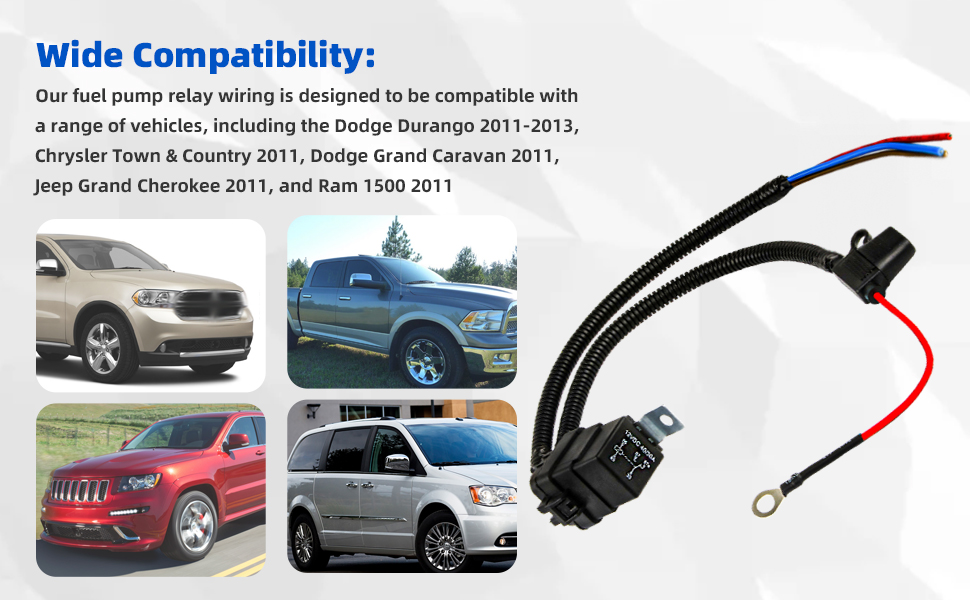
Alright, let's talk about bypassing the fuel pump relay on a 2015 Dodge Durango. This is a procedure that can be useful for troubleshooting fuel delivery problems, diagnosing a faulty relay, or even as a temporary fix to get you back on the road if your relay fails unexpectedly. However, safety is paramount. Working with fuel systems requires extreme caution. Ensure you're in a well-ventilated area, disconnect the negative battery terminal before starting, and have a fire extinguisher nearby.
Understanding the Fuel Pump Relay and Circuit
First, let's quickly recap what the fuel pump relay does and how it fits into the overall fuel system. The fuel pump relay is an electrically controlled switch that provides power to the fuel pump. It's controlled by the Powertrain Control Module (PCM), which is the car's main computer. When you turn the key to the "on" position, the PCM signals the relay to close, sending 12V to the fuel pump. This starts the pump, pressurizing the fuel lines and allowing the engine to start.
The relay itself is typically a four or five-pin device, located in the Power Distribution Center (PDC), which is often referred to as the fuse box. On the 2015 Durango, you'll usually find it in the PDC under the hood. Identifying the correct relay is crucial. The owner's manual will often have a diagram, or you can consult online resources specific to your model year.
Here's a breakdown of typical relay pin functions (though always verify with your vehicle's wiring diagram):
- Pin 30: Battery voltage (+) – This is the power source that the relay switches.
- Pin 87: Output to fuel pump (+) – This is the wire that feeds power to the fuel pump when the relay is closed.
- Pin 85: Relay coil ground (-) – This provides the ground path for the relay's internal coil.
- Pin 86: Relay coil trigger (+) – This receives the signal from the PCM to activate the relay.
- Pin 87a: (Sometimes present, not typically used in fuel pump relays) Normally closed contact - This would be connected to Pin 30 when the relay is *not* energized.
Why Bypass the Fuel Pump Relay?
There are several reasons why you might consider bypassing the fuel pump relay:
- Diagnosis: If you suspect a faulty fuel pump relay is preventing the fuel pump from operating, bypassing it can confirm whether the relay is the issue. If the fuel pump runs when bypassed, but doesn't run normally, the relay is the likely culprit.
- Troubleshooting Fuel Delivery Problems: Bypassing the relay and manually activating the fuel pump allows you to isolate fuel delivery issues. You can check fuel pressure at the fuel rail and verify that the pump is capable of delivering fuel.
- Emergency Repair: In a pinch, if you're stranded with a suspected bad relay, bypassing it can provide a temporary solution to get you home or to a repair shop. This is strictly a temporary measure as it removes safety features, and you should replace the relay as soon as possible.
Methods for Bypassing the Fuel Pump Relay (2015 Dodge Durango)
There are a couple of ways to bypass the fuel pump relay. I'll outline the two most common and safest methods.
Method 1: Jumper Wire (Preferred Method)
This method involves using a jumper wire to directly connect the power input to the fuel pump output, effectively mimicking a closed relay.
- Locate the Fuel Pump Relay: Consult your owner's manual or a reliable online resource to identify the fuel pump relay in the PDC. Remove the relay.
- Identify Pins 30 and 87: Using a wiring diagram specific to your 2015 Dodge Durango, identify the terminals in the relay socket that correspond to pins 30 (battery voltage) and 87 (fuel pump output).
- Prepare the Jumper Wire: Use a fused jumper wire. A 10-15 amp fuse is generally sufficient. This is crucial for safety, as it prevents overcurrent and potential damage to the fuel pump or wiring. Make sure the wire gauge is appropriate for the amperage – 14-16 gauge is usually sufficient.
- Insert the Jumper Wire: Carefully insert the ends of the fused jumper wire into the terminals corresponding to pins 30 and 87 in the relay socket. Ensure a secure connection.
- Test the Fuel Pump: With the jumper wire in place, the fuel pump should start running continuously. You should hear it prime. If the pump doesn't run, double-check your connections and ensure you've identified the correct terminals. If it still doesn't run, the problem may lie elsewhere, such as a faulty fuel pump or wiring issue.
Important Notes:
- Fuse is critical: Always use a fused jumper wire. This is non-negotiable. Bypassing the relay without a fuse creates a significant fire risk.
- Correct Pin Identification: Double and triple-check your pin identification. Inserting the jumper wire into the wrong terminals could damage other components. Use the wiring diagram!
- Limited Run Time: Run the fuel pump only as long as necessary for testing or to start the engine. Running the pump continuously for extended periods can overheat it and potentially cause damage.
Method 2: External 12V Power Source (Less Common, Requires More Skill)
This method involves directly powering the fuel pump with an external 12V power source. It’s generally used when other components are suspect or to eliminate the factory wiring as a cause of the issue.
- Identify the Fuel Pump Power Wire: Access the fuel pump wiring harness, usually located near the fuel tank. Refer to your vehicle's wiring diagram to identify the positive (+) wire that feeds power to the fuel pump. It will likely be a specific color.
- Disconnect the Fuel Pump Connector: Carefully disconnect the electrical connector from the fuel pump. This isolates the fuel pump from the vehicle's electrical system.
- Apply 12V Power: Using a fused jumper wire connected to a 12V power source (like a spare battery or a battery charger set to 12V), carefully connect the positive (+) end of the jumper wire to the fuel pump's positive (+) wire that you identified in step 1. The negative (-) end of the power source should be grounded to the vehicle's chassis.
- Observe the Fuel Pump: If the fuel pump is functioning, it should start running immediately. As with the previous method, only run the pump for a short period.
Important Notes:
- Polarity is Crucial: Ensure you connect the positive (+) and negative (-) wires correctly. Reversing the polarity can damage the fuel pump.
- Fused Jumper Wire: Again, use a fused jumper wire to protect the fuel pump and wiring from overcurrent.
- Secure Connections: Make sure all connections are secure to prevent sparking or intermittent operation.
- Connector Damage: Exercise caution when disconnecting and reconnecting the fuel pump connector to avoid damaging the terminals.
Safety Considerations and Warnings
Working with fuel systems is inherently dangerous. Here's a reminder of the key safety precautions:
- Disconnect the Negative Battery Terminal: This is the first step to prevent electrical shorts and accidental sparking.
- Work in a Well-Ventilated Area: Fuel vapors are flammable and can be harmful to your health.
- Have a Fire Extinguisher Nearby: Be prepared for the possibility of a fire.
- Use Fused Jumper Wires: This protects the electrical system from overcurrent and potential damage.
- Avoid Sparks: Be careful not to create any sparks while working around the fuel system.
- Limited Run Time: Only run the fuel pump for the minimum time necessary to diagnose the problem.
- Replace the Relay: If bypassing the relay allows the fuel pump to run, replace the faulty relay as soon as possible with a new, high-quality unit. Don't continue to drive with the relay bypassed.
After the Bypass
Once you've completed your testing, remove the jumper wire immediately. Reinstall the fuel pump relay (or a new one, if that was the problem). Reconnect the negative battery terminal. Start the engine and verify that the fuel pump operates normally. If the problem persists, you'll need to further investigate other potential causes of fuel delivery issues, such as a faulty fuel pump, a clogged fuel filter, or a problem with the PCM.
This guide provides a general overview of bypassing the fuel pump relay on a 2015 Dodge Durango. Always refer to the specific wiring diagrams and repair procedures for your vehicle to ensure accuracy and safety. If you're not comfortable performing this procedure, consult a qualified mechanic.