2016 Kia Soul Tail Light Bulb Replacement
Replacing a tail light bulb on your 2016 Kia Soul is a relatively straightforward DIY project that can save you money and time compared to taking it to a mechanic. This guide provides step-by-step instructions to help you safely and effectively change your tail light bulb.
Understanding the Importance of Functioning Tail Lights
Before we begin, let's emphasize the importance of properly functioning tail lights. They are a critical safety feature, alerting drivers behind you when you're braking, turning, or simply present on the road, especially during low-visibility conditions like fog, rain, or nighttime driving. A malfunctioning tail light significantly increases the risk of accidents. Regularly checking your lights and promptly replacing any burnt-out bulbs is a vital part of responsible vehicle ownership. A burned-out bulb can lead to a ticket, so keeping your lights in working order can save you from fines.
Tools and Materials You'll Need
To replace the tail light bulb on your 2016 Kia Soul, you'll need the following tools and materials:
- New tail light bulb (Correct bulb type for 2016 Kia Soul - check your owner's manual or an auto parts store)
- Screwdriver (Phillips head)
- Socket wrench (with appropriate socket size, usually 10mm)
- Gloves (optional, to keep your hands clean)
- Soft cloth or towel (to protect the lens and paint)
- Safety Glasses (Recommended)
Important Note: Confirm the correct bulb type for your 2016 Kia Soul before purchasing. Your owner's manual is the best resource for this information. You can also consult with an auto parts store professional.
Step-by-Step Guide to Replacing the Tail Light Bulb
Follow these steps carefully to safely replace the tail light bulb on your 2016 Kia Soul:
1. Safety First: Preparation is Key
Before you start any work on your vehicle, prioritize safety:
- Park your Kia Soul on a level surface, away from traffic.
- Engage the parking brake firmly.
- Turn off the ignition and remove the key.
2. Accessing the Tail Light Assembly
The tail light assembly is typically accessed from inside the vehicle, through the rear cargo area.
- Open the rear hatch or trunk.
- Locate the access panel behind the tail light assembly on the side where the bulb needs replacement. This panel is usually held in place by plastic clips or screws.
- Carefully remove the access panel. You may need to use a screwdriver to gently pry it open.
3. Removing the Tail Light Assembly (if necessary)
On some 2016 Kia Soul models, you might need to remove the entire tail light assembly to access the bulb. If so, proceed as follows:
- Locate the bolts or nuts that secure the tail light assembly to the vehicle body. These are usually accessible from inside the cargo area after removing the access panel.
- Using the socket wrench, carefully remove the bolts or nuts.
- Gently pull the tail light assembly away from the vehicle. Be careful not to force it, as there may be retaining clips holding it in place. If it doesn't come easily, double-check for any remaining fasteners.
4. Locating and Removing the Bulb Socket
Now that you have access to the back of the tail light assembly (either directly or after removing the assembly), locate the bulb socket for the tail light.
- Identify the correct bulb socket. It will be connected to the wiring harness and directly behind the tail light lens.
- Twist the bulb socket counterclockwise (usually about a quarter turn) to release it from the tail light assembly.
- Gently pull the bulb socket straight out from the assembly.
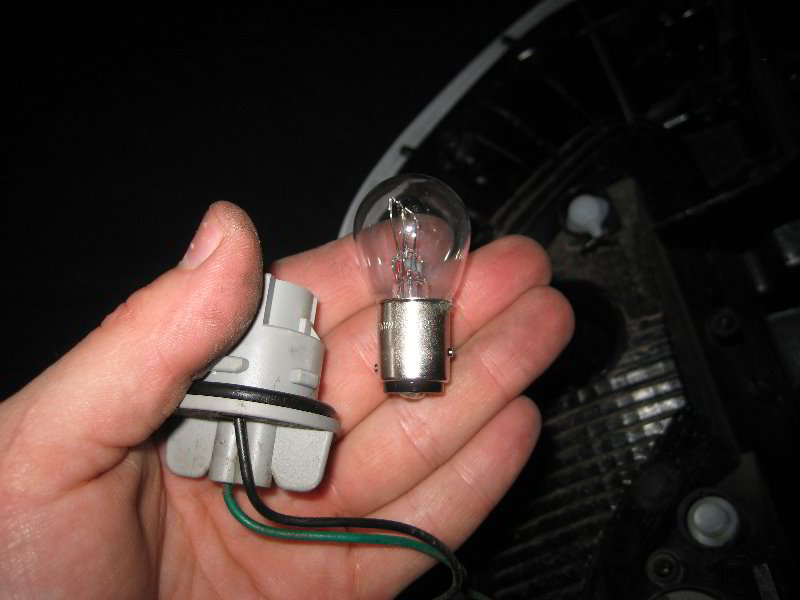
5. Removing the Old Bulb
With the bulb socket removed, you can now remove the old bulb.
- Gently push the bulb in slightly and twist it counterclockwise to release it from the socket. This is often a bayonet-style mount. Alternatively, some bulbs simply pull straight out.
- Remove the old bulb from the socket.
6. Installing the New Bulb
Now it's time to install the new tail light bulb.
- Insert the new bulb into the socket. Ensure it is the correct type and that the pins align properly.
- Push the bulb in slightly and twist it clockwise to lock it into place. If it's a push-in style, simply push it in firmly.
7. Reinstalling the Bulb Socket
Reinstall the bulb socket back into the tail light assembly.
- Align the bulb socket with the opening in the tail light assembly.
- Push the bulb socket into the opening and twist it clockwise to lock it into place.
8. Reinstalling the Tail Light Assembly (if removed)
If you removed the entire tail light assembly, reinstall it now.
- Carefully align the tail light assembly with the vehicle body.
- Reinstall the bolts or nuts that secure the assembly.
- Tighten the bolts or nuts securely, but be careful not to overtighten them.
9. Reinstalling the Access Panel
Reinstall the access panel in the cargo area.
- Align the access panel with the opening.
- Press the panel into place until the clips or screws secure it.
10. Testing the New Bulb
Before you finish, it's crucial to test the new bulb to ensure it's working correctly.
- Turn on the ignition (but don't start the engine).
- Activate the tail lights, brake lights, and turn signals on the side where you replaced the bulb.
- Have someone observe the tail lights to confirm that the new bulb is functioning properly.
- If the bulb doesn't light up, double-check that it is properly installed in the socket and that the socket is securely connected to the tail light assembly. Also, ensure the correct bulb type was used. If problems persist, consult a qualified mechanic.
Troubleshooting Common Issues
Here are a few common issues you might encounter during the tail light bulb replacement process and how to address them:
- Bulb Doesn't Light Up: Double-check the bulb type, the bulb's connection in the socket, and the socket's connection to the assembly. Also, check the vehicle's fuses related to the tail lights. A blown fuse could be the culprit.
- Difficulty Removing the Assembly: Ensure you have removed all the fasteners (bolts, nuts, or clips). If it's still stuck, gently wiggle the assembly while pulling it straight out. Avoid forcing it.
- Broken Clips: Plastic clips can sometimes break, especially in older vehicles. You can often purchase replacement clips at an auto parts store.
Final Thoughts
Replacing the tail light bulb on your 2016 Kia Soul is a simple task that can save you money and keep you safe on the road. By following these steps carefully, you can ensure that your tail lights are functioning properly. Remember to always prioritize safety and consult your owner's manual for specific instructions related to your vehicle. If you're uncomfortable performing this task yourself, don't hesitate to seek assistance from a qualified mechanic. Always dispose of old bulbs properly according to local regulations. Regular maintenance of your vehicle's lighting system is crucial for safe driving. Drive safely!