
2018 Nissan Rogue Oxygen Sensor Location
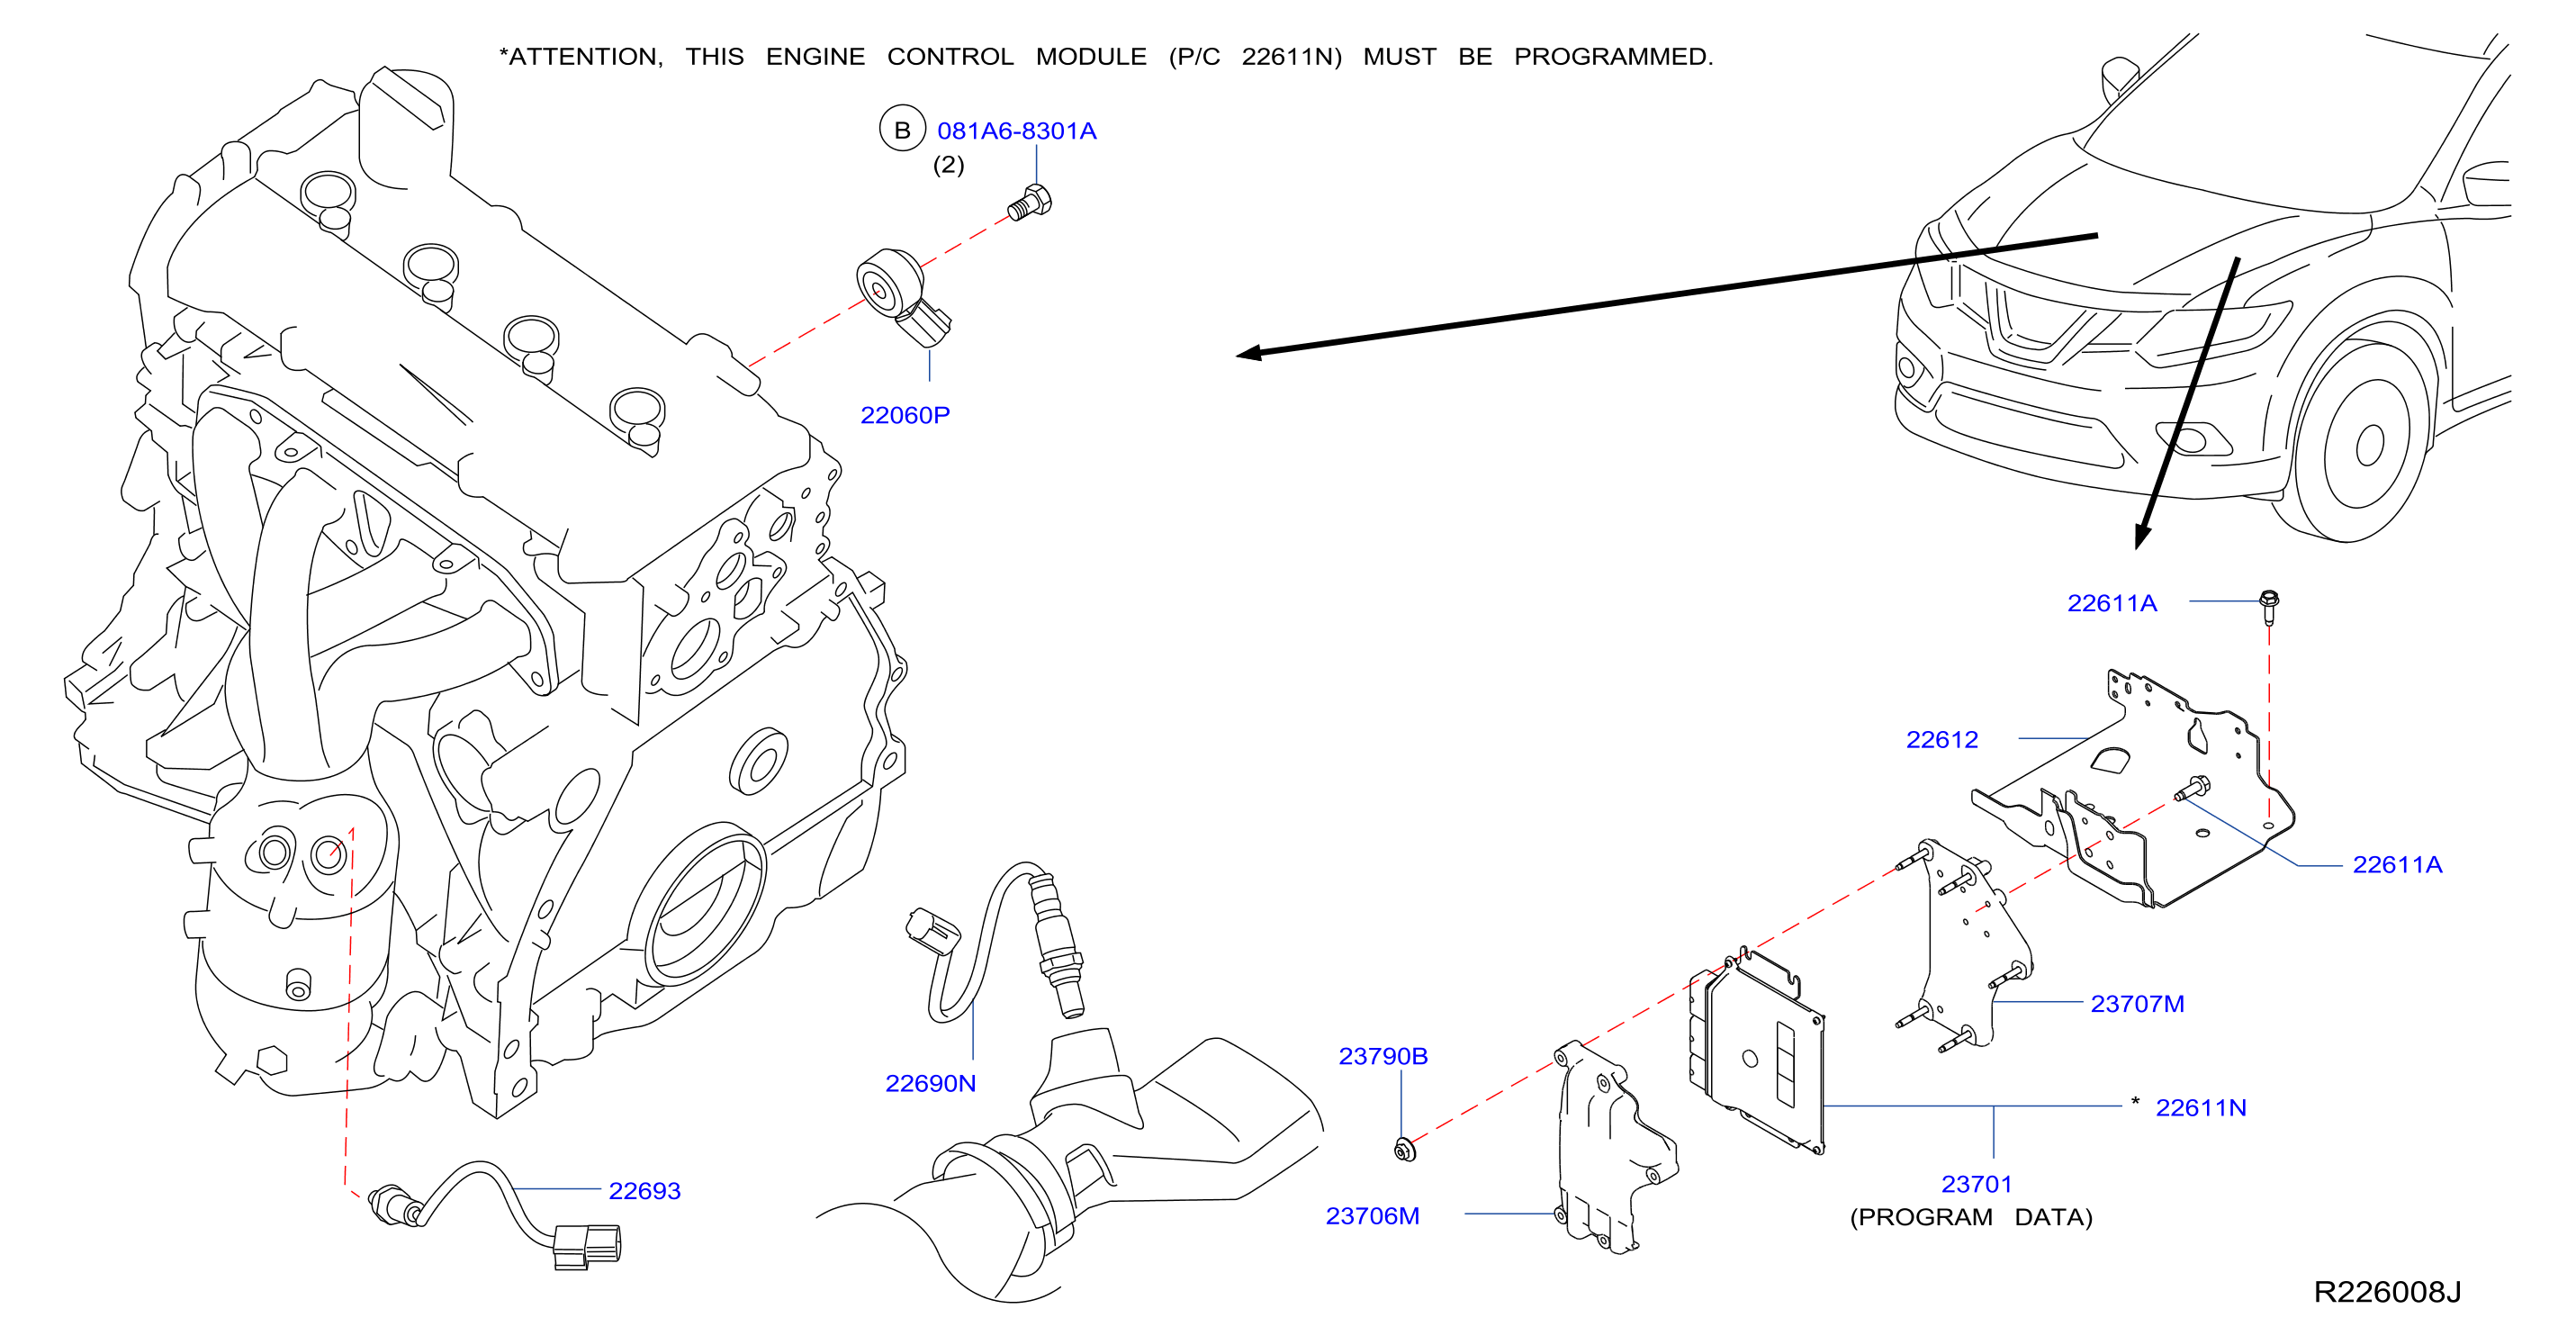
The 2018 Nissan Rogue, a popular compact SUV, relies on a sophisticated engine management system to optimize performance, fuel economy, and emissions. A critical component of this system is the oxygen sensor (O2 sensor). Understanding the location of these sensors is crucial for diagnosis, maintenance, and repair. This article will provide a detailed guide to locating the O2 sensors on the 2018 Nissan Rogue, catering to both DIY enthusiasts and professional mechanics.
Understanding Oxygen Sensors
Before diving into the specific locations, it’s important to understand the function of oxygen sensors. These sensors measure the amount of oxygen in the exhaust gases. This data is relayed to the engine control unit (ECU), which uses it to adjust the air-fuel mixture. There are typically two types of oxygen sensors:
- Upstream (Pre-Catalytic Converter) Sensors: These sensors, also known as air-fuel ratio sensors or lambda sensors, are located before the catalytic converter. They directly measure the oxygen content of the exhaust gas exiting the engine. This is the primary sensor used for adjusting the air-fuel mixture.
- Downstream (Post-Catalytic Converter) Sensors: These sensors are located after the catalytic converter. Their primary function is to monitor the efficiency of the catalytic converter. By comparing the oxygen levels before and after the converter, the ECU can determine if the converter is functioning correctly.
A faulty oxygen sensor can lead to a variety of problems, including poor fuel economy, reduced engine performance, a rough idle, and a failed emissions test. Common diagnostic trouble codes (DTCs) associated with oxygen sensors include P0130, P0131, P0132, P0133, P0134 (for upstream sensors) and P0136, P0137, P0138, P0139, and P0140 (for downstream sensors). These codes will vary slightly depending on the specific engine and location of the faulty sensor.
2018 Nissan Rogue Engine Variants and Oxygen Sensor Configurations
The 2018 Nissan Rogue primarily came with one engine option: the 2.5-liter QR25DE inline-4 cylinder engine. This engine utilizes a dual overhead camshaft (DOHC) design and is coupled with a continuously variable transmission (CVT). The hybrid version also uses a 2.0 liter engine and electric motors. However, the sensor locations are similar.
This engine configuration employs two oxygen sensors: one upstream and one downstream. Understanding this basic configuration is vital before attempting to locate the sensors.
Location of the Upstream Oxygen Sensor (Bank 1 Sensor 1)
The upstream oxygen sensor, also referred to as Bank 1 Sensor 1, is situated on the exhaust manifold, before the catalytic converter. Accessing this sensor can be somewhat challenging due to its location in the engine bay.
- Identify the Exhaust Manifold: The exhaust manifold is a series of pipes that collect exhaust gases from the engine cylinders and direct them towards the catalytic converter. It's typically made of cast iron or stainless steel and is located near the front of the engine.
- Locate the Sensor: The upstream oxygen sensor is screwed directly into the exhaust manifold. Look for a sensor with a wire harness connected to it. The sensor itself will resemble a small metal cylinder with a threaded end.
- Access Considerations: Depending on the specific Rogue trim and options, you may need to remove some components for easier access. This could include the air intake ducting or other components blocking the sensor.
Pro Tip: Allow the engine to cool completely before attempting to remove the oxygen sensor. The exhaust manifold can get extremely hot, and working on a hot engine can cause burns. Consider using a penetrating oil on the sensor threads a few hours before attempting removal to help loosen it.
Location of the Downstream Oxygen Sensor (Bank 1 Sensor 2)
The downstream oxygen sensor, also known as Bank 1 Sensor 2, is positioned after the catalytic converter, typically on the exhaust pipe between the catalytic converter and the muffler.
- Locate the Catalytic Converter: The catalytic converter is a canister-shaped component located in the exhaust system, usually underneath the vehicle, near the middle.
- Identify the Sensor: The downstream oxygen sensor is screwed into the exhaust pipe, immediately after the catalytic converter. It will have a similar appearance to the upstream sensor, with a metal cylinder and a wire harness.
- Access Considerations: Accessing the downstream sensor is generally easier than the upstream sensor, as it is located underneath the vehicle. You may need to raise the vehicle using a jack and jack stands to gain sufficient access. Always use proper safety precautions when working under a vehicle.
Tools and Equipment
To successfully locate and replace the oxygen sensors on a 2018 Nissan Rogue, you will need the following tools and equipment:
- Oxygen Sensor Socket: This is a specialized socket designed to fit around the oxygen sensor and its wiring. Using a regular socket can damage the sensor or its wiring.
- Wrench Set: A set of standard wrenches may be needed to remove any components blocking access to the sensors.
- Socket Set: A socket set with various sizes will be useful for removing bolts and nuts.
- Penetrating Oil: As mentioned earlier, applying penetrating oil to the sensor threads can help loosen them, especially if they are corroded.
- Jack and Jack Stands: To safely raise the vehicle for access to the downstream sensor.
- Gloves and Safety Glasses: To protect your hands and eyes.
- Torque Wrench: To ensure the new oxygen sensors are tightened to the correct torque specification. Refer to the vehicle's service manual for the specific torque value.
- OBD-II Scanner: After replacing the oxygen sensor, an OBD-II scanner can be used to clear any stored diagnostic trouble codes and monitor the sensor's performance.
Replacing Oxygen Sensors: Considerations and Best Practices
Replacing oxygen sensors can be a straightforward task, but there are a few considerations to keep in mind:
- Quality of Replacement Sensors: It is crucial to use high-quality replacement sensors from a reputable manufacturer. Aftermarket sensors can vary significantly in quality, and using a cheap sensor can lead to premature failure or inaccurate readings. Denso and NGK are original equipment (OE) suppliers and are generally considered reliable choices.
- Torque Specifications: Tightening the oxygen sensor to the correct torque specification is essential. Overtightening can damage the sensor or the exhaust manifold, while undertightening can lead to leaks. Consult the vehicle's service manual for the correct torque value.
- Anti-Seize Compound: Some new oxygen sensors come with anti-seize compound pre-applied to the threads. If not, apply a small amount of anti-seize compound to the threads before installation. This will make it easier to remove the sensor in the future. Be careful not to get any anti-seize compound on the sensor tip, as this can damage it.
- Wiring Harness: Inspect the wiring harness and connector for any damage or corrosion. If the wiring is damaged, it should be repaired or replaced before installing the new sensor.
- Clearing Diagnostic Trouble Codes: After replacing the oxygen sensor, clear any stored diagnostic trouble codes using an OBD-II scanner. This will reset the ECU and allow it to learn the new sensor's readings.
Common Problems and Troubleshooting
Even with proper maintenance, oxygen sensors can fail over time. Here are some common problems and troubleshooting tips:
- Contamination: Oxygen sensors can be contaminated by oil, coolant, or fuel leaks. This contamination can damage the sensor and cause it to fail prematurely. Inspect the engine for any leaks and address them promptly.
- Corrosion: Corrosion on the sensor threads or wiring harness can prevent the sensor from functioning properly. Clean any corrosion with a wire brush and apply dielectric grease to the connector.
- Heater Circuit Failure: Some oxygen sensors have a built-in heater that helps them reach operating temperature quickly. If the heater circuit fails, the sensor will not function properly, especially during cold starts. Check the heater circuit with a multimeter to diagnose any issues.
- Catalytic Converter Failure: A failing catalytic converter can cause the downstream oxygen sensor to report incorrect readings. If you suspect a catalytic converter failure, have it inspected by a qualified mechanic.
Estimated Replacement Costs
The cost of replacing an oxygen sensor on a 2018 Nissan Rogue can vary depending on several factors, including the brand of the sensor, the labor costs (if you are having a mechanic do the work), and your location. Generally, you can expect to pay between $100 and $300 per sensor, including labor. A DIY replacement will cost significantly less, primarily the cost of the sensor itself, typically ranging from $50 to $150, depending on the brand and type.
Conclusion
Understanding the location of oxygen sensors on your 2018 Nissan Rogue is a valuable skill for any car enthusiast or owner. By following the guidelines outlined in this article, you can accurately locate the sensors, diagnose potential problems, and perform necessary maintenance or repairs. Remember to prioritize safety and use the appropriate tools and equipment when working on your vehicle. By keeping your oxygen sensors in good working order, you can ensure optimal engine performance, fuel economy, and emissions control. Regular inspections and timely replacements, when needed, are key to maintaining the overall health and longevity of your 2018 Nissan Rogue.