A Friendly Guide To Replacing Your 2014 Nissan Frontiers Headlight Bulbs
Replacing your headlight bulbs on a 2014 Nissan Frontier might seem daunting at first, but with a little know-how and the right tools, it's a manageable DIY project. Not only can you save yourself some money by avoiding a trip to the mechanic, but you'll also gain a better understanding of your truck's electrical system in the process. This guide will walk you through the entire process, from understanding the components to troubleshooting common issues, all while keeping the language approachable for the intermediate DIYer.
Understanding the Frontier's Headlight System
Before we dive into the replacement procedure, let's take a quick look at the headlight system in your 2014 Frontier. The Frontier, in its 2014 iteration, uses halogen bulbs for its headlights. While some newer vehicles utilize LED or HID (High-Intensity Discharge) systems, halogen remains a cost-effective and relatively simple lighting solution. Understanding how halogen bulbs work will help you diagnose issues and choose the right replacement. Halogen bulbs create light by passing electricity through a tungsten filament, heating it to incandescence. The bulb is filled with halogen gas, which helps regenerate the filament and prolong its lifespan. This cycle helps to redeposit tungsten back onto the filament instead of it depositing on the glass of the bulb.
Technical Breakdown: How Halogen Headlights Work
Let's delve into the workings of a halogen bulb at a more detailed level:
- Filament: The heart of the bulb, this thin tungsten wire glows brightly when heated by electrical current. Its resistance to the electrical current is what generates heat and light.
- Halogen Gas: Typically iodine or bromine, this gas prevents the tungsten from evaporating too quickly. It participates in a chemical cycle where evaporated tungsten atoms combine with the halogen gas and redeposit onto the filament, extending the bulb's life and maintaining its brightness.
- Quartz Glass Envelope: The bulb is made of high-temperature quartz glass. This is crucial because the halogen cycle requires high operating temperatures. Regular glass would soften and deform under these conditions.
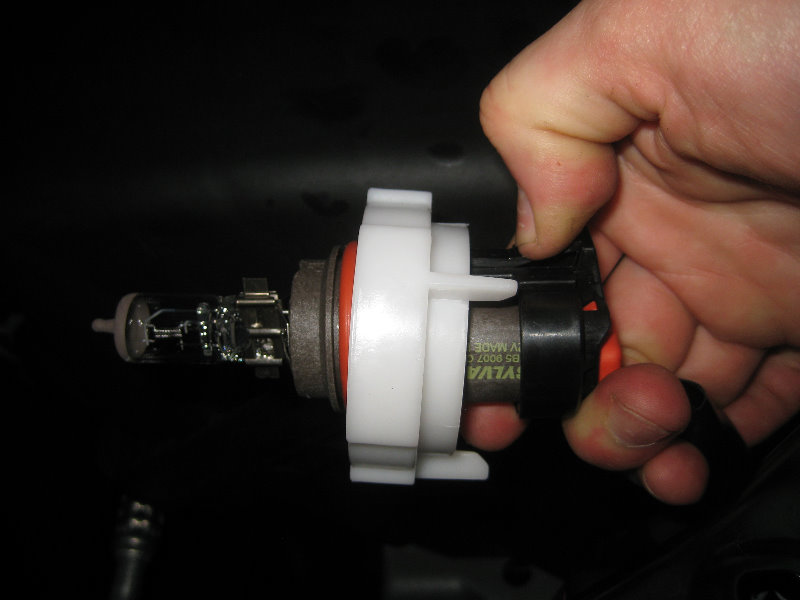
- Electrical Connector: This is where the bulb connects to the vehicle's wiring harness, supplying the electrical current needed to illuminate the filament. The connector design is specific to the bulb type (in this case, likely an H4 or 9003 bulb).
Electrical Circuit Overview
The headlight circuit is relatively straightforward. It starts with the battery, which provides the power. The power then flows through a fuse, which protects the circuit from overloads. From the fuse, it goes to the headlight switch, which allows you to turn the headlights on and off. The switch then directs the power to the appropriate headlight relay. The relay is essentially an electrically controlled switch that can handle the high current required by the headlights. Finally, the power flows from the relay to the headlight bulb.
The Body Control Module (BCM) also plays a role in some lighting functions, especially with daytime running lights (DRLs) and automatic headlight features. The BCM monitors sensors and controls relays based on pre-programmed logic. For example, it may automatically turn on the headlights when it detects low ambient light or activate DRLs when the engine is running.
Replacing Your Headlight Bulbs: A Step-by-Step Guide
Now, let's get our hands dirty. Here's how to replace the headlight bulbs on your 2014 Nissan Frontier:
- Gather Your Tools and Supplies: You'll need:
- New headlight bulbs (check your owner's manual or a parts website for the correct bulb type – likely an H4 or 9003).
- Gloves (to prevent oil from your skin from damaging the bulb).
- Screwdriver (Phillips head may be required).
- Possibly a socket set with extensions, depending on access.
- A flashlight or headlamp.
- Safety First: Disconnect the negative terminal of your battery. This prevents any accidental electrical shorts during the process.
- Access the Headlight Assembly: On the Frontier, you'll typically access the headlight bulbs from behind the headlight assembly, inside the engine bay. Some models may require removing a plastic cover or loosening the air intake duct for better access.
- Remove the Dust Cover: Locate the rubber or plastic dust cover on the back of the headlight assembly. Twist or pull it off to expose the bulb connector.
- Disconnect the Electrical Connector: Carefully disconnect the electrical connector from the bulb. There's usually a clip or tab you need to press or squeeze to release it. Do not pull on the wires! Grasp the connector itself.
- Remove the Old Bulb: The bulb is typically held in place by a wire clip or a rotating locking mechanism. Depress the clip and unhook it, or rotate the locking mechanism to release the bulb. Carefully remove the old bulb.
- Install the New Bulb: Insert the new bulb into the headlight assembly, ensuring it's properly seated and aligned. Secure it with the wire clip or locking mechanism. Avoid touching the glass of the bulb with your bare hands. If you do, clean it with rubbing alcohol.
- Reconnect the Electrical Connector: Reconnect the electrical connector to the new bulb, making sure it clicks into place.
- Replace the Dust Cover: Reinstall the dust cover to protect the bulb from moisture and debris. Ensure it seals properly.
- Repeat on the Other Side: Repeat the process on the other headlight.
- Reconnect the Battery: Reconnect the negative terminal of your battery.
- Test the Headlights: Turn on your headlights to make sure both bulbs are working properly.
Common Issues and Maintenance Concerns
- Bulb Burnout: Halogen bulbs have a limited lifespan. Over time, the filament will weaken and eventually break.
- Dim Headlights: Dim headlights can be caused by a weak battery, corroded connections, or a failing bulb. Replacing the bulbs is the first step in troubleshooting this issue.
- Moisture in the Headlight Assembly: A cracked or damaged dust cover can allow moisture to enter the headlight assembly, which can corrode the bulb and wiring. Replace the dust cover if it's damaged. You may need to dry out the assembly before installing new bulbs.
- Corroded Electrical Connectors: Corrosion on the electrical connectors can reduce the amount of current that reaches the bulb, causing it to be dim or not work at all. Clean the connectors with a wire brush and apply dielectric grease to prevent future corrosion.
- Fuse Problems: If the headlight doesn't work at all, check the headlight fuse. A blown fuse indicates a problem in the circuit, such as a short. Replace the fuse with the correct amperage rating.
Do's and Don'ts / Best Practices
Do's:
- Do wear gloves when handling the bulbs to prevent oil from your skin from damaging them.
- Do use the correct bulb type for your vehicle. Check your owner's manual or a parts website.
- Do make sure the bulb is properly seated and aligned in the headlight assembly.
- Do replace both bulbs at the same time. This ensures that they have the same brightness and color.
- Do use dielectric grease on the electrical connectors to prevent corrosion.
- Do disconnect the negative battery terminal before starting any electrical work.
Don'ts:
- Don't touch the glass of the bulb with your bare hands.
- Don't force the bulb into the headlight assembly.
- Don't use a bulb with a higher wattage than recommended for your vehicle. This can damage the headlight assembly or wiring.
- Don't neglect damaged or cracked headlight lenses or dust covers.
Conclusion
Replacing the headlight bulbs on your 2014 Nissan Frontier is a straightforward task that can save you money and improve your visibility. By following these steps and taking the necessary precautions, you can confidently tackle this project yourself. Remember to prioritize safety, use the correct tools and parts, and take your time. If you encounter any difficulties or are unsure about any step, it's always best to consult a qualified mechanic. Consider upgrading to a higher quality halogen bulb for improved performance, but ensure they are DOT-approved and legal for road use in your area.