Aem Bosch Lsu 4.9 Replacement Uego Sensor
Okay, so you're here because you're probably wrestling with an AEM Bosch LSU 4.9 UEGO (Universal Exhaust Gas Oxygen) sensor issue. Don't worry; it's a common problem, especially if you're running aftermarket engine management or have been pushing your vehicle hard. Let's break down the problem and how to tackle it.
The Problem: When Your UEGO Sensor Goes South
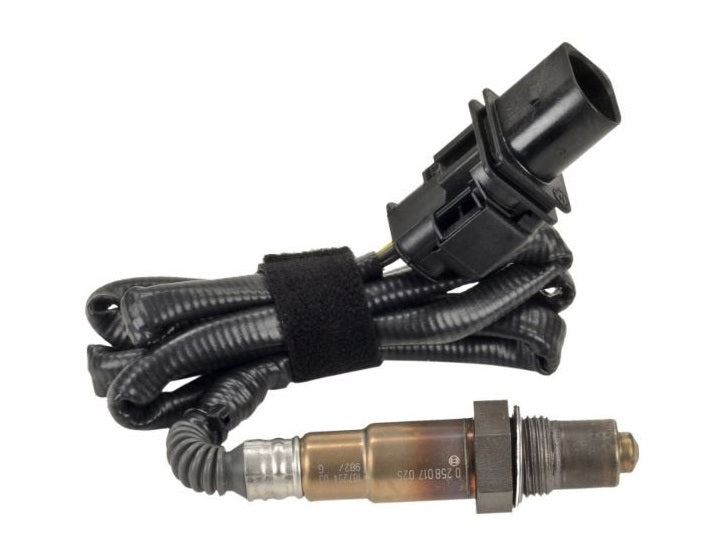
The AEM Bosch LSU 4.9 is a widely used wideband oxygen sensor, prized for its accuracy and relatively quick response time. It’s the workhorse behind many aftermarket air/fuel ratio gauges and plays a crucial role in providing feedback to standalone engine management systems. But like any sensor, it's not invincible. Here's what typically goes wrong:
- Sensor Failure: This is the most straightforward – the sensor simply stops functioning correctly. You might see error codes (like P0130, P0131, P0132, P0133, P0134, P0135, or codes related to heater circuit malfunction) on your ECU or your air/fuel ratio gauge will display erratic or nonsensical readings. Sometimes it reads a constant value, stuck lean or rich.
- Slow Response Time: Even if the sensor isn't completely dead, its response time can degrade over time. This means the readings you're seeing are lagging behind what's actually happening in the exhaust stream, which can lead to tuning issues and poor engine performance. You might notice hesitation or a lack of power.
- Heater Circuit Issues: The LSU 4.9 has an internal heater that brings the sensor up to operating temperature quickly for accurate readings. If the heater circuit fails, the sensor won't reach the necessary temperature, and you'll get inaccurate or no readings, especially when the engine is cold. This often manifests as a code specifically indicating a heater circuit malfunction.
- Contamination: Fuel additives, oil leaks, coolant leaks, or even excessive carbon buildup can contaminate the sensor element, leading to inaccurate readings or premature failure. This is especially common if you're running rich or have an engine with blow-by.
- Wiring or Connector Problems: Sometimes, the issue isn't the sensor itself, but the wiring harness or connector leading to it. Damaged wires, corroded connectors, or loose connections can interrupt the signal and cause similar symptoms to a faulty sensor.
Diagnosing the Problem: Pinpointing the Culprit
Before you rush out and buy a new sensor, it's crucial to diagnose the problem accurately. Here's a step-by-step approach:
- Read Error Codes: Use an OBDII scanner to check for any stored error codes. This will give you a valuable starting point for troubleshooting. Pay close attention to codes related to oxygen sensor function, heater circuits, or air/fuel ratio imbalances.
- Visual Inspection: Carefully inspect the sensor, wiring harness, and connector for any signs of damage, corrosion, or loose connections. Pay particular attention to areas where the wiring harness might rub against the chassis or engine components.
- Check the Wiring: Use a multimeter to check the continuity of the wiring between the sensor and the ECU or gauge. Also, check for shorts to ground. Refer to your ECU or gauge manufacturer's wiring diagram for pinouts and expected resistance values. This step is critical to rule out wiring problems.
- Sensor Resistance Test: You can use a multimeter to measure the resistance of the sensor's heater circuit. The specific resistance value will vary depending on the sensor and manufacturer, so consult the documentation for your specific AEM setup or the Bosch LSU 4.9 datasheet. An open circuit (infinite resistance) indicates a faulty heater.
- Monitor Sensor Output: If you have access to a data logger or a scan tool that can display live sensor data, monitor the sensor's output while the engine is running. Look for erratic readings, slow response times, or a complete lack of signal.
- Consider Sensor Age and Usage: Wideband sensors have a finite lifespan. If your sensor has been in use for a considerable amount of time (e.g., several years or a significant number of miles, especially under demanding conditions), it's likely nearing the end of its service life, even if it's not throwing a code yet.
The Solution: Replacing the LSU 4.9 Sensor
Okay, you've confirmed that the sensor is indeed the problem. Here's how to replace it:
Tools You'll Need:
- New AEM Bosch LSU 4.9 UEGO Sensor: Make sure you get the correct part number and that it's compatible with your AEM system.
- Oxygen Sensor Socket: This is a specialized socket with a cutout for the sensor wiring. Using a regular wrench can damage the sensor.
- Wrench (for removing the O2 sensor socket): Usually a 3/8" drive.
- Ratchet and Extensions: To reach the sensor.
- Penetrating Oil: Helpful for loosening stubborn sensors. Spray it on the threads and let it soak for a few minutes before attempting to remove the sensor.
- Anti-Seize Compound: Apply a small amount to the threads of the new sensor to prevent it from seizing in the future. (Usually comes with the new sensor)
- Gloves: To keep your hands clean.
- Safety Glasses: Protect your eyes.
Step-by-Step Replacement:
- Disconnect the Battery: This is a crucial safety step to prevent electrical shorts.
- Locate the Sensor: The sensor is typically located in the exhaust manifold or downpipe, after the catalytic converter (if equipped).
- Disconnect the Electrical Connector: Carefully disconnect the electrical connector from the sensor. Take care not to damage the connector or wiring.
- Apply Penetrating Oil: Spray penetrating oil on the threads of the sensor where it enters the exhaust pipe. Let it soak for a few minutes.
- Remove the Old Sensor: Use the oxygen sensor socket and ratchet to carefully remove the old sensor. Apply steady pressure and avoid stripping the threads. If the sensor is extremely stubborn, you may need to use a breaker bar. Be patient; stripping the threads will create a bigger headache.
- Prepare the New Sensor: Apply a small amount of anti-seize compound to the threads of the new sensor. Do NOT get anti-seize on the sensor element itself.
- Install the New Sensor: Carefully thread the new sensor into the exhaust pipe by hand, making sure it's properly aligned. Then, use the oxygen sensor socket and ratchet to tighten the sensor to the specified torque (usually around 30-40 Nm or 22-30 lb-ft). Over-tightening can damage the sensor or the exhaust pipe threads.
- Connect the Electrical Connector: Reconnect the electrical connector to the new sensor. Make sure it clicks into place securely.
- Reconnect the Battery: Reconnect the battery.
- Clear Error Codes: Use an OBDII scanner to clear any stored error codes related to the oxygen sensor.
- Test the Sensor: Start the engine and monitor the sensor's output using a data logger or scan tool to verify that it's functioning correctly. Let the engine warm up fully.
Cost Considerations:
The cost of an AEM Bosch LSU 4.9 replacement sensor typically ranges from $80 to $150, depending on the supplier. If you're having a shop do the work, expect to pay an additional $50 to $150 for labor. The labor cost can vary depending on the vehicle and the accessibility of the sensor.
Preventative Measures:
While sensor failure is sometimes unavoidable, there are steps you can take to extend the lifespan of your LSU 4.9 sensor:
- Avoid Leaded Fuel: Leaded fuel will quickly destroy the sensor element.
- Maintain Proper Engine Tuning: Running excessively rich or lean can shorten the sensor's lifespan.
- Address Oil Leaks and Blow-By: Oil contamination is a common cause of sensor failure.
- Use Quality Fuel Additives Sparingly: Some fuel additives can contain chemicals that damage the sensor.
- Regularly Inspect Wiring and Connectors: Catching wiring problems early can prevent damage to the sensor.
By following these steps, you should be able to diagnose and resolve your AEM Bosch LSU 4.9 UEGO sensor issues. Remember to take your time, be thorough, and consult a qualified mechanic if you're not comfortable performing the repair yourself. Good luck!