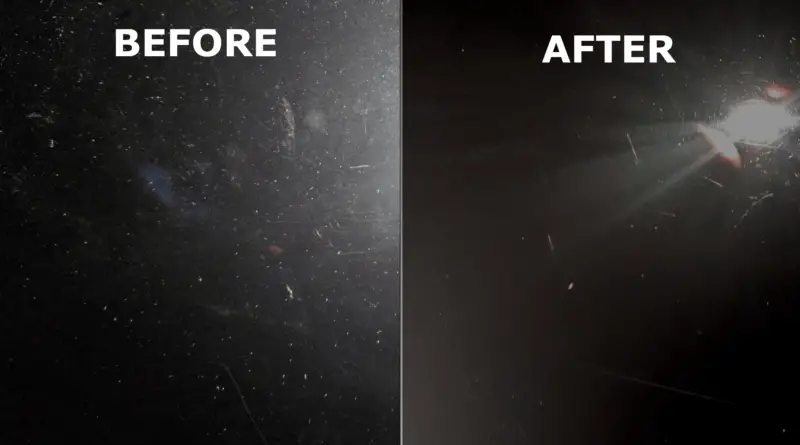
Before And After Clay Bar
Clay barring is a crucial step in achieving a truly pristine finish on your vehicle. It goes beyond simply washing and waxing; it's about removing embedded contaminants that cling to your paint despite regular cleaning. This article will delve into the "before and after" of clay barring, providing a detailed explanation of what contaminants a clay bar removes, how it works, and the improvements you can expect to see in your paint's appearance and feel. Think of it as prepping the canvas before applying the final masterpiece.
Understanding Surface Contamination
Before we dive into the clay bar process itself, it's essential to understand what we're trying to remove. These contaminants are often invisible to the naked eye but contribute to a rough, dull finish. They fall into two broad categories: bonded surface contaminants and embedded surface contaminants. While washing removes the bonded contaminants, the embedded ones require more aggressive methods.
Common Culprits: Embedded Contaminants
These are the prime targets for a clay bar. They've penetrated the clear coat's surface and become lodged within the paint. Common examples include:
- Industrial Fallout: Tiny metallic particles released from factories, trains, and even brake dust. These particles can oxidize and corrode the paint if left untreated.
- Rail Dust: Similar to industrial fallout, rail dust is generated from train wheels and tracks, particularly common near railway lines.
- Brake Dust: A constant source of contamination, especially on vehicles with performance brakes. Brake dust is abrasive and can etch into the paint.
- Overspray: Paint particles from nearby construction or other vehicles.
- Tree Sap: Sticky and acidic, tree sap can damage the clear coat if not removed promptly.
- Bug Splatter: Insect remains contain enzymes that can etch into the paint over time.
- Road Tar: Tiny specks of asphalt that adhere stubbornly to the paint, particularly on the lower panels of the car.
These contaminants create a rough texture and prevent waxes, sealants, and coatings from properly bonding to the paint surface. This hinders their ability to protect and enhance the shine of your vehicle.
The Clay Bar: How It Works
A clay bar, typically made of a synthetic clay compound, works by mechanically pulling these embedded contaminants out of the paint. The clay's pliable texture allows it to mold around the contaminants, while the lubricant allows it to glide safely across the paint surface, minimizing the risk of scratching. Think of it like a gentle abrasive that specifically targets these lodged particles without harming the underlying paint.
Types of Clay Bars
Clay bars come in varying degrees of aggressiveness, usually categorized as:
- Mild/Fine Grade: Suitable for well-maintained vehicles with minimal contamination. Best for regular detailing.
- Medium Grade: A good all-around choice for most vehicles. Effective at removing moderate contamination.
- Aggressive Grade: Reserved for heavily contaminated vehicles or neglected paint. Should be used with caution as it carries a higher risk of marring (fine scratches). Always follow with polishing to refine the finish.
Choosing the right clay bar is crucial. Starting with the least aggressive option and working your way up is generally recommended. Test the clay in an inconspicuous area first to ensure it doesn't cause excessive marring.
Before Clay Bar: Assessing the Paint
Before you reach for the clay bar, a thorough inspection is necessary. This involves both visual examination and a tactile test.
Visual Inspection
Start by washing and drying your vehicle thoroughly. Then, examine the paint under good lighting, ideally sunlight or a bright halogen lamp. Look for:
- Dullness: Areas that appear less shiny or reflective than others.
- Surface Imperfections: Visible specks, spots, or discoloration.
- Swirl Marks: Fine scratches caused by improper washing techniques (while clay barring won't remove these, it's important to identify them for future polishing).
The Plastic Bag Test
This is the most effective way to assess surface contamination. Place your hand inside a thin plastic sandwich bag and gently rub it over the cleaned paint surface. The bag will amplify any surface roughness caused by embedded contaminants. If the paint feels gritty or bumpy, it's a clear indication that clay barring is needed. If it feels smooth, you may not need to clay bar, or only in specific areas.
Important: This test should be performed *after* washing the vehicle. Otherwise, you'll be rubbing loose dirt and debris against the paint, increasing the risk of scratching.
The Clay Bar Process: Step-by-Step
Here's a detailed guide to using a clay bar effectively and safely:
- Wash and Dry: As mentioned, a clean surface is essential.
- Lubrication: Generously spray the area you'll be working on with clay bar lubricant (also known as detail spray). This is crucial to prevent the clay bar from scratching the paint. Never use water or soap as a lubricant.
- Clay Bar Application: Flatten the clay bar into a pancake shape. Gently rub the clay bar back and forth over the lubricated area, using light to medium pressure. Avoid pressing too hard, as this can increase the risk of marring.
- Folding and Kneading: As the clay bar picks up contaminants, you'll feel it become rougher. Fold the clay bar over to expose a clean surface. Knead the clay bar to redistribute the contaminants and keep a clean side exposed. Repeat this process as needed.
- Wipe Away Residue: After clay barring each section, wipe away any remaining lubricant with a clean microfiber towel.
- Inspect and Repeat: Re-inspect the area and repeat the clay barring process if necessary, until the paint feels smooth to the touch.
- Repeat Around the Vehicle: Work in small sections (approximately 2x2 feet) until the entire vehicle has been clay barred.
- Final Wash: After clay barring the entire vehicle, give it a final wash to remove any remaining clay residue and lubricant.
- Protection: Apply a wax, sealant, or coating to protect the freshly cleaned paint surface. This will also enhance the shine and make future cleaning easier.
Caution: If you drop the clay bar on the ground, discard it immediately. It will pick up dirt and debris that will scratch your paint.
After Clay Bar: The Transformation
The difference after clay barring can be dramatic. Here's what you can expect to see and feel:
Improved Paint Smoothness
The most noticeable change is the incredible smoothness of the paint. The "plastic bag test" will now reveal a silky, glass-like surface. This smoothness allows light to reflect more evenly, resulting in a deeper, more vibrant shine.
Enhanced Gloss and Reflection
By removing embedded contaminants, the clay bar allows the paint to reflect light more purely. This results in a noticeable increase in gloss and clarity. Colors will appear richer and deeper, and reflections will be sharper and more defined.
Better Wax/Sealant Bonding
A clean, contaminant-free surface is essential for waxes, sealants, and coatings to properly bond to the paint. Clay barring ensures that these products can adhere effectively, providing maximum protection and longevity. You'll notice improved water beading and sheeting, indicating a strong bond between the protectant and the paint.
Easier Washing and Detailing
A smooth, clean surface makes washing and detailing significantly easier. Dirt and grime will have less to cling to, making it easier to remove them with a simple wash. You'll also find that products like waxes and sealants spread more evenly and buff off more easily.
Long-Term Paint Protection
By removing corrosive contaminants like industrial fallout and brake dust, clay barring helps to prevent long-term damage to the paint. This can extend the life of your paint job and help maintain your vehicle's value.
Polishing After Clay Bar: Refining the Finish
While clay barring significantly improves the paint's surface, it can sometimes leave behind fine scratches known as marring, especially when using medium or aggressive grade clay. Polishing is the process of using a machine polisher with abrasive compounds to remove these imperfections and further refine the finish.
If you notice marring after clay barring, consider polishing the paint. This will restore the gloss and clarity to an even higher level. However, polishing requires specialized equipment and knowledge, so it's important to do your research and practice on an inconspicuous area first.
In conclusion, clay barring is an essential step for anyone serious about achieving a flawless finish on their vehicle. By removing embedded contaminants and creating a smooth, clean surface, it unlocks the true potential of your paint, enhancing its gloss, clarity, and protection. The "before and after" difference is often remarkable, making it a worthwhile investment of your time and effort.