Best Leveling Kit For 2016 Silverado 1500
For owners of the 2016 Chevrolet Silverado 1500 seeking a more aggressive stance, enhanced ground clearance, or simply a level appearance, a leveling kit presents a compelling option. Unlike a full suspension lift, a leveling kit focuses on raising the front of the truck to match the factory height of the rear. This seemingly simple modification involves more than just bolting on spacers; understanding the mechanics, components, and potential ramifications is crucial for a successful and safe installation.
Understanding Leveling Kit Mechanics
The fundamental principle behind a leveling kit is correcting the factory rake. Trucks are often designed with a slightly lower front end for aerodynamic purposes and to accommodate payload in the bed. A leveling kit combats this rake by effectively increasing the distance between the chassis and the front suspension components. This is typically achieved through one of two primary methods:
- Strut Spacers: These are the most common and generally the most cost-effective type of leveling kit. Strut spacers are installed either above or below the front strut assembly. Upper strut spacers, often made of aluminum or steel, mount between the strut tower and the strut itself. Lower strut spacers attach between the strut and the lower control arm. The choice between upper and lower spacers often depends on the desired lift amount and ease of installation.
- Torsion Bar Keys: Although less common on newer trucks, some Silverado 1500 models, particularly those with a torsion bar suspension system, can be leveled using torsion bar keys. These keys replace the factory torsion bar keys and allow for adjustment of the torsion bar preload, effectively raising the front of the truck. While seemingly straightforward, over-adjusting the torsion bars can negatively impact ride quality and suspension component lifespan.
For the 2016 Silverado 1500, which typically utilizes a coilover strut setup, strut spacers are the prevalent choice. Regardless of the method, it's imperative to remember that leveling kits alter the vehicle's geometry, potentially affecting ride quality, handling, and the longevity of suspension components.
Component Considerations
Choosing the "best" leveling kit involves careful consideration of its constituent parts and their impact on your truck. Key components include:
- Spacers/Keys Material: The material of the spacers or keys directly impacts their durability and resistance to corrosion. Aluminum offers a good balance of strength and weight, while steel provides superior strength but can be more prone to rust if not properly coated. Polyurethane spacers are also available, offering vibration dampening but potentially less structural rigidity than metal options.
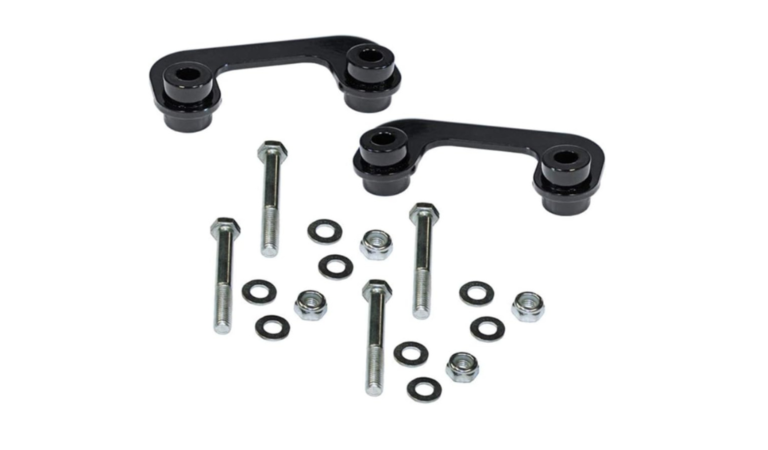
- Hardware Quality: High-quality hardware is non-negotiable. The kit should include grade 8 or higher bolts and nuts to ensure secure and reliable installation. Inferior hardware can lead to premature failure and potential safety hazards.
- Shock Extenders/Relocation Brackets (Optional): For leveling kits exceeding 2 inches, shock extenders or relocation brackets might be necessary. Lifting the front of the truck extends the shock's travel range, and without these accessories, the shock could bottom out prematurely, resulting in a harsh ride and potential damage.
- Differential Drop Kit (For 4WD Models, Optional): Lifting a 4WD truck can alter the driveline angles, potentially leading to vibrations and accelerated wear on the CV joints. A differential drop kit lowers the front differential, restoring the driveline angles closer to their original specifications. Whether or not a differential drop kit is needed depends on the amount of lift and the specific characteristics of the truck.
Beyond these core components, some kits may include bump stop extensions to prevent over-compression of the suspension and sway bar end links to maintain proper sway bar geometry. These additions can contribute to a more refined and comfortable ride after leveling.
Installation Process and Considerations
Installing a leveling kit is generally a DIY-friendly project for mechanically inclined individuals with access to appropriate tools. However, it's essential to understand the steps involved and to proceed with caution. Here's a generalized overview:
- Preparation: Gather all necessary tools, including a jack, jack stands, wrenches, sockets, torque wrench, and potentially a spring compressor (depending on the kit design). Park the truck on a level surface and engage the parking brake.
- Disassembly: Disconnect the battery. Loosen the lug nuts on the front wheels. Jack up the front of the truck and secure it with jack stands. Remove the front wheels. Disconnect any electrical connectors or brake lines attached to the strut assembly.
- Strut Removal: Carefully remove the strut assembly from the truck. This often involves disconnecting the sway bar end link and unbolting the upper and lower strut mounts. Be extremely careful when working with compressed springs. If using a spring compressor, follow the manufacturer's instructions precisely.
- Spacer Installation: Install the strut spacer according to the manufacturer's instructions. This may involve attaching the spacer to the strut assembly or to the strut tower on the vehicle.
- Reassembly: Reinstall the strut assembly, reconnecting all electrical connectors and brake lines. Reinstall the sway bar end link. Reinstall the front wheels and lower the truck.
- Torque Specifications: Torque all bolts to the manufacturer's specified torque values. Improper torque can lead to component failure and safety hazards.
- Alignment: After installing a leveling kit, it is absolutely essential to have the vehicle professionally aligned. Leveling kits alter the suspension geometry, and an alignment is necessary to ensure proper tire wear and handling.
It's also crucial to inspect all suspension components for wear or damage before and after installation. Replace any worn or damaged parts as needed.
Potential Ramifications and Mitigation
While leveling kits offer several advantages, they also come with potential drawbacks:
- Ride Quality: Leveling kits can sometimes result in a firmer or harsher ride, particularly if the shocks are not adequately matched to the new suspension geometry. Consider upgrading to longer or adjustable shocks to improve ride quality.
- Handling: Altering the suspension geometry can affect the vehicle's handling characteristics. The truck may feel slightly less stable in corners or exhibit increased body roll. Upgrading the sway bars can help mitigate these effects.
- Component Wear: Leveling kits can increase stress on suspension components, potentially leading to premature wear. Regularly inspect ball joints, tie rod ends, and other suspension components.
- CV Joint Angle (4WD): As mentioned earlier, lifting a 4WD truck can increase the CV joint angles, potentially leading to vibrations and accelerated wear. A differential drop kit can help mitigate this issue.
Thorough research and careful planning are essential for minimizing these potential drawbacks. Choosing a leveling kit from a reputable manufacturer, using high-quality components, and following the installation instructions meticulously are all crucial steps. Furthermore, be prepared to address any potential issues that may arise after installation, such as ride quality changes or vibrations.
Conclusion
Selecting the "best" leveling kit for your 2016 Silverado 1500 is a multifaceted decision. By understanding the underlying mechanics, carefully evaluating the components, and considering the potential ramifications, you can make an informed choice that enhances your truck's appearance and performance while maintaining its reliability and safety. Remember to prioritize quality, precision, and professional installation to ensure a successful and enjoyable leveling experience.