Diy Truck Bed Camper Shell
Building your own DIY truck bed camper shell offers a fantastic way to customize your camping experience while saving money. Commercial camper shells can be expensive, and often don't perfectly match your needs. A DIY project allows you to tailor the design, materials, and features to create the perfect mobile basecamp. This guide will walk you through the process, from planning and design to construction and finishing.
Planning Your DIY Truck Bed Camper Shell
Before you start cutting wood or welding metal, careful planning is crucial. This phase will determine the success and usability of your final product. Consider these key aspects:
1. Determine Your Needs and Budget
What are you hoping to achieve with your camper shell? Will it primarily be for weekend camping trips, or longer expeditions? Do you need sleeping space, storage, cooking facilities, or electrical systems? Answering these questions will define the size, layout, and features of your build. Your budget will influence material choices and construction complexity. Create a detailed budget that includes lumber, fasteners, tools, and any additional components like windows, doors, or ventilation.
2. Choose Your Design and Materials
Several designs are popular for DIY truck bed camper shells:
- Flat Roof: Simple to build, maximizing interior space.
- Wedge (or Angled Roof): Improves aerodynamics and provides additional headroom at the rear.
- Pop-Up: Offers the most headroom when camping, but requires more complex construction.
Common materials include:
- Wood: Plywood (marine grade if possible for water resistance), dimensional lumber (2x4s, 2x2s) for framing. Relatively inexpensive and easy to work with.
- Metal: Steel or aluminum. Stronger and more durable than wood, but requires welding skills and specialized tools. Aluminum is lighter but more expensive.
- Fiberglass: Can create lightweight and durable shells, but requires specialized skills and equipment for molding and application.
- Composite Panels: Pre-fabricated panels consisting of an insulating core sandwiched between durable outer layers. Offer excellent insulation and strength, but can be expensive.
Consider the pros and cons of each material based on your budget, skill level, and desired durability. Choose materials that are weather-resistant or can be easily sealed and protected from the elements.
3. Create Detailed Plans and Measurements
Accurate plans are essential for a successful build. Measure your truck bed precisely, including the length, width, and height. Account for any existing features like tie-down points or bed rails. Use these measurements to create detailed drawings or CAD models of your camper shell. Include dimensions for all components, including framing members, panels, doors, and windows. Pay close attention to the angles and curves, ensuring everything fits together properly.
"Measure twice, cut once." - An old woodworking adage that holds true for DIY camper shell construction.
Building Your DIY Truck Bed Camper Shell: A Step-by-Step Guide
With your plans finalized, it's time to start building. This section outlines the general construction process, but the specific steps will vary depending on your chosen design and materials.
1. Build the Frame
Start by constructing the frame of your camper shell. If using wood, assemble the frame using screws, nails, or wood glue. Ensure the frame is square and level. If using metal, weld the frame members together. Use clamps to hold the pieces in place while welding. Pay attention to weld quality to ensure structural integrity.
2. Attach the Skin (Panels)
Once the frame is complete, attach the skin or panels to the exterior. If using plywood, cut the panels to size and attach them to the frame using screws or nails. Seal all seams and edges with caulk to prevent water leaks. If using metal, weld the panels to the frame or use rivets. If using composite panels, follow the manufacturer's instructions for installation.
3. Install Doors, Windows, and Vents
Cut openings for doors, windows, and vents according to your plans. Install the doors and windows using appropriate hardware. Ensure they are weather-sealed to prevent leaks. Install vents to provide ventilation and prevent condensation buildup inside the camper shell. Consider adding screens to the vents to keep insects out.
4. Wiring and Electrical
If you plan to install electrical systems, now is the time to run wiring and install outlets, lights, and other components. Use appropriate wiring and connectors for your chosen voltage (12V DC is common for camper setups). Consider installing a battery and charging system to power your electrical devices. Always follow safety precautions when working with electricity. Consider hiring a qualified electrician if you're not comfortable with electrical work.
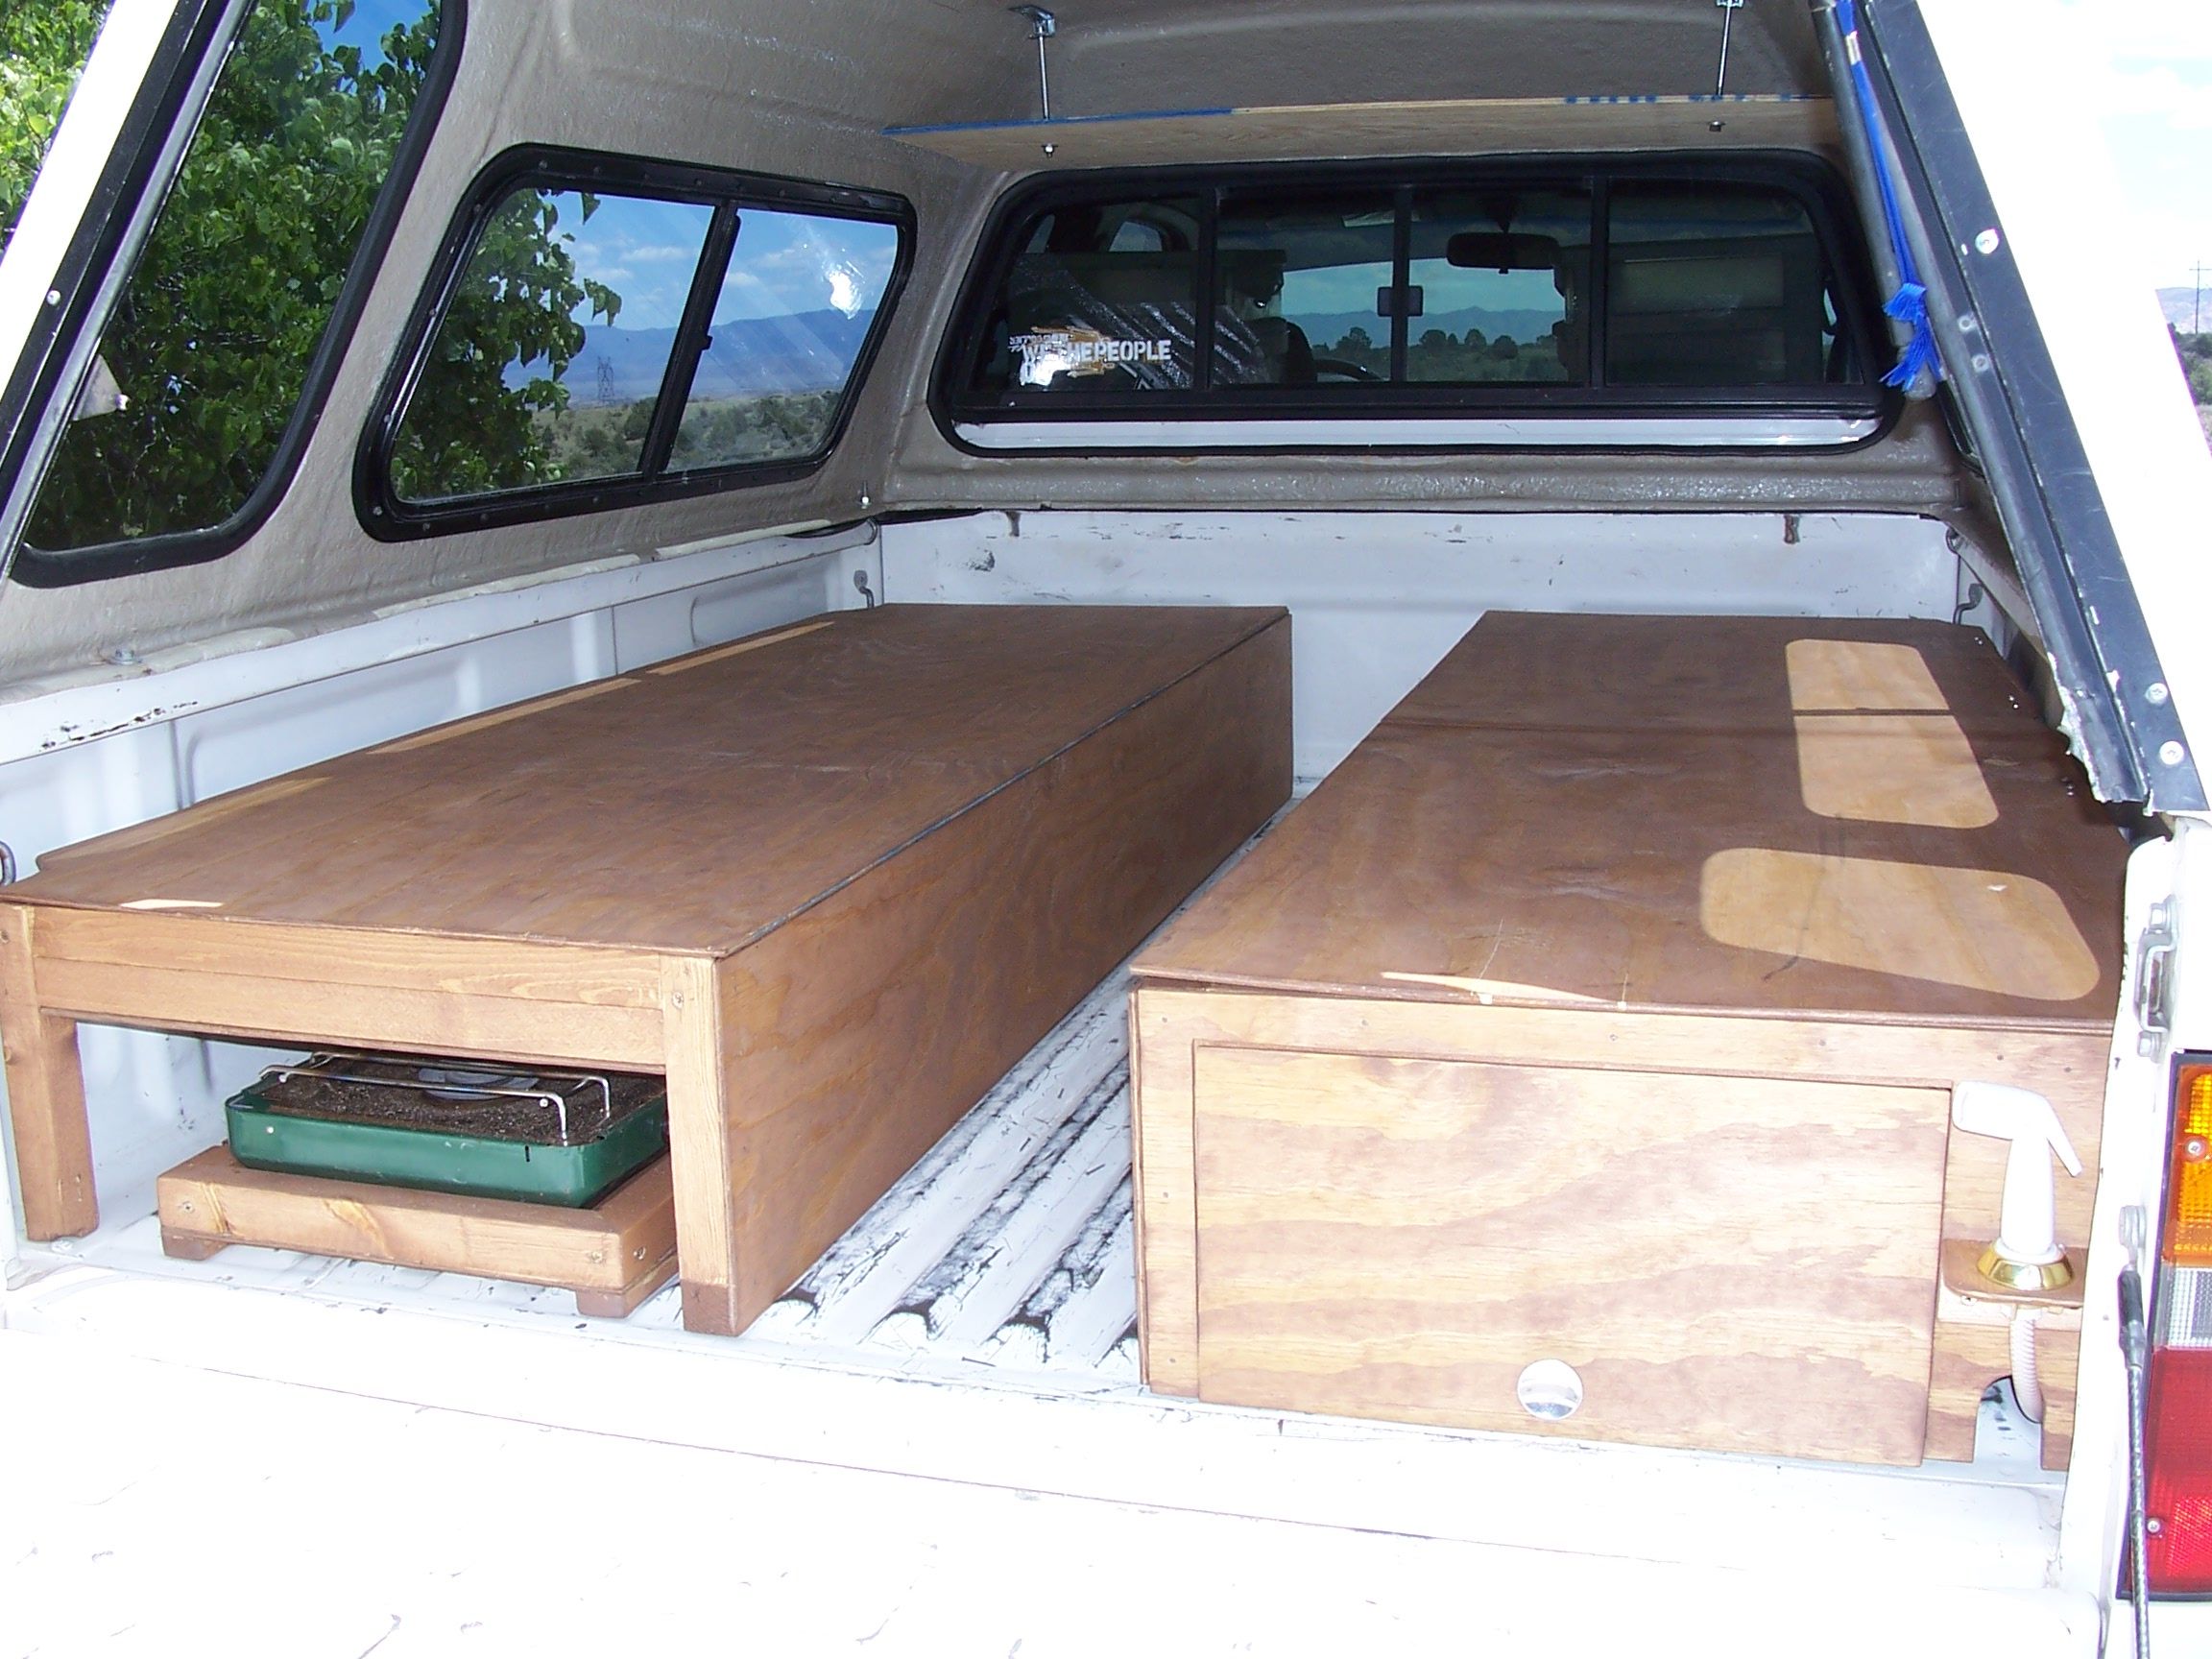
5. Interior Finishing
Finish the interior of your camper shell to make it comfortable and functional. This can include adding insulation, paneling, flooring, and storage compartments. Consider using lightweight materials to minimize the overall weight of the camper shell. Install sleeping platforms, seating areas, and other amenities according to your needs.
6. Sealing and Weatherproofing
Thorough sealing and waterproofing are essential to protect your camper shell from the elements. Caulk all seams and edges, and apply a waterproof sealant to the exterior. Inspect the camper shell regularly for any signs of leaks and repair them promptly. Consider using a waterproof paint or coating to further protect the exterior.
Tips for Success
- Take your time: Don't rush the process. Careful planning and execution will result in a higher-quality camper shell.
- Use quality materials: Investing in durable, weather-resistant materials will ensure your camper shell lasts for years to come.
- Ask for help: If you're not sure about a particular step, don't hesitate to ask for help from experienced builders or online communities.
- Document your progress: Take photos and videos of your build to track your progress and share your experience with others.
- Test your camper shell: Before embarking on a long trip, test your camper shell in your backyard or on a short camping trip to identify any issues and make necessary adjustments.
DIY Truck Bed Camper Shell: Is It Right for You?
Building a DIY truck bed camper shell can be a rewarding project, but it's not for everyone. Consider these factors before deciding to take on this project:
- Skills and Experience: Do you have the necessary skills in woodworking, welding, or other relevant areas? Are you comfortable working with power tools and following detailed instructions?
- Time Commitment: Building a camper shell can take a significant amount of time, especially if you're working on it in your spare time. Be prepared to dedicate several weekends or even weeks to the project.
- Tools and Equipment: Do you have access to the necessary tools and equipment, such as saws, drills, welders, and sanders?
- Space: Do you have enough space to work on the project? You'll need a large, well-ventilated area to cut, assemble, and finish the camper shell.
If you're willing to invest the time and effort, and you have the necessary skills and resources, building a DIY truck bed camper shell can be a great way to create a custom camping setup that perfectly meets your needs.
Whether you are looking for a cheap alternative to buying a truck camper shell, or are simply enjoy DIY projects, building a truck camper shell can be a great experience and can give you the exact product you are looking for.