
How Do You Test An Idle Air Control Valve
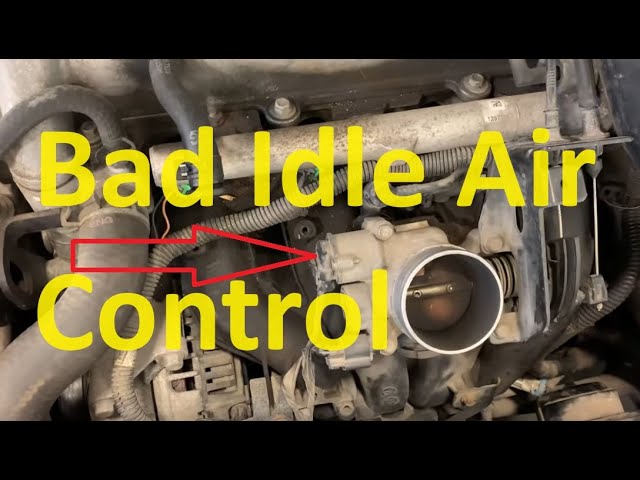
Is your car idling rough, stalling unexpectedly, or experiencing high RPMs when it should be idling smoothly? These are classic symptoms of a faulty Idle Air Control (IAC) valve. The IAC valve is a small but crucial component that regulates the amount of air entering your engine when the throttle is closed, maintaining a stable idle speed. If it's not working correctly, you'll definitely notice it. Fortunately, you can often diagnose an IAC valve issue at home with a few basic tools and some patience. Let's walk through how to test it.
Understanding the Idle Air Control Valve
Before we dive into testing, it's helpful to understand what the IAC valve does and where it's located. The IAC valve is typically mounted on the throttle body, near the throttle plate. Its primary function is to bypass the closed throttle plate and allow a specific amount of air into the engine, ensuring a consistent idle speed regardless of engine temperature, load from accessories (like the AC), or other factors. It's essentially a tiny "door" that opens and closes based on signals from the engine control unit (ECU) to maintain that sweet spot of RPMs when you're not pressing the gas pedal.
There are different types of IAC valves, but they generally operate using a small electric motor that moves a pintle or plunger to control airflow. This motor is controlled by the ECU based on sensor readings (like engine temperature and RPM) to precisely adjust the idle speed.
Symptoms of a Faulty IAC Valve
Recognizing the symptoms of a bad IAC valve is the first step in diagnosing the problem. Here are some common tell-tale signs:
- Rough or unstable idle: The engine idles erratically, fluctuating up and down or feeling like it's about to stall.
- Stalling: The engine stalls frequently, especially when coming to a stop or when accessories like the AC are turned on.
- High idle speed: The engine idles at a significantly higher RPM than normal, even when warm.
- Difficulty starting: The engine may be hard to start, especially in cold weather.
- Check engine light: A faulty IAC valve can trigger the check engine light, with diagnostic trouble codes (DTCs) specifically related to the idle control system.
Tools You'll Need
Testing an IAC valve doesn't require a huge investment in tools. Here's what you'll generally need:
- Basic hand tools: Screwdrivers (Phillips and flathead), wrenches, sockets.
- Multimeter: A multimeter is essential for testing electrical continuity and voltage. A basic digital multimeter will suffice.
- OBD-II scanner (optional): An OBD-II scanner can help you read diagnostic trouble codes (DTCs) related to the IAC valve and other engine systems. While not strictly required for basic testing, it can provide valuable information.
- Cleaning supplies: Throttle body cleaner or carburetor cleaner, clean rags.
- Wiring diagram (optional but helpful): A wiring diagram for your specific vehicle can help you identify the correct wires for testing. You can usually find these in a repair manual or online.
Testing Procedures
Here are a few methods for testing your IAC valve. Remember to always disconnect the negative battery terminal before working on any electrical components.
1. Visual Inspection
Start with a visual inspection. Check the IAC valve for any obvious damage, such as cracks, broken wires, or loose connections. Look for any signs of excessive dirt or carbon buildup around the valve. A dirty IAC valve can often cause it to stick or malfunction. If it's visibly dirty, cleaning it might be the first step before further testing.
2. Cleaning the IAC Valve
Cleaning the IAC valve can sometimes resolve idle issues caused by carbon buildup. To clean it, remove the IAC valve from the throttle body (refer to your vehicle's repair manual for specific instructions). Spray the valve thoroughly with throttle body cleaner, paying particular attention to the pintle or plunger and the surrounding areas. Use a clean rag to wipe away any dirt or debris. Allow the cleaner to evaporate completely before reinstalling the valve.
Important: Be careful not to damage the pintle or plunger during cleaning. Avoid using abrasive cleaners or tools.
3. Electrical Resistance Test (Using a Multimeter)
This test checks the internal resistance of the IAC valve's motor windings. Refer to your vehicle's repair manual or a reliable online source for the specified resistance range for your IAC valve. This information is crucial, as resistance values vary widely between different car models and IAC valves.
Here's how to perform the resistance test:
- Disconnect the IAC valve's electrical connector.
- Set your multimeter to the Ohms (Ω) setting.
- Touch the multimeter's probes to the appropriate terminals on the IAC valve connector. The specific terminals will depend on the type of IAC valve (usually 2, 3, or 4-pin). Consult your vehicle's wiring diagram for confirmation.
- Read the resistance value on the multimeter.
- Compare the measured resistance value to the specified range. If the resistance is outside the specified range, the IAC valve is likely faulty and needs to be replaced. An open circuit (infinite resistance) or a short circuit (zero resistance) also indicates a problem.
4. Voltage Test (Using a Multimeter)
This test checks if the IAC valve is receiving power from the ECU. You'll need to consult a wiring diagram for your specific vehicle to identify the correct wires to test.
- With the IAC valve connected and the ignition key in the "ON" position (but engine not running), use a multimeter to check for voltage at the IAC valve connector.
- Set your multimeter to the DC voltage setting.
- Probe the power and ground wires on the IAC valve connector.
- You should see a voltage reading, typically around 12 volts. If you don't see any voltage, there may be a problem with the wiring or the ECU.
5. Using an OBD-II Scanner
If you have an OBD-II scanner, connect it to your vehicle's diagnostic port and check for diagnostic trouble codes (DTCs) related to the IAC valve. Common codes include:
- P0505: Idle Air Control System Malfunction
- P0506: Idle Air Control System RPM Lower Than Expected
- P0507: Idle Air Control System RPM Higher Than Expected
While these codes can point to a faulty IAC valve, it's important to remember that they can also be caused by other issues, such as vacuum leaks or problems with the throttle position sensor (TPS). Use the scanner readings as a starting point for further diagnosis.
What if the IAC Valve is Faulty?
If your testing indicates that the IAC valve is faulty, the best course of action is usually to replace it. Replacing the IAC valve is typically a straightforward procedure, but it's essential to follow the instructions in your vehicle's repair manual. After replacing the IAC valve, you may need to perform an idle learn procedure using an OBD-II scanner or by following a specific sequence of steps outlined in your vehicle's repair manual. This procedure helps the ECU learn the new IAC valve's characteristics and ensure proper idle control.
Important: Always disconnect the negative battery terminal before working on the IAC valve.
Approximate Repair Costs
The cost of replacing an IAC valve can vary depending on the make and model of your vehicle, the cost of the part, and the labor rate at your local repair shop. The IAC valve itself can range from $50 to $200 or more. Labor costs can range from $50 to $150, depending on the complexity of the job. Therefore, you can expect to pay anywhere from $100 to $350 or more to have an IAC valve replaced by a professional mechanic. Doing it yourself will save you on labor costs but remember to factor in your time and the cost of any tools you may need to purchase.
Final Thoughts
Testing an IAC valve is a relatively simple process that can save you time and money. By following these steps, you can determine whether your IAC valve is functioning correctly and whether it needs to be replaced. Remember to always consult your vehicle's repair manual for specific instructions and safety precautions. If you're not comfortable performing these tests yourself, it's always best to consult with a qualified mechanic.