How Long Does It Take To Change A Cv Axle
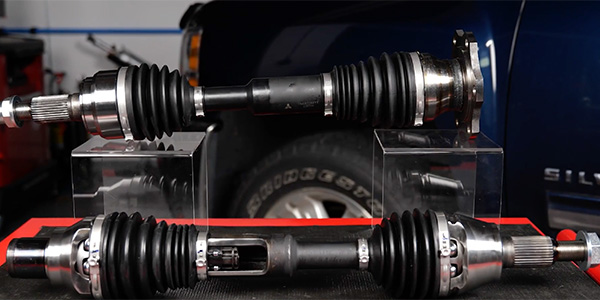
The CV (Constant Velocity) axle, also known as a half-shaft, is a critical component in front-wheel drive (FWD), rear-wheel drive (RWD) independent suspension, and all-wheel drive (AWD) vehicles. It transmits power from the transmission or differential to the wheels while allowing for suspension movement and steering articulation. When a CV axle fails, it typically manifests as clicking or popping noises during turns, vibrations at speed, or a complete loss of drive. Understanding the process of replacing a CV axle and the factors influencing the time required can be beneficial for both diagnostic purposes and planning a repair, whether you're tackling it yourself or relying on a professional.
Factors Affecting CV Axle Replacement Time
Estimating the time it takes to replace a CV axle is not an exact science. Several variables can significantly influence the duration of the job. While a seasoned mechanic might complete the task in under an hour on a straightforward vehicle, a novice could easily spend several hours wrestling with stubborn components. Here's a breakdown of the key factors:
Vehicle Make and Model
The design and complexity of the suspension system vary greatly between different vehicle makes and models. Some vehicles offer ample access to the CV axle and its mounting points, while others require the removal of additional components to gain access. For instance, certain European vehicles may have more intricate suspension designs that demand specialized tools and procedures, thereby extending the replacement time.
Rust and Corrosion
Rust is arguably the biggest time killer in automotive repair. Severely corroded bolts, nuts, and hub assemblies can make disassembly incredibly difficult. Applying penetrating oil and allowing it to soak for an extended period is often necessary. In extreme cases, heat from a torch or specialized bolt extractors might be required, adding significantly to the overall time.
Experience Level of the Mechanic
An experienced mechanic possesses the knowledge, skills, and tools to efficiently diagnose the problem, access the CV axle, and execute the replacement. They've likely encountered similar situations before and know the common pitfalls and shortcuts (while still maintaining proper procedures). A novice, on the other hand, may struggle with each step, leading to a longer completion time. Furthermore, an experienced mechanic will be more adept at identifying and addressing potential secondary issues that arise during the repair.
Availability of Tools and Equipment
Having the right tools for the job is crucial. A well-equipped garage can significantly reduce the time required for CV axle replacement. Essential tools include a socket set, wrenches, a torque wrench, a hammer, penetrating oil, a jack and jack stands, wheel chocks, and potentially a CV axle puller and slide hammer. Specialized tools, such as an impact wrench or ball joint separator, can also speed up the process. Attempting the repair with inadequate tools can lead to frustration, delays, and even damage to the vehicle.
Presence of Related Damage or Wear
During the CV axle replacement, it's essential to inspect surrounding components, such as the wheel bearing, ball joints, and suspension bushings. If these parts are damaged or worn, they should be replaced concurrently. Addressing these issues at the same time can save time and money in the long run, as it avoids having to disassemble the suspension again later. However, it will also extend the initial repair time.
Estimated Time Breakdown
To provide a more granular estimate, let's break down the CV axle replacement process into individual steps and estimate the time required for each:
- Preparation (15-30 minutes): This includes gathering tools, jacking up the vehicle, securing it on jack stands, removing the wheel, and loosening the axle nut. This initial phase is critical for safety and proper access to the work area.
- Disassembly (30-60 minutes): This involves disconnecting the suspension components (e.g., tie rod end, ball joint), detaching the CV axle from the hub, and removing it from the transmission or differential. This step can be challenging if components are rusted or seized. Specialized tools like ball joint separators or slide hammers might be needed here.
- Inspection (5-10 minutes): After removing the old CV axle, inspect the surrounding components (wheel bearing, ball joints, bushings) for wear or damage. This is a good time to clean the hub and transmission mating surfaces.
- Installation (30-60 minutes): Install the new CV axle, ensuring it's properly seated in the transmission or differential and hub. Reconnect the suspension components and torque all fasteners to the manufacturer's specifications. Proper torque is essential for safety and component longevity.
- Reassembly and Testing (15-30 minutes): Reinstall the wheel, lower the vehicle, torque the wheel lug nuts, and perform a test drive to verify the repair. Listen for any unusual noises or vibrations.
Based on this breakdown, a reasonable estimate for CV axle replacement is 1.5 to 3 hours. However, as discussed earlier, this can vary significantly depending on the factors mentioned above.
DIY vs. Professional Repair
Deciding whether to tackle a CV axle replacement yourself or entrust it to a professional mechanic depends on your skill level, available tools, and comfort level. Here's a comparison:
- DIY: Offers potential cost savings on labor. However, it requires a good understanding of automotive mechanics, access to the necessary tools, and the ability to troubleshoot potential problems. If you're unsure or lack the experience, it's best to leave it to the professionals.
- Professional Repair: Provides peace of mind knowing that the repair is being done correctly by a trained technician. Mechanics also have access to specialized tools and diagnostic equipment. While labor costs are higher, the overall cost may be comparable if you factor in the cost of tools and potential mistakes in a DIY repair.
Ultimately, the decision is a personal one. Consider your skills, resources, and the complexity of the job before making a decision. If you choose to DIY, be sure to consult a repair manual or online resources for specific instructions for your vehicle. Safety should always be your top priority.
Preventative Measures
While CV axle failure is often inevitable due to wear and tear, there are steps you can take to extend their lifespan:
- Regular Inspection: Periodically inspect the CV axle boots for cracks or tears. Damaged boots allow grease to escape and contaminants to enter, leading to premature failure.
- Avoid Harsh Driving: Aggressive acceleration and sharp turns can put excessive stress on the CV axles.
- Proper Vehicle Maintenance: Ensure proper suspension alignment and tire inflation, as these factors can contribute to CV axle wear.
- Replace Damaged Boots Promptly: If you notice a torn CV axle boot, replace it immediately to prevent further damage. A boot replacement is significantly cheaper and easier than replacing the entire CV axle.
By understanding the factors that influence CV axle replacement time and taking preventative measures, you can better prepare for this common automotive repair and potentially extend the life of your vehicle's drivetrain.