
How Long To Replace Brake Pads And Rotors
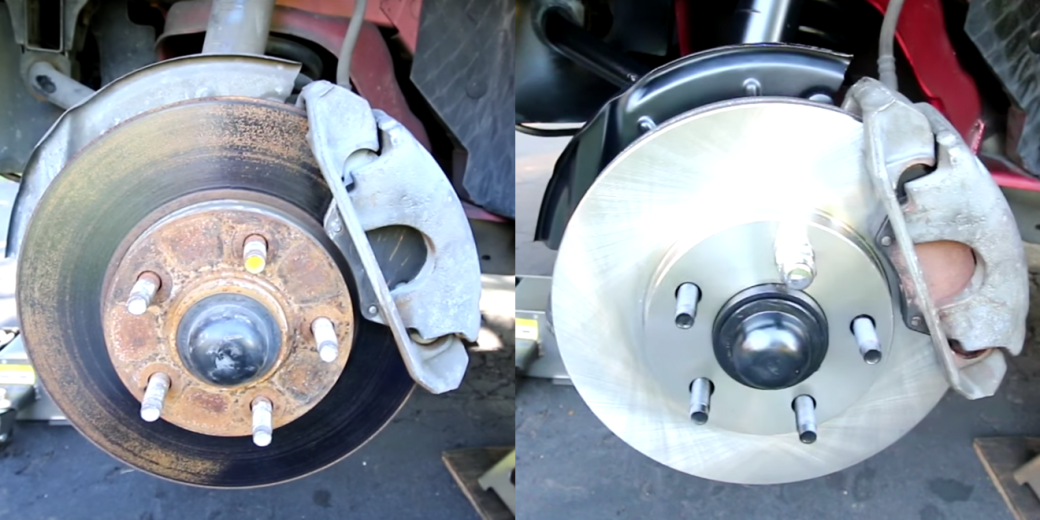
Brake pads and rotors are critical safety components in any vehicle. Understanding their lifespan, recognizing wear symptoms, and knowing the replacement process are crucial for both car owners and mechanics. This article provides a practical guide to estimating replacement intervals, troubleshooting common issues, and maintaining optimal brake performance.
How Long Should Brake Pads and Rotors Last?
There's no magic number for how long brake pads and rotors will last. Several factors influence their lifespan, including driving habits, vehicle type, and the quality of the components themselves. A car driven primarily on highways will generally experience less brake wear than one constantly navigating city traffic. Heavy vehicles, like trucks and SUVs, tend to wear through brake components faster than lighter passenger cars.
Typical Lifespan Estimates:
- Brake Pads: 25,000 to 70,000 miles (40,000 to 112,000 kilometers). Aggressive driving can significantly shorten this lifespan, potentially down to the lower end of the range.
- Rotors: 50,000 to 100,000 miles (80,000 to 160,000 kilometers). Rotors often last through two sets of brake pads, but this isn't always the case.
For example, a Honda Civic driven responsibly might see its brake pads last for 60,000 miles, while a Ford F-150 used for towing might need replacements every 30,000 miles. Always consult your vehicle's owner's manual for specific recommendations.
Recognizing the Symptoms of Worn Brake Pads and Rotors
Early detection of brake wear can prevent more serious and costly damage. Here are some common symptoms to watch out for:
- Squealing or Screeching Noises: This is often the first sign. Many brake pads have a built-in wear indicator that makes a high-pitched squeal when the pads are nearing the end of their life.
- Grinding Noises: This indicates that the brake pads are completely worn down, and the metal backing plate is rubbing against the rotor. This is a serious issue that requires immediate attention.
- Vibration or Pulsation When Braking: This can be caused by warped rotors, uneven brake pad wear, or issues with the wheel bearings.
- Reduced Braking Performance: If you notice that it takes longer to stop, or that you need to apply more pressure to the brake pedal, your brake system may be compromised.
- Pulling to One Side During Braking: This could indicate uneven brake wear or a problem with the brake calipers on one side of the vehicle.
- Visible Wear on Brake Pads: You can often visually inspect the brake pads through the wheel spokes. If the pad material is thin (less than 1/4 inch), it's time for a replacement.
- Brake Fluid Level Low: As brake pads wear down, the brake fluid level in the master cylinder will drop. However, this could also indicate a leak in the system.
Troubleshooting Common Brake Problems
Let's look at some common problems, their likely causes, and potential solutions:
Problem: Brake Squeal
- Possible Causes: Worn brake pads, glazed brake pads, low-quality brake pads, debris between the pad and rotor.
- Solutions: Replace the brake pads with high-quality replacements, resurface or replace the rotors, clean the brake components. Consider using a brake lubricant on the shims and backing plates.
Problem: Brake Pulsation/Vibration
- Possible Causes: Warped rotors, uneven rotor thickness variation, loose wheel bearings, worn suspension components.
- Solutions: Resurface or replace the rotors. If the rotors are too thin, they must be replaced. Inspect and repair or replace worn wheel bearings or suspension parts.
Problem: Brake Fade (Reduced Braking Power After Repeated Use)
- Possible Causes: Overheated brake pads and rotors, contaminated brake fluid.
- Solutions: Allow the brakes to cool down. Replace the brake pads with performance pads if you frequently experience brake fade. Flush and replace the brake fluid with a high-temperature fluid.
Problem: Caliper Sticking
- Possible Causes: Corrosion inside the caliper, damaged caliper piston seal, seized slide pins.
- Solutions: Rebuild the caliper with new seals and piston (if possible), or replace the entire caliper. Clean and lubricate the caliper slide pins.
The Replacement Process: A Simplified Overview
Replacing brake pads and rotors can be a DIY project for mechanically inclined individuals, but it's crucial to follow safety precautions and have the proper tools. Here's a simplified overview:
- Gather Supplies: New brake pads, new rotors (if needed), brake cleaner, brake lubricant, a wrench set, a socket set, a torque wrench, a C-clamp or brake caliper compressor, and safety glasses.
- Loosen Lug Nuts: Before lifting the vehicle, loosen the lug nuts on the wheels.
- Lift the Vehicle: Use a jack to safely lift the vehicle and secure it with jack stands. Never work under a vehicle supported only by a jack.
- Remove the Wheel: Remove the lug nuts and take off the wheel.
- Remove the Caliper: Disconnect the brake line (clamp it first!), remove the caliper bolts, and carefully remove the caliper. Support the caliper so it's not hanging by the brake line.
- Remove the Old Brake Pads: Slide the old brake pads out of the caliper bracket.
- Remove the Rotor: Remove the caliper bracket (if necessary). Remove the rotor (sometimes they can be stuck due to rust).
- Clean and Inspect: Clean all components with brake cleaner. Inspect the brake lines, calipers, and other brake parts for damage.
- Install New Rotor: Install the new rotor.
- Install New Brake Pads: Install the new brake pads into the caliper bracket.
- Reinstall Caliper: Compress the caliper piston using a C-clamp or brake caliper compressor. Reinstall the caliper.
- Reinstall Wheel: Reinstall the wheel and tighten the lug nuts to the manufacturer's specified torque.
- Repeat for Other Wheels: Repeat the process for the other wheels.
- Pump the Brakes: Before driving, pump the brake pedal several times to ensure proper brake engagement.
- Bedding-In Procedure: Follow the brake pad manufacturer's recommended bedding-in procedure. This usually involves performing a series of moderate stops from a specific speed to transfer brake pad material to the rotors.
Important Note: This is a simplified overview. Consult a repair manual or online resources for detailed instructions specific to your vehicle. If you are not comfortable performing this work yourself, it's best to take your vehicle to a qualified mechanic.
Maintaining Optimal Brake Performance
Proper maintenance can extend the life of your brake components and ensure safe braking performance.
- Regular Inspections: Inspect your brake pads and rotors regularly, especially before long trips.
- Brake Fluid Flushes: Replace your brake fluid every two to three years, or as recommended by your vehicle's manufacturer. This helps remove moisture and contaminants that can damage brake components.
- Proper Driving Habits: Avoid aggressive braking and excessive speeding. Smooth, controlled braking will help extend the life of your brake pads and rotors.
- Use Quality Components: Invest in high-quality brake pads and rotors from reputable brands. Cheaper components may not last as long and could compromise your safety.
- Lubricate Moving Parts: Use brake lubricant on the caliper slide pins and other moving parts to prevent corrosion and ensure smooth operation.
By following these guidelines, you can keep your car's brakes in top condition, ensuring your safety and the longevity of your vehicle.