
How To Attach A Hose To An Air Compressor
So, you've finally bitten the bullet and joined the ranks of the pneumatically empowered! Congratulations! Whether you're planning on running an impact wrench, blasting away rust with a sandblaster, or just topping off your tires after a spirited backroad run, an air compressor is a game-changer in any garage. But before you unleash the power of compressed air, there's a crucial first step: attaching that all-important hose. Sounds simple, right? Well, like with anything involving cars, there's more to it than meets the eye.
Understanding Your Compressor's Connection
The first hurdle is identifying your compressor's outlet size and type. Most compressors use either NPT (National Pipe Thread) or quick-connect fittings. Let's break down the differences:
NPT Fittings: The Traditional Route
NPT fittings are a tapered thread design, creating a seal as they are tightened. These are generally considered more robust and less prone to leaking, especially under high pressure. However, they require sealant tape (Teflon tape) for a proper seal and aren't as convenient for frequent hose changes.
Quick-Connect Fittings: Speed and Convenience
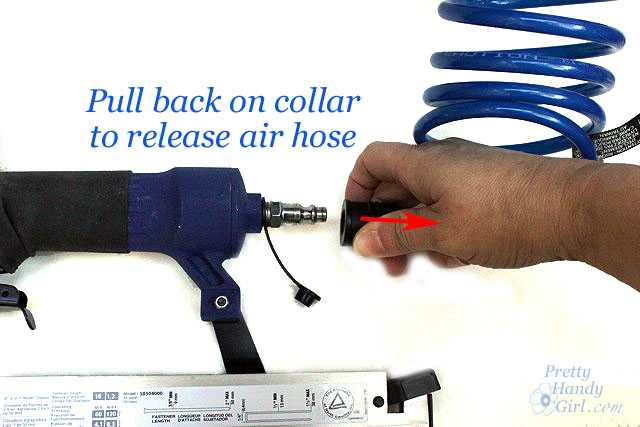
Quick-connect fittings, as the name suggests, allow for rapid connection and disconnection of hoses. They utilize a spring-loaded mechanism that locks the hose coupler onto the compressor's nipple. This is ideal if you frequently switch between different air tools or need to move your hose around the garage. However, they can be more susceptible to leaks over time, especially if the seals become worn or contaminated.
Here's a handy table comparing the two:
| Feature | NPT Fittings | Quick-Connect Fittings |
|---|---|---|
| Ease of Use | Requires sealant tape, more time to connect/disconnect. | Fast and easy one-handed operation. |
| Durability | Generally more durable, less prone to leaks under high pressure. | Can leak over time, especially with wear and tear. |
| Cost | Fittings are typically cheaper. | Fittings can be slightly more expensive. |
| Best For | Permanent or semi-permanent connections, high-pressure applications. | Frequent hose changes, convenience. |
Choosing the Right Hose
Once you know your compressor's connection type, you need to select the appropriate hose. Consider these factors:
* **Length:** Don't skimp! A longer hose provides more flexibility and reach. Avoid excessive lengths, however, as they can reduce air pressure at the tool. 25-50 feet is a good starting point for most home garages. * **Diameter:** The inner diameter of the hose affects airflow. A smaller diameter will restrict airflow, potentially impacting the performance of your air tools. 3/8" is a common size for general-purpose use, while 1/2" is recommended for high-demand tools like sandblasters. * **Material:** Rubber hoses are more durable and flexible, especially in cold weather, but they are heavier and more expensive. Polyurethane hoses are lighter and more affordable but can become stiff in cold temperatures. Hybrid polymer hoses offer a good balance of durability, flexibility, and cost. * **Pressure Rating:** Always choose a hose with a pressure rating that exceeds your compressor's maximum pressure. Safety first!The Connection Process: Step-by-Step
Regardless of the fitting type, the basic process is the same:
- Turn off and unplug your compressor. Safety is paramount!
- Inspect the fittings. Check for any damage, dirt, or debris. Clean as needed.
- For NPT fittings: Wrap the male threads with Teflon tape, applying 2-3 layers in a clockwise direction.
- Connect the hose. Tighten NPT fittings with a wrench until snug. Avoid overtightening, which can damage the threads. For quick-connect fittings, simply push the coupler onto the nipple until it clicks into place.
- Check for leaks. Turn on the compressor and listen for air leaks around the connection. If you hear a leak, turn off the compressor, unplug it, and tighten the fitting or replace the Teflon tape.
Troubleshooting Common Issues
Even with careful preparation, you might encounter some issues:
* **Leaking Connections:** The most common problem. Retighten the fitting, replace the Teflon tape (for NPT), or inspect the quick-connect coupler for damage or worn seals. * **Restricted Airflow:** Check the hose diameter. A hose that's too small can limit the performance of your tools. * **Frozen Fittings:** In cold weather, moisture in the air can freeze inside the fittings. Try warming the fitting with a heat gun or hair dryer (use caution!). * Incorrect Thread Size: Make sure the fittings on your hose match the fittings on your compressor and air tools. Using incompatible thread sizes can damage the threads and cause leaks.Real-World Driving Impressions (of Air Tools, of course!)
Okay, so you can't exactly "drive" an air compressor, but you can *drive* air tools with it! Here's a quick rundown of how different hose setups can impact your tool performance:
* Impact Wrench: A 3/8" hose works well for most impact wrenches, but if you're using a high-torque model on stubborn fasteners, a 1/2" hose will provide better power and speed. * Air Ratchet: A 1/4" or 3/8" hose is usually sufficient for air ratchets, as they don't require as much airflow as impact wrenches. * Spray Gun: Air flow is extremely important. Use the hose specified by the manufacturer. * Sandblaster: Definitely go with a 1/2" hose for sandblasting. A smaller hose will severely limit the blaster's performance.Pro Tip: The "Oil Can" Oiler
Consider adding an in-line oiler to your air system, especially if you're using pneumatic tools that require lubrication. These devices inject a small amount of oil into the air stream, extending the life of your tools and improving their performance.
Pros of an In-Line Oiler:
- Extends the life of air tools.
- Improves tool performance.
Cons of an In-Line Oiler:
- Adds another point of potential leakage to the system.
- Requires periodic filling with oil.
The Bottom Line
Attaching a hose to your air compressor is a fundamental skill that will unlock a world of possibilities in your garage. By understanding the different fitting types, hose materials, and connection procedures, you can ensure a safe and efficient air system that will power your tools for years to come.
So, which is superior: NPT or Quick-Connect? Let the debate begin!