How To Check A Car Fuse With A Multimeter
Fuses: the unsung heroes of your vehicle's electrical system. They're small, inexpensive, and often overlooked until something stops working. Whether it's a malfunctioning headlight, a silent radio, or a non-responsive power window, a blown fuse is often the culprit. But before you start tearing into wiring harnesses, learning how to check a car fuse with a multimeter is a skill every car owner and professional mechanic should possess. It's a quick, accurate, and safe way to diagnose electrical problems.
Understanding Car Fuses: A Brief Overview
Before diving into the how-to, let's briefly recap what fuses are and why they're important. A fuse is essentially a safety device designed to protect your car's electrical circuits from overcurrent. Think of it as a tiny, sacrificial link. When excessive current flows through a circuit (due to a short circuit or component failure), the thin wire inside the fuse melts, breaking the circuit and preventing damage to more expensive components like the ECU (Engine Control Unit), wiring harnesses, or even starting a fire.
Car fuses come in various types and amperage ratings, each designed to protect specific circuits. Common types include blade fuses (the most common in modern vehicles), glass tube fuses (older vehicles), and cartridge fuses (for high-current applications). The amperage rating, clearly marked on the fuse, indicates the maximum current it can handle before blowing. Always replace a blown fuse with one of the same amperage rating. Using a higher amperage fuse can be extremely dangerous and could lead to serious electrical damage or fire.
Why Use a Multimeter to Check Fuses?
While visually inspecting a fuse for a broken filament is a common practice, it's not always reliable. Sometimes a fuse can be blown internally, leaving no visible signs. A multimeter provides a definitive test, ensuring you accurately diagnose the problem. Plus, it's far safer than relying solely on visual inspection, especially when dealing with potentially sensitive electrical components.
Step-by-Step Guide: Checking a Car Fuse with a Multimeter
Here's a detailed guide on how to check a car fuse using a multimeter:
- Safety First: Turn off the ignition and remove the key. Locate the fuse box. Most vehicles have at least one fuse box, often located under the dashboard, in the engine compartment, or sometimes even in the trunk. Consult your owner's manual for the exact location of the fuse box and a diagram of the fuse layout.
- Identify the Fuse: Refer to the fuse box diagram to identify the fuse you suspect is blown. This diagram will show you which fuse corresponds to which circuit (e.g., headlights, radio, power windows).
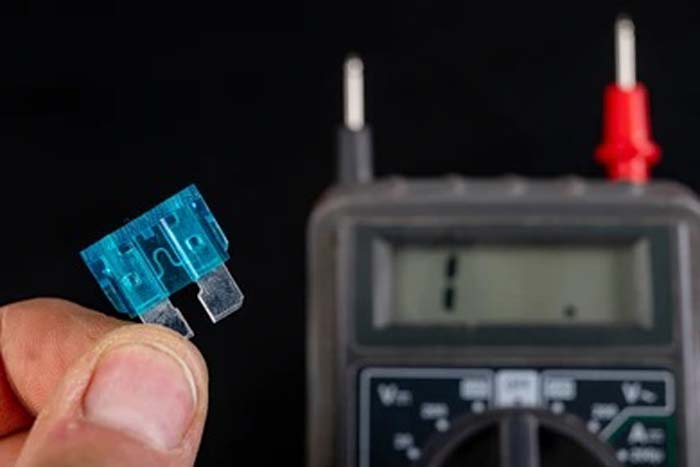
- Set Up Your Multimeter: Set your multimeter to the continuity setting. This setting is usually represented by a diode symbol (looks like a triangle with a line at the tip) or a sound wave symbol. Continuity testing checks if there is a complete and unbroken path for electricity to flow.
- Test the Fuse: Without removing the fuse (using the in-circuit test method) touch one probe of the multimeter to one of the fuse's test points (small metal tabs on top of the fuse) and the other probe to the other test point. If the multimeter beeps or displays a reading of close to 0 ohms, the fuse is good (there is continuity). If the multimeter displays "OL" (overload) or a very high resistance reading, the fuse is blown (no continuity).
- Optional: Removing the Fuse: For a more thorough test or if the in-circuit test is inconclusive, carefully remove the fuse using a fuse puller (usually included in the fuse box). Repeat the continuity test as described above. This method is the most reliable as it eliminates any potential interference from other components in the circuit.
- Replace the Blown Fuse: If the fuse is blown, replace it with a new fuse of the exact same amperage rating. Never use a higher amperage fuse.
- Test the Circuit: After replacing the fuse, turn the ignition back on and test the circuit to ensure it's working correctly. If the fuse blows again immediately, there's a more serious problem in the circuit that needs further investigation. It could indicate a short circuit, faulty wiring, or a malfunctioning component. In this case, it's best to consult a qualified mechanic.
Troubleshooting & Common Issues
Repeatedly blown fuses often point to a more significant underlying problem. Don't just keep replacing fuses without investigating the cause. Common causes of blown fuses include:
- Short Circuits: Damaged wiring, frayed insulation, or loose connections can create a short circuit, causing excessive current flow.
- Overloaded Circuits: Plugging too many devices into a single circuit (e.g., using a power strip in your cigarette lighter) can overload the circuit and blow the fuse.
- Faulty Components: A malfunctioning component, such as a motor or relay, can draw excessive current and blow the fuse.
Pro Tip: Keep a spare fuse kit in your vehicle. It's a small investment that can save you time and hassle on the road. Also, remember to always disconnect the negative battery terminal before working on electrical components to prevent accidental shorts.
By following these steps, you can confidently check car fuses with a multimeter and diagnose many common electrical problems. While fuse replacement is often a simple fix, remember that repeated fuse failures indicate a deeper issue that requires professional attention. Understanding your car's electrical system and how to troubleshoot basic problems like blown fuses is a valuable skill for any car owner or automotive professional.