
How To Check Antifreeze Level In Radiator
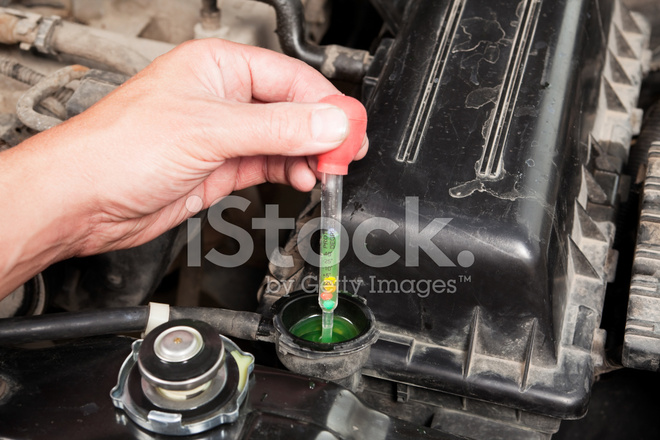
Maintaining the correct antifreeze, or coolant, level in your radiator is crucial for preventing overheating, corrosion, and engine damage. Checking the coolant level is a simple task that any car owner can perform, yet it’s often overlooked. This guide provides a comprehensive breakdown of how to check your antifreeze level, ensuring your cooling system operates efficiently and prolongs the life of your engine.
Why Checking Your Antifreeze Level is Important
The cooling system is responsible for regulating engine temperature. Antifreeze, a mixture of ethylene glycol or propylene glycol and water, circulates through the engine, absorbing heat. This heat is then dissipated as the coolant passes through the radiator. A low coolant level compromises this process, leading to:
- Overheating: Insufficient coolant means less heat is removed from the engine. Overheating can cause serious damage, including warped cylinder heads and blown head gaskets.
- Corrosion: Coolant contains additives that prevent corrosion within the cooling system. Low coolant levels reduce the effectiveness of these additives, leading to rust and scale buildup.
- Freezing: In cold climates, a proper antifreeze concentration prevents the coolant from freezing. Frozen coolant can expand and crack the engine block or radiator.
Tools You'll Need
Fortunately, checking your antifreeze level requires minimal tools:
- Gloves: Protect your hands from potential spills of coolant.
- Safety Glasses: Shield your eyes from splashes.
- Flashlight: Helpful for illuminating hard-to-see areas.
- Clean Rags: For wiping up any spills.
Step-by-Step Guide: Checking Antifreeze Level
1. Safety First: Let the Engine Cool Down Completely. This is the most important step. Never, ever open the radiator cap on a hot engine. The cooling system is under pressure, and hot coolant can erupt, causing severe burns. Allow the engine to cool for at least a few hours, or ideally overnight.
2. Locate the Coolant Reservoir (Expansion Tank). The coolant reservoir is usually a translucent plastic tank, often located near the radiator or engine. It's typically marked with "Coolant" or "Antifreeze" symbols. Refer to your owner's manual if you're unsure of its location.
3. Inspect the Coolant Reservoir Level. Most reservoirs have "Min" and "Max" or "Low" and "Full" markings. The coolant level should be between these lines when the engine is cold. If the level is below the "Min" line, you need to add coolant.
4. Check the Radiator Directly (If Necessary). If your vehicle doesn't have a coolant reservoir or if you want to double-check the level, you can carefully open the radiator cap after the engine is completely cool. Use a rag to cover the cap while slowly releasing the pressure. Once the pressure is released, remove the cap. The coolant level should be just below the cap's neck. If you can't see any coolant, you need to add more.
5. Adding Coolant (If Needed). If the coolant level is low, add a 50/50 mixture of antifreeze concentrate and distilled water. Never use tap water, as it contains minerals that can damage the cooling system. Use the correct type of antifreeze specified in your owner's manual. Common types include IAT (Inorganic Additive Technology), OAT (Organic Additive Technology), and HOAT (Hybrid Organic Additive Technology). Mixing incompatible coolants can lead to corrosion and reduced cooling efficiency.
6. Inspect for Leaks. While checking the coolant level, inspect the radiator, hoses, water pump, and engine block for any signs of leaks. Look for wet spots, stains, or the smell of antifreeze. Address any leaks promptly to prevent further coolant loss and engine damage.
Troubleshooting Common Issues
Low Coolant Level with No Visible Leaks: This could indicate a leak in the engine's internal cooling passages, such as a leaking head gasket. It could also mean the coolant is slowly evaporating. Have a mechanic pressure test the cooling system.
Coolant Looks Rusty or Dirty: This indicates the coolant needs to be flushed and replaced. Old coolant loses its protective properties and can cause corrosion.
Milky Coolant: This could indicate oil mixing with the coolant, possibly due to a blown head gasket or cracked cylinder head. This requires immediate professional attention.
Preventative Maintenance Tips
Regularly checking your antifreeze level is a key component of preventative maintenance. In addition to checking the level, it is recommended to:
- Flush and replace your coolant every 2-5 years, depending on the type of coolant used. Refer to your owner's manual for specific recommendations.
- Inspect hoses and clamps for cracks, leaks, or looseness. Replace any damaged components.
- Pressure test the cooling system periodically to check for leaks.
By following these steps, you can ensure your cooling system is functioning correctly, preventing costly repairs and extending the life of your engine. Remember, preventative maintenance is always more cost-effective than dealing with the consequences of a neglected cooling system.