
How To Clean Fuel Injectors After Removal
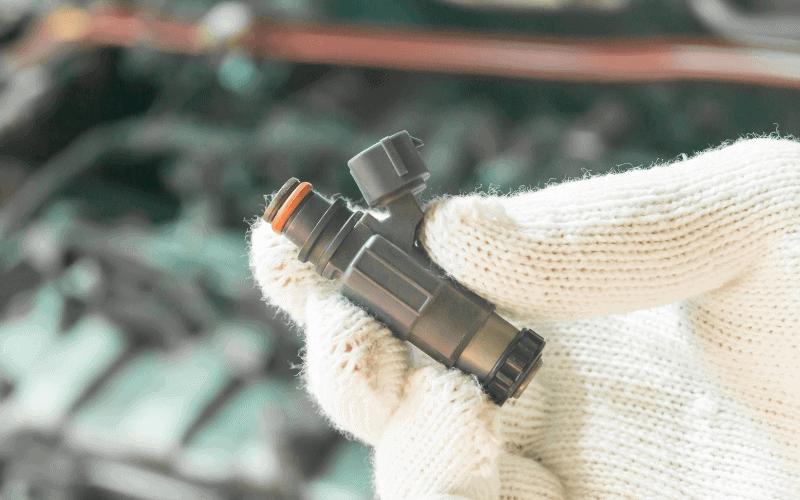
Fuel injectors, the unsung heroes of modern internal combustion engines, play a crucial role in delivering precisely metered fuel into the cylinders for optimal combustion. Over time, however, these intricate components can become clogged with varnish, carbon deposits, and other contaminants, leading to reduced engine performance, poor fuel economy, and even rough idling. While professional injector cleaning services exist, understanding how to clean fuel injectors yourself after removal offers a rewarding and cost-effective approach for the DIY enthusiast. This guide provides a comprehensive overview of the process, emphasizing the underlying principles and best practices.
Understanding Fuel Injector Fouling
Before diving into the cleaning procedure, it’s essential to understand why injectors get dirty in the first place. Several factors contribute to injector fouling:
- Fuel Quality: Lower-quality fuels often contain higher levels of impurities, which can accumulate within the injector.
- Heat Soak: After the engine is shut off, the heat from the engine can "bake" residual fuel in the injector, leaving behind varnish.
- Oil Contamination: In some cases, oil can find its way into the fuel system, contributing to deposits.
- Ethanol Blends: While ethanol can help clean the fuel system, excessive moisture absorption can lead to corrosion and deposit formation, especially in older vehicles not designed for high ethanol content.
These deposits restrict fuel flow, alter the spray pattern, and ultimately compromise engine performance. Recognizing the symptoms of dirty injectors is the first step toward addressing the problem.
Symptoms of Dirty Fuel Injectors
Common indicators of fouled fuel injectors include:
- Reduced Fuel Economy: A noticeable decrease in miles per gallon.
- Rough Idling: An unsteady or uneven idle.
- Hesitation or Stumbling: A lack of responsiveness during acceleration.
- Misfires: Intermittent engine misfires, often accompanied by a check engine light.
- Increased Emissions: Higher levels of harmful emissions, which may be detected during emissions testing.
If you experience these symptoms, cleaning or replacing your fuel injectors may be necessary.
Tools and Materials Required
To effectively clean fuel injectors after removal, you will need the following tools and materials:
- Fuel Injector Cleaning Kit: These kits typically include a pressurized canister, injector adapters, and cleaning solution.
- Safety Glasses and Gloves: Essential for protecting your eyes and skin from chemicals.
- Fuel Injector Pulse Tester (Optional): Allows you to manually actuate the injector during cleaning.
- Carburetor Cleaner or Fuel Injector Cleaner: Choose a high-quality cleaner specifically designed for fuel injectors.
- Compressed Air Source: Required for pressurizing the cleaning canister.
- Catch Container: To collect the used cleaning solution.
- Soft Rags or Paper Towels: For cleaning and wiping components.
- Small Brushes: Useful for scrubbing stubborn deposits.
- Multimeter (Optional): To check injector resistance.
- Manual or Repair Guide: Consult your vehicle's manual for specific injector removal and installation procedures.
Step-by-Step Cleaning Procedure
The following steps outline the general procedure for cleaning fuel injectors after removal. Always consult your vehicle's repair manual for specific instructions and safety precautions.
1. Safety First
Disconnect the negative battery cable to prevent accidental sparks or electrical shocks. Work in a well-ventilated area, and wear safety glasses and gloves at all times. Fuel and cleaning solvents are flammable and potentially harmful.
2. Injector Removal
Carefully remove the fuel injectors from the engine. Refer to your vehicle's repair manual for the specific procedure. Typically, this involves disconnecting the electrical connectors and fuel lines, and then carefully extracting the injectors from the fuel rail. Note: Be prepared for some fuel spillage and have rags readily available. Label each injector to ensure it is reinstalled in the same location.
3. Visual Inspection
Thoroughly inspect each injector for signs of damage, such as cracks, leaks, or corrosion. If any damage is found, the injector should be replaced rather than cleaned. Use a multimeter to check the resistance of each injector coil and compare to manufacturer specifications. Significant deviations may indicate a faulty injector.
4. Preparation for Cleaning
Attach the appropriate adapter from the cleaning kit to the injector. Ensure a secure and leak-proof connection. If you are using a fuel injector pulse tester, connect it to the injector.
5. Cleaning Process
There are two common methods for cleaning fuel injectors:
a) Pressurized Canister Method: Fill the cleaning canister with fuel injector cleaner. Connect the compressed air source to the canister and pressurize it according to the kit's instructions. Open the valve on the canister to allow the cleaning solution to flow through the injector. If using a pulse tester, activate the injector periodically to simulate engine operation. Direct the spray into a catch container. Continue this process for several minutes, or until the spray pattern becomes consistent and even.
b) Manual Cleaning: This method involves manually spraying carburetor cleaner or fuel injector cleaner through the injector while actuating it with a pulse tester or by briefly applying voltage to the terminals (use extreme caution with this method). Repeat the process until the spray pattern is clean and consistent.
6. Backflushing
After cleaning, it is beneficial to backflush the injector to remove any remaining debris. Reverse the flow of the cleaning solution by attaching the adapter to the opposite end of the injector. This can help dislodge any particles that may have been pushed further into the injector during the initial cleaning.
7. Final Inspection
After cleaning and backflushing, inspect the spray pattern of each injector. The spray should be a fine, even mist, without any drips or streams. If the spray pattern is still uneven or distorted, repeat the cleaning process or consider replacing the injector.
8. Reinstallation
Lightly lubricate the O-rings on the injectors with fresh engine oil or silicone grease. Carefully reinstall the injectors into the fuel rail, ensuring they are properly seated and secured. Reconnect the fuel lines and electrical connectors. Reconnect the negative battery cable.
9. Testing
Start the engine and allow it to idle. Monitor the engine for any signs of misfires, rough idling, or hesitation. Use a diagnostic scanner to check for any error codes. If any problems persist, further diagnosis or replacement of the injectors may be necessary.
Important Considerations
- Injector Type: Some injectors are more sensitive to cleaning than others. Refer to your vehicle's service manual for specific recommendations.
- Solvent Compatibility: Ensure that the cleaning solvent is compatible with the injector materials.
- Over-Pressurization: Avoid over-pressurizing the cleaning canister, as this can damage the injectors.
- Injector Seals: Replace the O-rings on the injectors whenever they are removed, as they can become brittle and leak.
- Professional Cleaning: For severely clogged injectors, professional cleaning services may be more effective. These services typically use ultrasonic cleaning equipment and specialized solvents.
Conclusion
Cleaning fuel injectors after removal is a worthwhile DIY project that can improve engine performance and fuel economy. By understanding the principles of injector fouling and following the proper cleaning procedures, you can effectively restore the performance of your fuel injectors and keep your engine running smoothly. Remember to prioritize safety and consult your vehicle's repair manual for specific instructions. While this guide provides a comprehensive overview, consider consulting a qualified mechanic if you are unsure about any aspect of the procedure.