
How To Compress Brake Piston With C Clamp
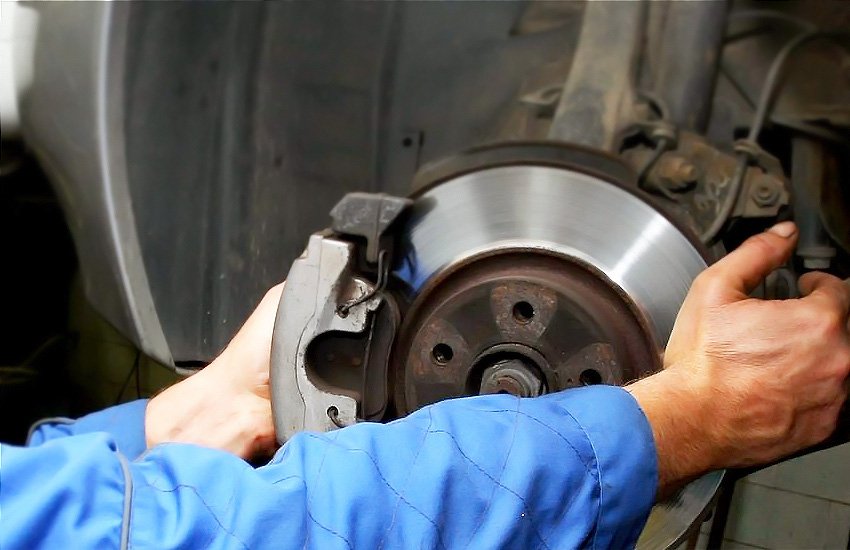
Understanding Brake Piston Compression: A Step-by-Step Guide with a C-Clamp
Replacing brake pads is a common maintenance task, but sometimes it requires more than just swapping out the old pads. Often, you'll need to compress the brake piston back into the caliper to create enough space for the new, thicker pads. While there are specialized tools for this, a C-clamp can be a reliable and cost-effective alternative. This guide will walk you through the process of compressing a brake piston using a C-clamp safely and effectively.
Why Compress the Brake Piston?
Before diving into the "how-to," let's understand why this step is necessary. As your brake pads wear down, the brake piston extends further out of the caliper to maintain contact with the rotor. When you install new, thicker brake pads, this extended piston prevents the caliper from fitting back over the rotor. Compressing the piston pushes it back into the caliper body, creating the necessary clearance for the new pads.
Tools and Materials You'll Need
Before you begin, gather the following tools and materials:
- C-clamp: The size will depend on the size of your caliper, but a standard 6-inch C-clamp usually suffices.
- Old brake pad (or a suitable substitute): This protects the piston surface.
- Rags or shop towels: For cleaning and preventing messes.
- Brake cleaner: For cleaning the caliper and surrounding area.
- Gloves: To protect your hands.
- Safety glasses: To protect your eyes.
- Wrench or socket set: For removing the caliper (if necessary).
Important Safety Note: Brake systems are crucial for your vehicle's safety. If you're not comfortable performing this task, it's always best to consult a qualified mechanic. Improperly installed brakes can lead to serious accidents.
Step-by-Step Guide to Compressing the Brake Piston with a C-Clamp
Follow these steps carefully to safely and effectively compress the brake piston:
Step 1: Prepare the Vehicle
Park your vehicle on a level surface and engage the parking brake. Loosen the lug nuts on the wheel you'll be working on. Use a jack to lift the vehicle and secure it with jack stands. Never work under a vehicle supported only by a jack.
Step 2: Access the Brake Caliper
Remove the wheel. Depending on your vehicle, you may need to remove the brake caliper from the rotor. Usually, this involves removing two bolts located on the back of the caliper. Use a wrench or socket set to remove these bolts. If you don't need to remove the caliper to access the piston, skip to Step 4.
Important: Do not disconnect the brake line unless absolutely necessary. If you must disconnect it, be prepared to bleed the brakes afterward.
Step 3: Support the Caliper (If Removed)
If you removed the caliper, support it with a bungee cord or wire, ensuring that the brake line isn't stretched or damaged. Never let the caliper hang by the brake line.
Step 4: Clean the Area
Use brake cleaner and a rag to clean the caliper and the surrounding area. This will help prevent dirt and debris from contaminating the brake system.
Step 5: Position the Old Brake Pad
Place the old brake pad (or a suitable substitute, like a small piece of metal) against the brake piston. This will distribute the pressure from the C-clamp evenly and protect the piston surface from damage. Make sure the pad covers the entire surface of the piston.
Step 6: Position the C-Clamp
Position the C-clamp so that one end is against the back of the caliper and the other end is pressing against the old brake pad (or the substitute you are using). Ensure the C-clamp is aligned straight and applies pressure evenly.
Step 7: Compress the Piston
Slowly and steadily tighten the C-clamp. As you tighten, the brake piston will begin to retract into the caliper bore. Continue tightening until the piston is fully compressed, or at least far enough to allow you to install the new brake pads.
Important: Observe the brake fluid reservoir as you compress the piston. As the piston retracts, brake fluid will be pushed back into the reservoir. Make sure the reservoir doesn't overflow. If necessary, remove some brake fluid from the reservoir using a clean syringe or turkey baster.
Step 8: Verify Compression
Once the piston is fully compressed, verify that it's seated properly and that there's enough space to install the new brake pads.
Step 9: Reassemble the Brakes
Remove the C-clamp and the old brake pad. Install the new brake pads according to the manufacturer's instructions. If you removed the caliper, reattach it to the rotor and tighten the bolts to the manufacturer's specified torque. Reinstall the wheel and tighten the lug nuts. Lower the vehicle and remove the jack stands. Torque the lug nuts to the correct specification.
Step 10: Bed In the Brakes
After installing new brake pads, it's essential to bed them in properly. This involves performing a series of controlled stops from moderate speeds to transfer brake pad material onto the rotor surface. Consult your vehicle's owner's manual or the brake pad manufacturer's instructions for the proper bed-in procedure.
Troubleshooting Tips
- Piston Not Retracting: If the piston is difficult to compress, check for rust or corrosion on the piston surface. You may need to clean the piston with a wire brush and brake cleaner. If the piston is severely corroded, you may need to replace the caliper.
- Brake Fluid Overflow: If the brake fluid reservoir overflows, clean up the spilled fluid immediately. Brake fluid can damage painted surfaces.
- Damaged Caliper: If you notice any damage to the caliper, such as cracks or leaks, replace it immediately.
Final Thoughts
Compressing a brake piston with a C-clamp is a straightforward task that can save you money on brake repairs. By following these steps carefully and taking the necessary precautions, you can safely and effectively compress the piston and install new brake pads. Remember, if you are ever unsure about any aspect of brake repair, consult a qualified mechanic. Your safety is paramount.
Always prioritize safety when working on your vehicle's brake system. If you're not comfortable performing this task, seek professional assistance.