How To Fix A Leak In Air Conditioner Coil
A malfunctioning air conditioning system can turn a summer drive into a miserable experience. Often, a leak in the evaporator coil, commonly known as the A/C coil, is the culprit. This component, responsible for cooling the air inside your car, can develop leaks due to corrosion, physical damage, or simply age. While a professional A/C repair is often recommended, understanding the problem and exploring potential fixes can empower you to make informed decisions and potentially save money. This article aims to provide a practical guide for identifying and addressing A/C coil leaks, tailored for car enthusiasts, owners, and hobby mechanics.
Understanding the A/C System and the Evaporator Coil
Before diving into leak repair, it's crucial to grasp the basics of your car's A/C system. Think of it as a closed-loop system with four primary components:
- Compressor: Compresses the refrigerant, increasing its pressure and temperature.
- Condenser: Located at the front of the car (like a radiator), it dissipates heat from the high-pressure refrigerant, causing it to condense into a liquid.
- Expansion Valve (or Orifice Tube): Meters the flow of refrigerant into the evaporator coil, causing a pressure drop and allowing the refrigerant to expand and cool rapidly.
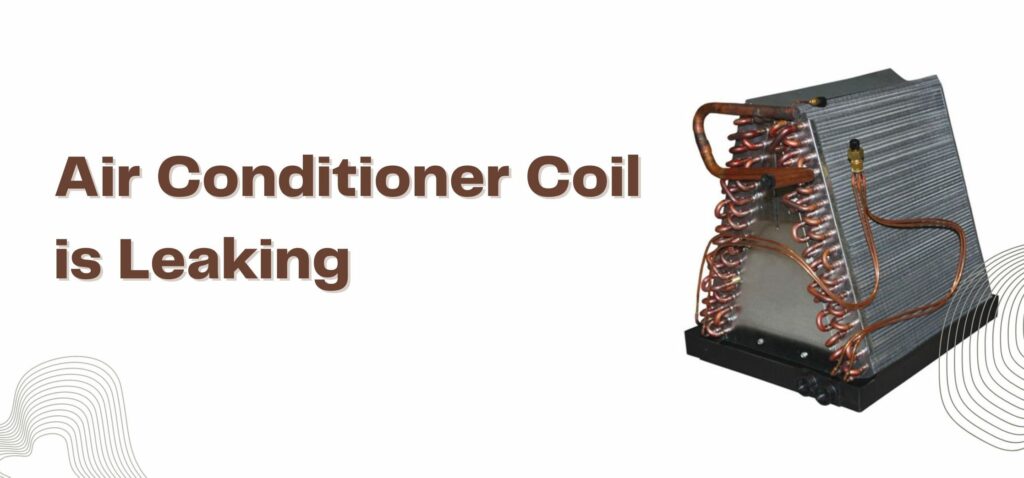
- Evaporator Coil: This is where the magic happens. Located inside the dashboard, the low-pressure refrigerant absorbs heat from the air blowing across the coil, cooling the air before it enters the cabin. Think of it as a reverse radiator.
The evaporator coil, typically made of aluminum, is a network of tubes and fins designed to maximize surface area for heat exchange. As refrigerant flows through the coil, it absorbs heat, turning from a liquid into a gas. This process cools the coil, and the blower motor then forces air across it, delivering chilled air into the cabin.
Leakage in the evaporator coil leads to refrigerant loss, reducing the system's ability to cool effectively. You might notice weak airflow, warm air blowing from the vents, or a hissing sound from inside the dashboard.
Identifying an A/C Coil Leak
Diagnosing an A/C coil leak can be tricky, as the coil is often hidden deep inside the dashboard. However, here are some telltale signs:
- Weak or Warm Air: This is the most common symptom. If your A/C isn't blowing cold air, a refrigerant leak is highly probable.
- Hissing Sound: You might hear a faint hissing sound coming from the dashboard, especially when the A/C is turned on. This could indicate refrigerant escaping from a leak.
- Oily Residue: Sometimes, the refrigerant carries a small amount of oil. If you can access the drain tube that expels condensation from the evaporator housing (usually located under the car near the firewall), inspect for oily residue.
- Refrigerant Dye Test: This is the most reliable method. A UV dye is injected into the A/C system, and after running the system for a while, a UV light is used to inspect for leaks. The dye will glow brightly under the UV light, revealing the leak location. Most auto parts stores sell A/C dye leak detection kits.
- Electronic Leak Detector: These devices can detect refrigerant leaks by sensing the presence of refrigerant gas. They are useful for pinpointing the general area of a leak, but may not be as precise as a dye test.
For example, imagine you own a 2010 Honda Civic and notice the A/C blowing warm air. You check the low-pressure port and find that the refrigerant level is low. A dye test might reveal a leak in the evaporator coil, which is a common issue in older Civics due to corrosion.
Fixing an A/C Coil Leak: Options and Considerations
Once you've confirmed a leak in the evaporator coil, you have a few options:
1. Replacing the Evaporator Coil:
This is the most reliable and recommended solution, especially for significant leaks or older coils. The process involves:
- Refrigerant Recovery: A certified technician must recover the remaining refrigerant using specialized equipment to avoid environmental damage. It is illegal to vent refrigerant into the atmosphere.
- Dashboard Disassembly: This is the most labor-intensive part. The dashboard needs to be partially or fully disassembled to access the evaporator housing. This can be complex, involving removing trim panels, the steering wheel (in some cases), and various electrical connectors.
- Coil Removal and Replacement: The old coil is disconnected from the A/C lines and removed. The new coil is installed, and the connections are properly sealed.
- System Evacuation and Recharge: The system is evacuated to remove any air and moisture, and then recharged with the correct amount of refrigerant.
This is a complex repair best left to experienced mechanics. For instance, replacing the evaporator coil in a 2015 Ford F-150 involves navigating a complex dashboard layout and requires specialized tools to disconnect the A/C lines without damaging them. A repair manual or online resources specific to your car model is essential.
2. Using A/C Sealant:
A/C sealant products claim to seal small leaks in the system. These are often added to the system through the low-pressure service port. While they might offer a temporary fix for minor leaks, they are generally not recommended for the following reasons:
- Limited Effectiveness: Sealants are unlikely to seal significant leaks or leaks caused by physical damage.
- Potential for Damage: Some sealants can clog the expansion valve or orifice tube, restricting refrigerant flow and causing further problems.
- Contamination: Sealants can contaminate the A/C system, making future repairs more difficult and expensive. Mechanics often dislike working on systems that have been treated with sealants.
Consider using A/C sealant as a last resort for very minor leaks, and only if you understand the potential risks. Choose a reputable brand and carefully follow the instructions. Avoid sealants that contain particulate matter, as these are more likely to cause blockages.
3. Patching the Coil (Rarely Recommended):
In very rare cases, a small, easily accessible leak might be patched using epoxy or a similar sealant specifically designed for aluminum. However, this is not a long-term solution and is generally not recommended due to the high pressure and temperature variations within the A/C system. Patches are likely to fail, leading to further refrigerant loss and potential damage.
Practical Takeaways
- Accurate Diagnosis is Key: Before attempting any repairs, accurately diagnose the leak using a dye test or electronic leak detector. Don't assume it's the evaporator coil without proper confirmation.
- Consider the Scope of the Repair: Replacing the evaporator coil is a complex and time-consuming task. Assess your skills and tools before attempting it yourself. If you're not comfortable disassembling the dashboard, seek professional assistance.
- Weigh the Pros and Cons of Sealant: While A/C sealant might seem like a quick fix, be aware of its limitations and potential risks. It's generally not a substitute for proper repair.
- Prioritize System Health: Regardless of the repair method you choose, ensure the A/C system is properly evacuated and recharged by a qualified technician. This will ensure optimal performance and prevent further damage.
- Preventative Maintenance: Regularly inspect your A/C system for leaks and have it serviced periodically. This can help prevent major problems and extend the life of your A/C components.
By understanding the intricacies of your car's A/C system and the potential causes and solutions for evaporator coil leaks, you can make informed decisions and keep your cool on the road. Remember to prioritize safety and consult a qualified mechanic when in doubt.