
How To Fix A Leaking Valve Stem On A Tire
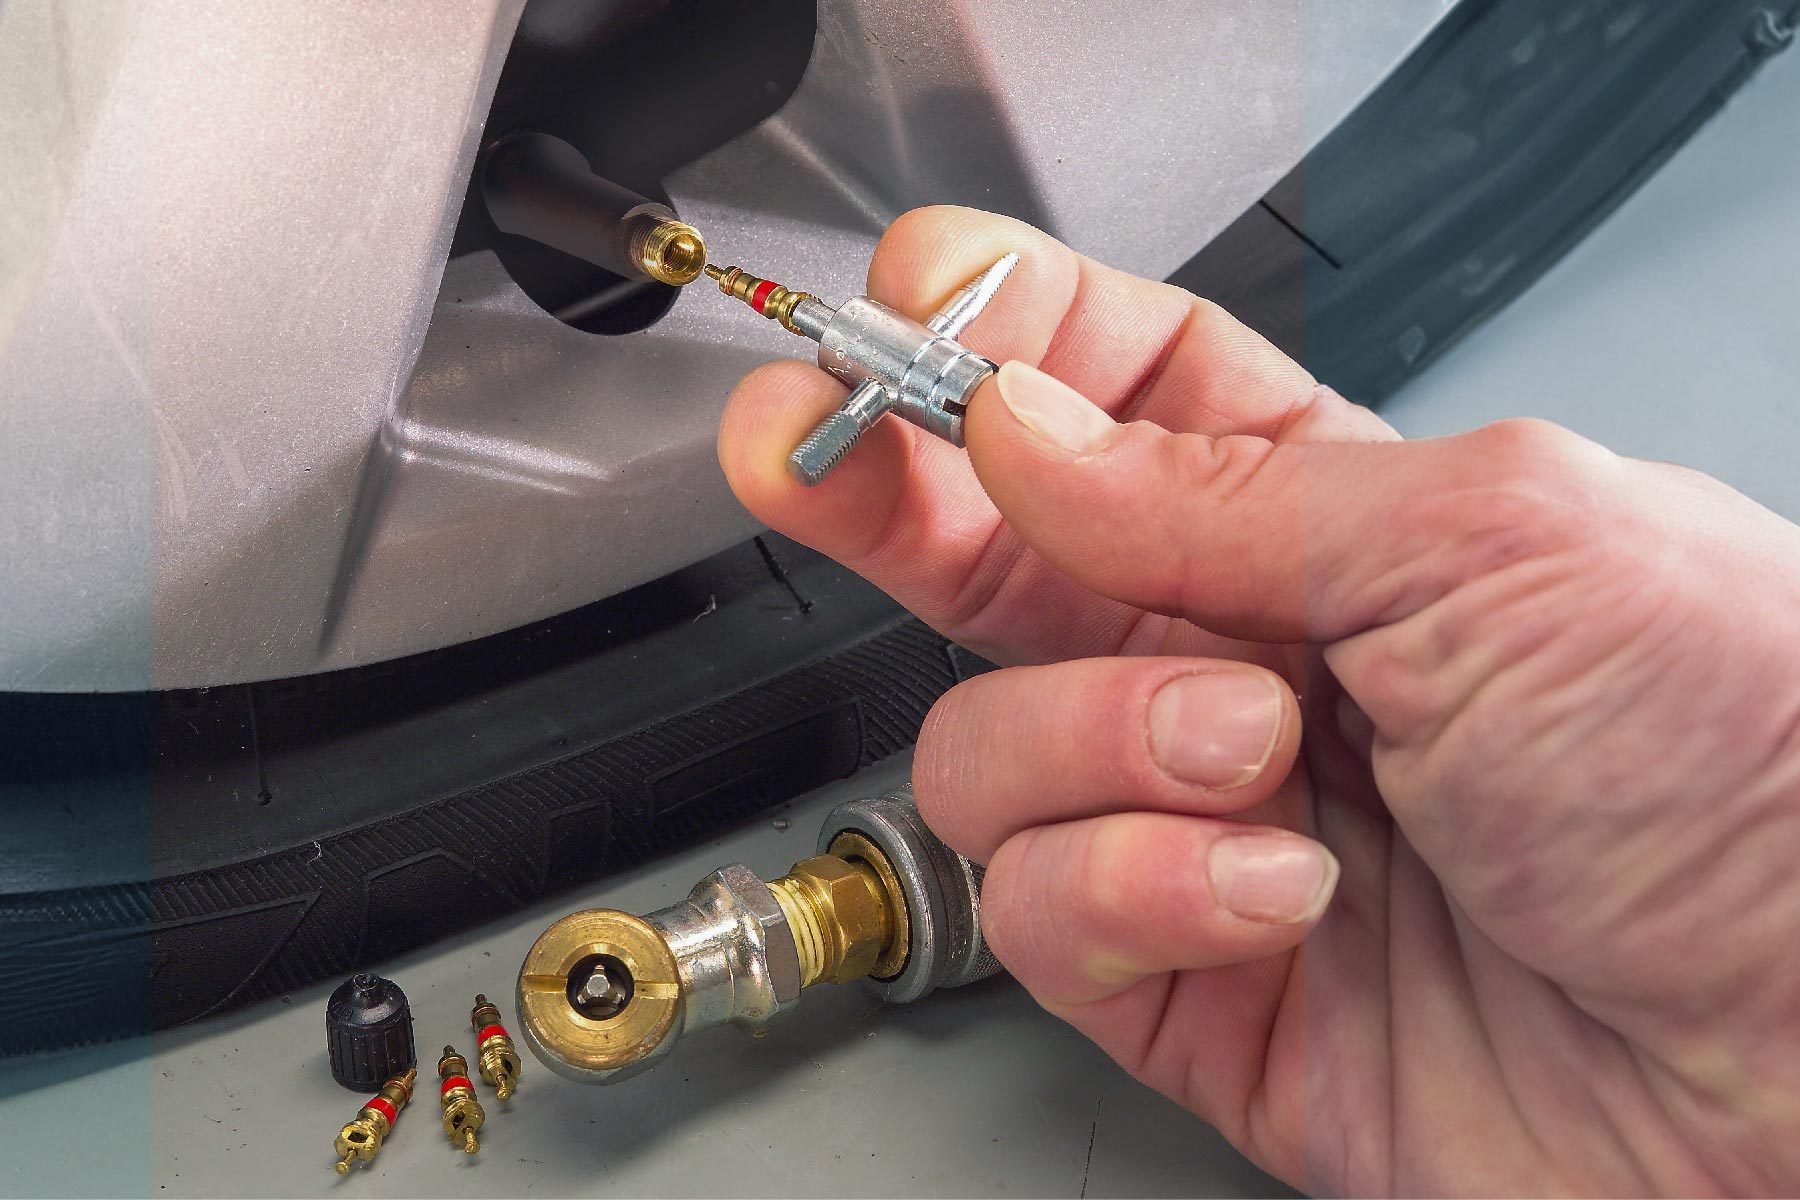
The slow, insidious hiss. It's the sound that strikes dread into the heart of any driver – the telltale sign of a tire losing pressure. While a puncture to the tire itself is often the culprit, a leaking valve stem is another frequent offender. This seemingly small component plays a crucial role in maintaining proper tire inflation, and when it fails, it can lead to flat tires, reduced fuel efficiency, and compromised handling. This article delves into the anatomy of a valve stem, the reasons for its failure, and provides a detailed guide on how to diagnose and fix a leaking valve stem.
Understanding the Valve Stem
Before we dive into the repair process, it's important to understand the construction and function of a tire valve stem. The standard valve stem, also known as a Schrader valve, comprises several key parts:
- Valve Core: This is the heart of the valve. It's a spring-loaded poppet valve that allows air to enter the tire during inflation but seals tightly to prevent air from escaping.
- Valve Stem Body: This is the metal or rubber body that houses the valve core and provides a secure connection to the wheel. Metal valve stems are typically used on high-performance vehicles or those equipped with tire pressure monitoring systems (TPMS), while rubber stems are more common on standard vehicles.
- Valve Cap: This seemingly insignificant piece is crucial. It protects the valve core from dirt, debris, and moisture, which can corrode the core and cause leaks. It also provides a secondary seal, further preventing air loss.
- Sealing Washer (if applicable): Some valve stems, particularly metal ones used with TPMS, incorporate a sealing washer to ensure an airtight fit against the wheel.
The entire assembly is designed to be airtight under pressure, providing a reliable and leak-free connection to the tire. However, over time, these components can degrade, leading to leaks.
Common Causes of Valve Stem Leaks
Several factors can contribute to a leaking valve stem. Identifying the cause is crucial for selecting the appropriate repair strategy:
- Corroded Valve Core: Moisture and contaminants can enter the valve stem, corroding the valve core and preventing it from sealing properly. This is particularly common in areas with harsh weather conditions or where road salt is used.
- Damaged Valve Core: The valve core can be damaged by improper inflation techniques or by using a faulty tire pressure gauge. Forcing the gauge onto the valve stem can bend or break the internal components.
- Cracked or Deteriorated Rubber Stem: Rubber valve stems are susceptible to cracking and deterioration due to exposure to sunlight, ozone, and chemicals. Over time, the rubber can become brittle and develop leaks around the base where it's bonded to the wheel.
- Loose Valve Core: Vibration and normal wear and tear can cause the valve core to loosen over time, breaking its airtight seal.
- Damaged or Missing Valve Cap: As mentioned earlier, the valve cap provides a secondary seal. Without it, the valve core is exposed to the elements, increasing the risk of corrosion and leaks.
- Faulty TPMS Sensor (if applicable): In vehicles equipped with TPMS, the valve stem is often integrated with the sensor. A failing sensor or a damaged seal around the sensor can cause air leaks.
- Improper Installation: A valve stem that was not correctly installed, whether too loose or over-tightened, can also leak.
Diagnosing a Leaking Valve Stem
Before attempting any repairs, it's essential to accurately diagnose the source of the leak. Here's a step-by-step guide:
- Visual Inspection: Start by visually inspecting the valve stem for any obvious signs of damage, such as cracks, corrosion, or a loose valve cap.
- Listen for Hissing: Listen carefully for a hissing sound coming from the valve stem area. This is a strong indicator of a leak.
- The Soap Test: This is the most reliable method for pinpointing a leak. Mix a solution of soapy water (dish soap works well) and apply it generously to the valve stem, including the valve core, the base of the stem where it meets the wheel, and the TPMS sensor (if present). Look for bubbles forming in the soapy water. The location of the bubbles indicates the source of the leak.
- Valve Core Tightness Check: Use a valve core tool (a small, inexpensive tool designed for this purpose) to gently tighten the valve core. Over-tightening can damage the core, so use caution.
- Check the Valve Cap: Ensure the valve cap is properly tightened and that the sealing surface inside the cap is clean and undamaged.
Fixing a Leaking Valve Stem: A Step-by-Step Guide
Once you've identified the source of the leak, you can proceed with the repair. The appropriate repair method will depend on the nature and location of the leak.
Repair Option 1: Replacing the Valve Core
This is the simplest and most common fix for a leaking valve stem. It's effective for leaks caused by a corroded or damaged valve core.
- Gather Your Tools: You'll need a valve core tool, a new valve core (available at any auto parts store), and pliers (optional).
- Remove the Valve Cap: Unscrew and remove the valve cap.
- Remove the Old Valve Core: Insert the valve core tool into the valve stem and turn it counterclockwise to unscrew the old valve core. Be prepared for a brief burst of air as the core is removed.
- Install the New Valve Core: Insert the new valve core into the valve stem and turn the valve core tool clockwise to tighten it securely. Do not over-tighten.
- Reinstall the Valve Cap: Screw the valve cap back onto the valve stem.
- Re-check for Leaks: Apply the soapy water solution to the valve stem and check for bubbles. If the leak is gone, you've successfully fixed the problem.
Repair Option 2: Replacing the Entire Valve Stem
If the rubber valve stem is cracked or deteriorated, or if the leak is coming from the base of the stem where it meets the wheel, you'll need to replace the entire valve stem. This is a more involved process and requires removing the tire from the wheel. This is best left to a professional tire technician.
- Safety First: Ensure the vehicle is properly supported on jack stands before removing the wheel.
- Deflate the Tire: Completely deflate the tire.
- Break the Bead: Use a tire bead breaker to separate the tire bead from the wheel rim. This requires specialized equipment and can be dangerous if not done correctly.
- Remove the Tire from the Wheel: Use a tire machine or tire irons to remove the tire from the wheel. Again, this requires specialized equipment and experience.
- Remove the Old Valve Stem: Cut the old valve stem from the wheel.
- Install the New Valve Stem: Insert the new valve stem into the hole in the wheel and pull it through using a valve stem installation tool.
- Mount the Tire Back on the Wheel: Use a tire machine or tire irons to remount the tire onto the wheel.
- Inflate the Tire: Inflate the tire to the proper pressure.
- Balance the Wheel: After remounting the tire, it's essential to have the wheel balanced to prevent vibrations and uneven tire wear.
- Reinstall the Wheel: Reinstall the wheel onto the vehicle and tighten the lug nuts to the proper torque specifications.
Repair Option 3: TPMS Sensor Seal Replacement
If the leak is originating from around the TPMS sensor, you may be able to replace the seal between the sensor and the wheel. This typically requires dismounting the tire from the wheel.
Follow similar steps as replacing the entire valve stem, but focus on carefully removing the TPMS sensor and replacing the rubber seal. Ensure the new seal is properly seated before reinstalling the sensor and remounting the tire.
Preventing Future Leaks
Taking proactive steps can help prevent future valve stem leaks:
- Use Valve Caps: Always keep the valve caps in place to protect the valve core from dirt and moisture.
- Regularly Check Tire Pressure: Regularly check your tire pressure and inflate your tires to the recommended pressure. This helps prevent stress on the valve stems.
- Inspect Valve Stems: Periodically inspect your valve stems for any signs of damage or deterioration.
- Replace Valve Stems When Replacing Tires: When you replace your tires, it's a good idea to also replace the valve stems, especially if they are rubber. This is a relatively inexpensive precaution that can save you headaches down the road.
- Use Quality Valve Stems: When replacing valve stems, choose high-quality stems from reputable manufacturers.
A leaking valve stem, while seemingly minor, can have significant consequences. By understanding the anatomy of the valve stem, the causes of leaks, and the proper repair techniques, you can effectively address this common problem and maintain the optimal performance and safety of your vehicle. Remember, when in doubt, consult a qualified tire professional.