
How To Get A Lug Nut Off That Is Stripped
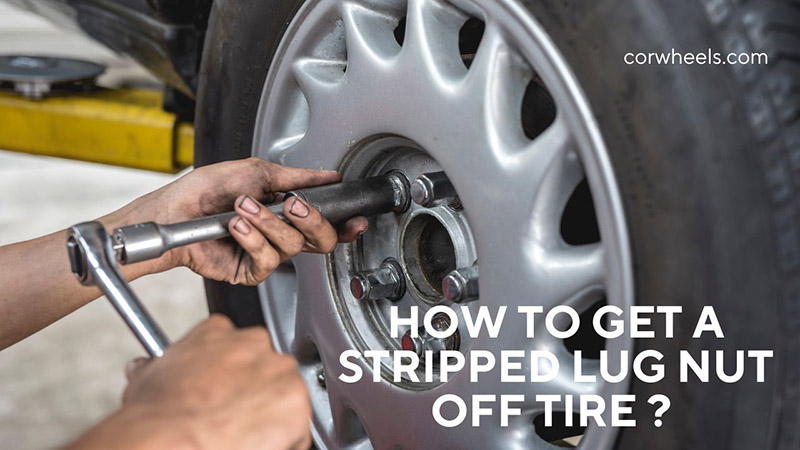
The dreaded rounded lug nut. A wheel's sentinel, now rendered useless – and infuriatingly stubborn. Whether through over-torquing, the use of incorrect sockets, or simply the relentless wear and tear of time, a stripped lug nut presents a significant obstacle to even the most seasoned DIY mechanic. But fear not, the situation is rarely insurmountable. This guide delves into the mechanics behind stripped lug nuts and provides a comprehensive overview of the techniques, tools, and considerations involved in their removal.
Understanding the Enemy: Anatomy of a Stripped Lug Nut
Before launching into solutions, it's crucial to understand *what* constitutes a "stripped" lug nut. The typical lug nut boasts a hexagonal profile, designed to interface precisely with a matching socket. When excessive force or mismatched tools are applied, the sharp corners of the hexagon can be worn down, rounded off, or even crushed. This results in a loss of grip, making it impossible for a standard socket to engage and apply the necessary torque for removal.
The severity of the stripping can vary. In some cases, the rounding might be slight, allowing for alternative socket types to still gain purchase. In more extreme scenarios, the nut becomes almost circular, requiring more aggressive extraction methods. Recognizing the degree of damage is paramount in selecting the appropriate course of action. Furthermore, it's vital to identify the type of lug nut. Are they standard closed-end nuts, open-end, or perhaps a more decorative style? This knowledge impacts the accessibility and effectiveness of certain removal techniques.
The Arsenal: Tools for the Task
Successfully removing a stripped lug nut requires a well-stocked toolbox and a healthy dose of patience. Here's a breakdown of essential and helpful tools:
- Penetrating Oil: A cornerstone of any stuck fastener removal strategy. Apply generously and allow ample time for it to seep into the threads.
- Lug Nut Extractor Sockets (Twist Sockets): These specialized sockets feature a reverse spiral design that bites into the rounded edges of the lug nut as force is applied. This aggressive grip provides the necessary leverage for removal. Available in standard SAE and metric sizes, purchasing a complete set is highly recommended.
- Impact Wrench: The sheer brute force of an impact wrench, combined with an extractor socket, can often break even the most stubborn lug nuts free. Caution: excessive force can damage wheel studs, so use judiciously.
- Breaker Bar: A longer handle provides greater leverage than a standard wrench. Useful for applying significant torque when an impact wrench isn't available or appropriate.
- Hammer: Used in conjunction with extractor sockets or chisels to help seat the tool and break the initial bond of corrosion.
- Chisels and Punches: For creating a purchase point on the lug nut's surface, allowing for a more direct application of force.
- Propane Torch (Optional): Applied carefully, heat can expand the lug nut, potentially loosening its grip on the stud. Extreme caution is required to avoid damaging surrounding components or causing a fire.
- Angle Grinder (Last Resort): For splitting or cutting the lug nut. A risky maneuver requiring precision and safety equipment.
- Welder (For Experienced Users): Welding a new nut onto the stripped one provides a solid point for wrenching.
Strategies for Extraction: A Step-by-Step Guide
Now, let's explore various techniques for removing that pesky stripped lug nut, progressing from the least invasive to the most drastic:
1. The Penetrating Oil Approach (Patience is Key)
This is the first line of defense. Apply a generous amount of penetrating oil to the lug nut and stud, ensuring it seeps into the threads. Allow at least 15-30 minutes (or even overnight) for the oil to work its magic. Try tapping the lug nut lightly with a hammer to help the oil penetrate. After the soaking period, attempt to remove the lug nut with a standard socket or wrench. If it still resists, move on to the next method.
2. The Extractor Socket Solution
Lug nut extractor sockets are purpose-built for this scenario. Select the correct size extractor socket for your lug nut (refer to the set's size chart). Firmly hammer the extractor socket onto the stripped lug nut, ensuring it's fully seated. The reverse spiral design should grip the rounded edges tightly. Attach an impact wrench or breaker bar to the extractor socket and apply torque in the loosening direction. Maintain constant pressure to prevent the socket from slipping. If the lug nut starts to turn, continue until it's completely removed. If it still refuses to budge, try applying more penetrating oil and repeating the process.
3. The Hammer and Chisel Technique
This method requires more finesse. Using a cold chisel and hammer, carefully create a notch on one of the remaining flats of the lug nut. Angle the chisel in the loosening direction and strike it firmly with the hammer. The goal is to gradually "walk" the lug nut off the stud. This technique is best suited for situations where the stripping is not too severe, and some semblance of a flat surface remains. Exercise caution to avoid damaging the wheel or stud.
4. The Heat Treatment (Use with Extreme Caution)
Applying heat can help break the bond between the lug nut and stud. Use a propane torch to heat the lug nut for a short period (approximately 30-60 seconds). Avoid overheating the surrounding area, especially the wheel bearings and tires. After heating, immediately attempt to remove the lug nut with an extractor socket or wrench. The rapid expansion and contraction of the metal can sometimes be enough to loosen the grip. Remember to wear appropriate safety gear, including heat-resistant gloves and eye protection. This method is inherently risky and should be employed only when other options have failed.
5. The Grinding Gambit (A Last Resort)
If all else fails, you can resort to carefully cutting the lug nut with an angle grinder. This is a dangerous process that requires precision and unwavering focus. Wear appropriate safety gear, including a face shield, gloves, and hearing protection. Use a thin cutting disc to carefully cut a slit into one side of the lug nut, being extremely careful not to damage the wheel stud or the wheel itself. Once the slit is deep enough, you may be able to use a chisel and hammer to split the lug nut open and remove it. This method is highly prone to error and should only be attempted as a last resort.
6. Welding a New Nut (For the Experienced Welder)
If you have access to a welder and possess the necessary skills, welding a new nut onto the stripped lug nut can provide a solid point for applying torque. Clean the surface of the stripped lug nut thoroughly and position a new nut (of the same size and thread pitch) on top. Tack weld the new nut in several places to secure it. Then, weld around the entire perimeter of the new nut to create a strong bond. Allow the weld to cool completely before attempting to remove the lug nut with a wrench or socket. This method requires considerable welding expertise and should only be performed by experienced individuals.
Post-Removal Considerations
Once the stripped lug nut is finally vanquished, the battle isn't quite over. It's imperative to inspect the wheel stud for any signs of damage. If the threads are worn or damaged, the stud must be replaced. Ignoring this step can lead to future wheel security issues. Furthermore, replace all lug nuts on the affected wheel with new ones to ensure uniform torque and prevent future stripping. Always use a torque wrench to tighten lug nuts to the manufacturer's specified torque value. Over-torquing is a primary cause of stripped lug nuts, so avoid the temptation to "crank them down" excessively.
Removing a stripped lug nut is a test of skill, patience, and resourcefulness. By understanding the underlying mechanics, employing the appropriate tools, and following a systematic approach, you can overcome this common automotive challenge and emerge victorious. Remember to prioritize safety and exercise caution throughout the process.