How To Get Bugs Off The Front Of Your Car
Alright, let's talk about something every driver deals with, especially during the warmer months: bug splatters. That sticky, crusty mess plastered across your car's front end isn't just unsightly; it can actually damage your paint over time. Bug guts contain acids that etch into the clear coat, leading to permanent blemishes if left untreated. Think of it like leaving bird droppings on too long – the result is the same. So, how do we safely and effectively remove these unwelcome hitchhikers? Let's get into it.
Understanding the Problem: Why are Bugs So Hard to Remove?
Before we dive into the solutions, it's important to understand why bug removal can be such a pain. As mentioned, the acidic nature of bug remains is a major contributor. But there's more to it than that.
- Protein Breakdown: The proteins in insect bodies break down quickly, creating a strong bond with your car's paint.
- The "Baked On" Effect: The sun's heat essentially bakes the bug remains onto the surface, making them even harder to dislodge. This is especially true if you've been driving for long periods in direct sunlight.
- Variety Matters: Different bugs have different compositions. Some are easier to remove than others, depending on what they've been eating and their overall makeup.
The Arsenal: Tools and Supplies You'll Need
Having the right tools makes all the difference. Here's a breakdown of what you'll need to tackle that bug massacre:
- Bug and Tar Remover: This is your primary weapon. Look for a product specifically designed for bug and tar removal. These formulas contain solvents that break down the bug remains without damaging your paint. Do not use harsh chemicals or abrasive cleaners.
- Microfiber Towels: Invest in a good set of microfiber towels. These are soft and non-abrasive, preventing scratches during the cleaning process. You'll need several, as you'll want to use a clean towel for each wipe.
- Wash Mitt: A dedicated wash mitt is essential for pre-soaking and gentle scrubbing.
- Two Buckets: The two-bucket method is crucial for preventing scratches. One bucket contains your soap solution, and the other contains clean water for rinsing your wash mitt.
- Car Wash Soap: Use a pH-neutral car wash soap. Dish soap is not recommended, as it can strip away wax and damage your paint.
- Hose with Adjustable Nozzle: You'll need a hose to rinse your car thoroughly. A nozzle with adjustable settings will allow you to control the water pressure.
- (Optional) Clay Bar: For stubborn bug remains that resist other methods, a clay bar can be effective. However, use it with caution and follow the manufacturer's instructions carefully.
- (Optional) Pressure Washer: A pressure washer can speed up the rinsing process, but be careful not to use too much pressure, as this can damage your paint. Start with a wide nozzle and low pressure setting.
The Battle Plan: Step-by-Step Bug Removal
Now for the fun part – getting those bugs off your car! Here's a detailed step-by-step guide:
Step 1: The Pre-Soak
The first step is to soften the bug remains. Use your hose to thoroughly rinse the affected area. This will remove loose dirt and debris and help to loosen the bug splatters.
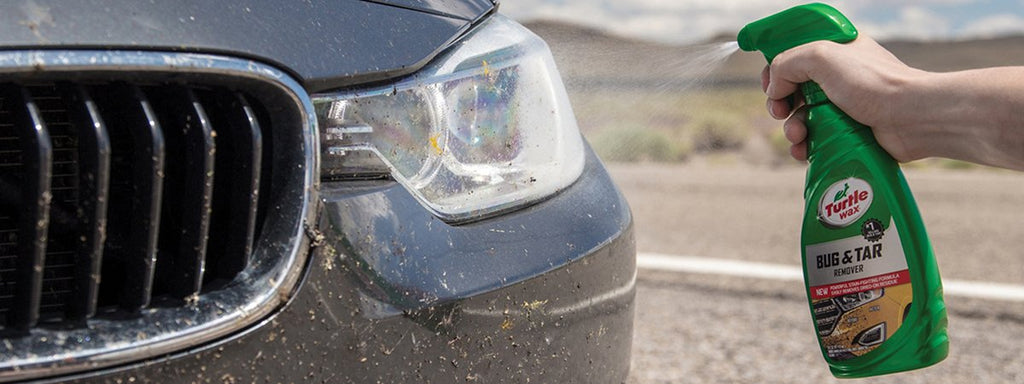
Step 2: Bug and Tar Remover Application
Spray the bug and tar remover liberally onto the affected areas. Follow the manufacturer's instructions, but generally, you'll want to let it dwell for a few minutes (usually 3-5 minutes) to allow the solvents to break down the bug remains. Do not let the product dry on the surface, especially in direct sunlight.
Step 3: Gentle Scrubbing (if needed)
After letting the bug and tar remover dwell, gently scrub the affected areas with your wash mitt. Use light pressure and circular motions. Avoid using excessive force, as this can scratch your paint. If the bug remains are particularly stubborn, you can reapply the bug and tar remover and let it dwell for a longer period.
Step 4: The Two-Bucket Wash
Fill one bucket with your car wash soap solution and the other with clean water. Dip your wash mitt into the soap solution, wash a small section of your car, and then rinse the mitt in the clean water bucket. Repeat this process until you've washed the entire affected area. This prevents you from transferring dirt and debris back onto your car's paint.
Step 5: Thorough Rinse
Rinse your car thoroughly with your hose to remove all traces of soap and bug and tar remover.
Step 6: Drying
Dry your car with clean, dry microfiber towels. Use a blotting motion to avoid scratching the paint.
Step 7: (Optional) Waxing
After washing and drying your car, consider applying a coat of wax or sealant. This will help to protect your paint and make it easier to remove bug splatters in the future.
Dealing with Stubborn Bugs: Advanced Techniques
Sometimes, those bugs just won't budge, even with the steps above. Here are a few more advanced techniques:
- Clay Bar Treatment: A clay bar can be used to remove embedded contaminants, including stubborn bug remains. Lubricate the surface with a clay bar lubricant and gently rub the clay bar over the affected areas. Be sure to knead the clay bar frequently to expose a clean surface.
- Dedicated Bug Sponge: There are specialized bug sponges available that are designed to safely remove bug remains without scratching your paint. Follow the manufacturer's instructions carefully.
- Professional Detailing: If you're unable to remove the bug remains yourself, consider taking your car to a professional detailer. They have the tools and expertise to safely and effectively remove even the most stubborn bug splatters.
Prevention is Key: Protecting Your Car's Finish
The best way to deal with bug splatters is to prevent them in the first place. Here are a few tips for protecting your car's finish:
- Regular Washing: Wash your car regularly, especially during bug season. This will prevent bug remains from building up and etching into your paint.
- Waxing and Sealing: Apply a coat of wax or sealant to your car's paint every few months. This will create a protective barrier that makes it easier to remove bug splatters.
- Paint Protection Film (PPF): Consider applying paint protection film (PPF) to the front of your car. PPF is a clear, self-healing film that protects your paint from scratches, chips, and bug splatters.
- Ceramic Coating: A ceramic coating provides a durable, hydrophobic layer that protects your paint from environmental contaminants, including bug splatters.
- Bug Deflectors: While some find them aesthetically unpleasing, bug deflectors can redirect airflow and reduce the number of bugs hitting your windshield and hood.
Cost Considerations
The cost of bug removal can vary depending on the severity of the problem and the methods you use. DIY bug removal can be relatively inexpensive, costing as little as $20-$50 for the necessary supplies (bug and tar remover, microfiber towels, car wash soap, etc.). However, if you need to use a clay bar or other specialized tools, the cost may be higher. Professional detailing can range from $100 to $300 or more, depending on the size of your car and the extent of the damage. Paint protection film (PPF) can cost anywhere from $500 to $2,000, depending on the coverage area and the type of film used. Ceramic coatings typically range from $500 to $1,500, depending on the size of your car and the number of coats applied.
Ultimately, dealing with bug splatters is a part of car ownership. By following these tips and using the right tools, you can keep your car looking its best and protect its finish from damage. And remember, prompt action is key! The sooner you remove those bugs, the easier it will be and the less likely they are to cause permanent damage. Good luck, and happy driving!