
How To Hook Up Jumper Cables To A Battery
Dead battery got you down? It's a common car problem, even in reliable vehicles like a Toyota Camry or a rugged Ford F-150. Luckily, jump-starting a car is a straightforward process you can master. This guide will walk you through the steps, explaining the technical details in a way that's easy to understand, whether you're a seasoned car enthusiast or just learning the basics.
Understanding the Basics: Why Batteries Die
Before we jump into the how-to, let's quickly cover why batteries fail. A car battery, typically a 12-volt lead-acid battery, provides the initial electrical power to start the engine. It also powers electrical accessories like lights, radio, and even the infotainment system in a modern Tesla Model 3 when the engine isn't running. Over time, batteries naturally lose their ability to hold a charge. This is accelerated by factors like:
- Leaving lights on: Headlights, interior lights – these drain the battery quickly, especially overnight.
- Extreme temperatures: Both excessive heat and cold can reduce battery life. Cold weather slows down the chemical reactions inside the battery.
- Short trips: If you only drive short distances, the alternator might not have enough time to fully recharge the battery after starting the engine.
- Age: Batteries typically last between 3 to 5 years.
- Parasitic drain: Even when the car is off, some systems like the alarm, clock, or computer memory continue to draw a small amount of power. This can drain the battery over time, especially if the car sits unused for extended periods.
The Right Tools for the Job
To jump-start a car, you'll need:
- Jumper cables: Choose a set with thick gauge wires for better current flow. Thinner, cheaper cables might struggle to deliver enough power, especially to larger engines like those found in a Chevrolet Silverado. Look for cables with robust clamps and insulation.
- A working vehicle: The "donor" vehicle. This needs a healthy battery to supply the needed power.
- Safety glasses: Protect your eyes from potential splashes of battery acid.
- Gloves (optional): For added protection.
Step-by-Step Guide: Hooking Up the Jumper Cables
Now, let's get to the actual jump-starting process. Safety is paramount, so read each step carefully.
Step 1: Position the Vehicles
Park the working (donor) vehicle close to the vehicle with the dead battery (the recipient). Position them so the batteries are as close as possible without the vehicles touching. Touching can create an electrical short, which is dangerous. Turn off both vehicles and engage the parking brakes. For added safety, consider placing wheel chocks behind the wheels of both vehicles, especially on an incline. If your car has an automatic transmission, make sure it's in Park. Manual transmission cars should be in Neutral.
Step 2: Locate the Batteries
In most vehicles, the battery is located under the hood. However, some cars, like certain BMW models (e.g., BMW 3 Series), might have the battery in the trunk. Refer to your owner's manual if you can't find the battery. Once you've located the batteries, inspect them. Look for any signs of damage, such as cracks, leaks, or corrosion. If you see any damage, do not attempt to jump-start the car. Call for professional assistance.
Step 3: Connect the Jumper Cables - Positive Connections
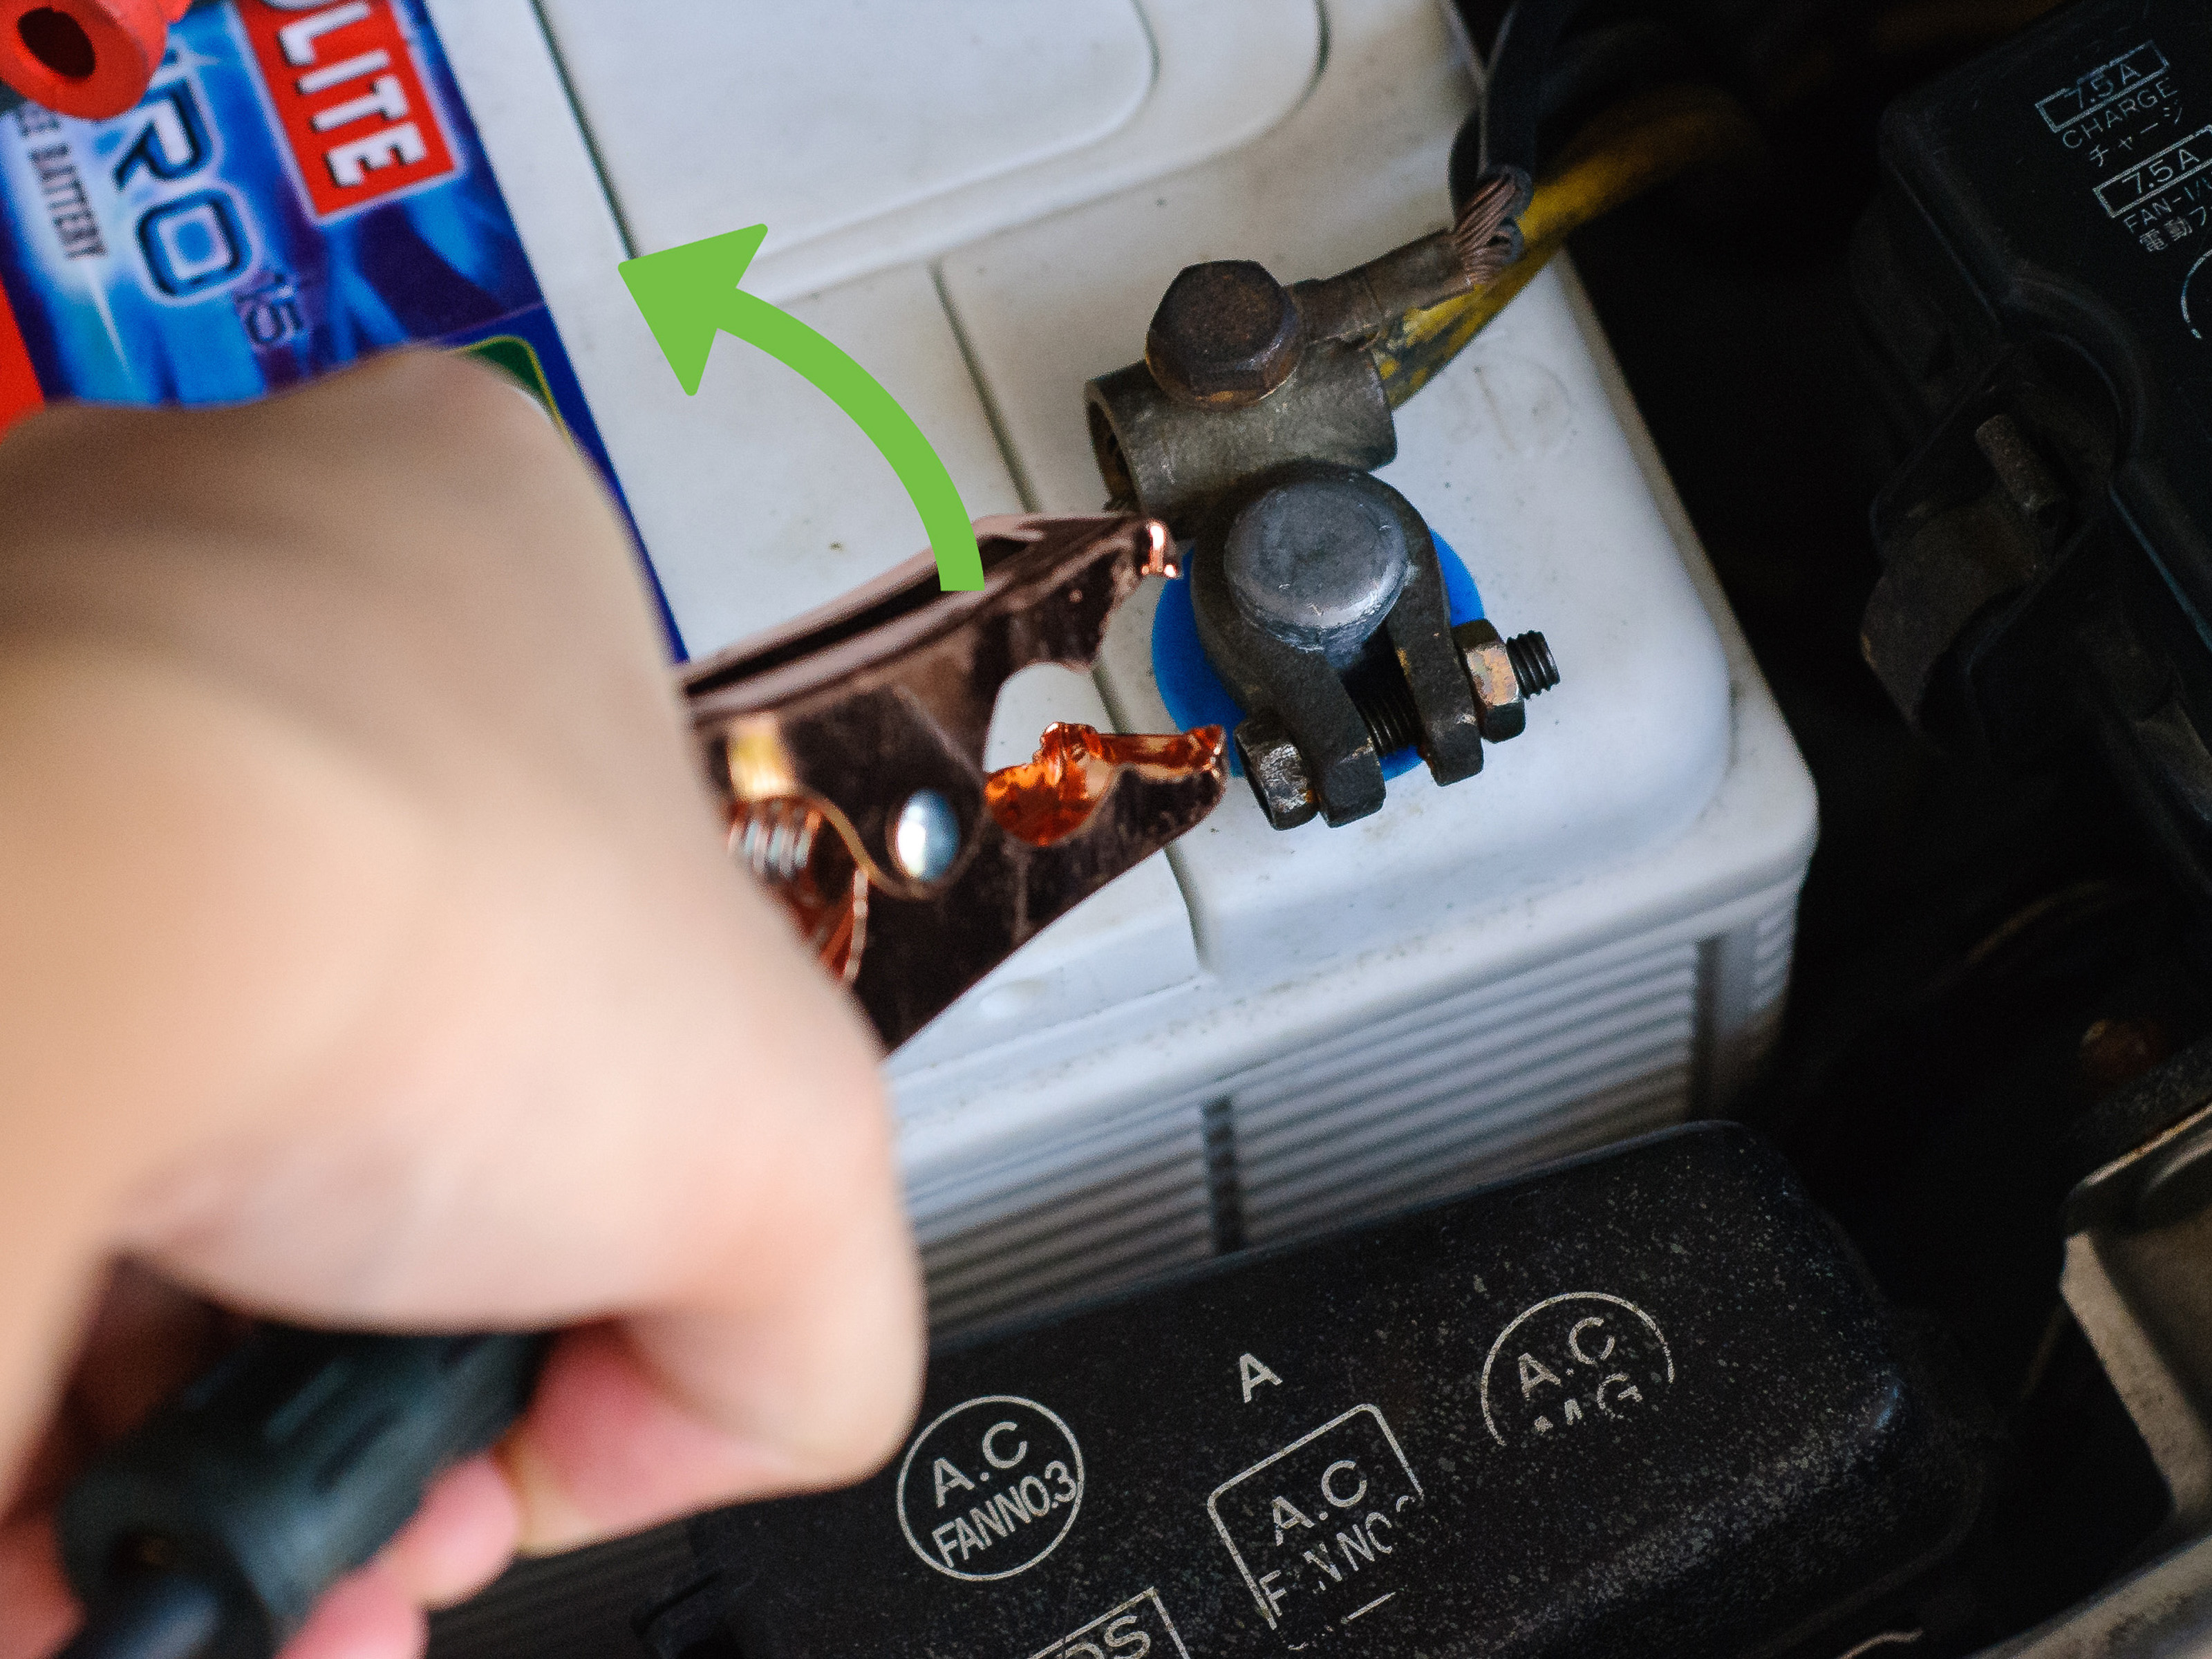
This is the most crucial step, so pay close attention. Jumper cables have two colors: red and black. Red is always positive (+), and black is always negative (-). Connect the red clamp to the positive (+) terminal on the dead battery. The positive terminal is usually marked with a "+" sign or a red cover. Ensure the clamp is securely attached.
Next, connect the other red clamp to the positive (+) terminal on the working vehicle's battery. Again, ensure a secure connection.
Step 4: Connect the Jumper Cables - Negative Connections
Now for the black (negative) cables. Connect one black clamp to the negative (-) terminal on the working vehicle's battery. The negative terminal is usually marked with a "-" sign or a black cover.
The final connection is critical for safety. Do not connect the remaining black clamp to the negative (-) terminal on the dead battery. Instead, connect it to a clean, unpainted metal surface on the dead car's engine block or chassis, away from the battery. This is called grounding. Good grounding points include a metal strut, a bolt on the engine block, or a metal bracket. Grounding away from the battery reduces the risk of sparks igniting hydrogen gas that may have built up around the battery. A spark near the battery could cause an explosion, especially if the battery is old or damaged. Some cars, like many modern Volvos, even have designated grounding points for jump-starting clearly marked in the engine bay.
Why Grounding Matters: Connecting directly to the negative terminal on the dead battery creates a closed circuit very close to the battery itself. Any sparks generated during the connection are more likely to ignite hydrogen gas released by the battery, leading to a potential explosion. By grounding to a remote metal part of the car, you move the spark away from the battery, significantly reducing the risk.
Step 5: Start the Working Vehicle
Start the engine of the working vehicle and let it run for a few minutes. This allows the alternator to charge the dead battery slightly.
Step 6: Attempt to Start the Dead Vehicle
Now, try to start the vehicle with the dead battery. If it starts, let it run for at least 20-30 minutes to allow the alternator to recharge the battery. If it doesn't start immediately, wait a few more minutes with the working vehicle running and try again. If it still doesn't start after several attempts, there may be a more serious problem than just a dead battery. Call a mechanic or tow truck.
Step 7: Disconnect the Jumper Cables - In Reverse Order
Once the dead vehicle is running, disconnect the jumper cables in the reverse order of connection:
- Remove the black clamp from the grounding point on the previously dead vehicle.
- Remove the black clamp from the negative (-) terminal on the working vehicle's battery.
- Remove the red clamp from the positive (+) terminal on the working vehicle's battery.
- Remove the red clamp from the positive (+) terminal on the now-running vehicle's battery.
Be careful to avoid letting the clamps touch each other or any metal surfaces while disconnecting them.
Step 8: Let the Recharged Vehicle Run
After jump-starting, allow the recharged vehicle to run for an extended period (at least 20-30 minutes) or drive it around to allow the alternator to fully recharge the battery. A short drive around town will help. If the car struggles to start again after being turned off, the battery is likely too weak and needs to be replaced.
Troubleshooting
- Clicking sound but no start: This usually indicates a low battery. Ensure the jumper cables are properly connected and try again. If the clicking persists, the starter motor might be faulty.
- No sound at all: Check the battery connections for corrosion. Clean them with a wire brush if necessary. Also, check the fuses.
- Engine turns over slowly: This could indicate a weak battery or a problem with the starter motor.
Practical Takeaways
- Regular Battery Maintenance: Have your battery tested regularly, especially before winter. Most auto parts stores offer free battery testing.
- Keep Jumper Cables Handy: Store a quality set of jumper cables in your vehicle.
- Learn Your Car's Battery Location: Know where your car battery is located and how to access it.
- Consider a Portable Jump Starter: A portable jump starter is a self-contained unit that can jump-start your car without needing another vehicle. These are a convenient option, especially for solo drivers.
- Replace Old Batteries: Don't wait until your battery dies completely. Replace it proactively every 3-5 years.
Jump-starting a car is a valuable skill that can save you time and money. By understanding the process and following these steps carefully, you can confidently get your car back on the road.