
How To Program A Chevy Garage Door Opener
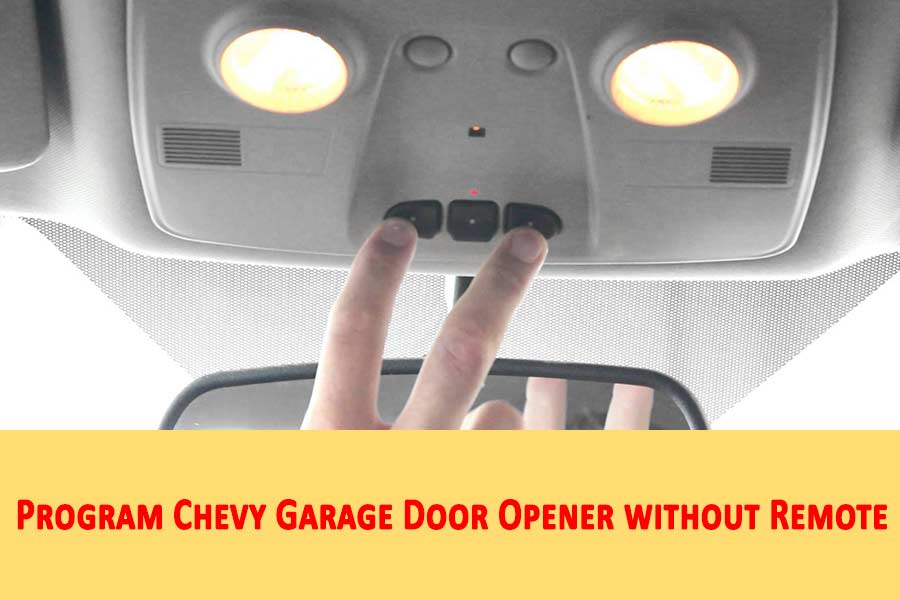
Many modern Chevrolet vehicles come equipped with a built-in garage door opener system, often referred to as HomeLink. This convenient feature allows you to control your garage door directly from your car's interior, eliminating the need for a separate remote. Programming your Chevy's garage door opener can seem daunting, but it's usually a straightforward process. This article will guide you through the steps, explaining the technical aspects in an accessible way.
Understanding HomeLink and Rolling Codes
The HomeLink system essentially acts as a universal remote control. It learns the radio frequency signal emitted by your garage door opener's remote and stores it in your car's memory. This allows you to activate your garage door opener by pressing a button inside your vehicle.
A crucial concept to understand is rolling codes. Most modern garage door openers utilize rolling code technology for enhanced security. Unlike older systems that transmit a fixed code, rolling code openers generate a new code each time the remote is used. This prevents potential intruders from recording the signal and using it later to open your garage door. Think of it like a one-time password system for your garage.
Vehicles like the Chevy Silverado, Equinox, Tahoe, and Corvette typically include HomeLink, though availability may vary depending on the trim level and model year. The programming process is generally similar across different Chevy models, but always refer to your owner's manual for specific instructions.
Step-by-Step Programming Guide
Here's a general guide to programming your Chevy's garage door opener. Remember to consult your owner's manual for model-specific instructions.
Step 1: Clear Existing Programming (If Necessary)
If you're programming a new vehicle or if you've previously programmed the HomeLink buttons, it's a good idea to clear the existing programming first. This ensures a clean slate for the new garage door opener. To do this, typically you'll press and hold the two outer HomeLink buttons simultaneously until the HomeLink indicator light flashes rapidly (usually for about 20-30 seconds). This process is similar to resetting the memory on many electronic devices.
Step 2: Training the HomeLink Button
Next, you need to train the HomeLink button with your garage door opener's remote. Here's how:
- Position your vehicle: Park your vehicle directly in front of your garage door, facing the door. Make sure the engine is running for a stable power supply.
- Hold the Remote: Hold your garage door opener's remote about 1-3 inches away from the HomeLink buttons in your vehicle. The exact distance may vary, so experiment if you don't get it right the first time.
- Simultaneously Press Buttons: Press and hold both the button on your garage door opener remote and the HomeLink button you want to program in your car.
- Observe the Indicator Light: Watch the HomeLink indicator light. Initially, it will likely flash slowly. Continue holding both buttons until the indicator light flashes rapidly or becomes solid. This indicates that the HomeLink button has successfully learned the frequency from your remote. This learning process involves the HomeLink system essentially "listening" to the remote's radio frequency signature and storing it.
- Release the Buttons: Once the indicator light flashes rapidly or becomes solid, release both buttons.
Example: Imagine you're programming the HomeLink in a Chevy Traverse. You'd hold your garage door remote near the HomeLink buttons on the rearview mirror and press both the remote's button and the desired HomeLink button simultaneously until the light changes.
Step 3: Synchronization with Rolling Codes (If Applicable)
If your garage door opener uses rolling code technology, you'll need to synchronize the HomeLink system with the garage door opener's receiver. This is because the HomeLink has learned the initial code from your remote, but it needs to be "introduced" to the rolling code system of your garage door opener.
- Locate the "Learn" Button: Find the "Learn" or "Smart" button on your garage door opener motor. This button is usually located on the back of the motor housing. Refer to your garage door opener's manual if you're unsure where it is.
- Press the "Learn" Button: Press and release the "Learn" button. You typically have a limited time window (around 30 seconds) to complete the next step.
- Press the Programmed HomeLink Button: Immediately after pressing the "Learn" button on the garage door opener, go back to your car and press the HomeLink button you programmed in Step 2. Press and release the button. You might need to press it multiple times (up to three times), pausing for a few seconds between each press, until the garage door starts to move. The system is trying to finalize the code synchronization.
- Test the System: Once the garage door activates, test the programmed HomeLink button to ensure it consistently opens and closes the door.
Example: Think of it like pairing Bluetooth devices. The HomeLink has "discovered" the garage door opener's frequency, but now it needs to "pair" with the rolling code system to work reliably. Similar to how you press a button on your Bluetooth headphones to initiate pairing with your phone.
If your garage door opener doesn't have a visible "Learn" button, consult your garage door opener's manual. Some openers might require a specific sequence of actions involving the remote control to initiate the learning process.
Troubleshooting Tips
Sometimes, programming the HomeLink system can be tricky. Here are some common troubleshooting tips:
- Weak Remote Battery: Ensure the battery in your garage door opener remote is fresh. A weak battery can prevent the HomeLink system from learning the signal correctly.
- Distance: Experiment with the distance between the remote and the HomeLink buttons. Sometimes, being too close or too far away can interfere with the programming process.
- Garage Door Opener Compatibility: Some older or less common garage door opener systems may not be compatible with HomeLink. Check the HomeLink website or your Chevy's owner's manual for compatibility information.
- Repeated Attempts: Don't be discouraged if it doesn't work the first time. Try repeating the steps carefully, ensuring you're following the instructions precisely.
- Seek Professional Assistance: If you've tried everything and still can't get it to work, consider contacting a HomeLink representative or a qualified automotive technician for assistance.
Analogy: It's like trying to tune a radio. You need to find the right frequency and adjust the antenna for the clearest signal. Similarly, programming the HomeLink requires finding the correct position and ensuring a strong signal from the remote.
Practical Takeaways
- Consult Your Owner's Manual: Always refer to your Chevy's owner's manual for specific instructions tailored to your vehicle model and year.
- Understand Rolling Codes: Knowing whether your garage door opener uses rolling codes is crucial for successful programming.
- Be Patient: The programming process might require a few attempts. Don't give up easily.
- Test Thoroughly: After programming, test the HomeLink button multiple times to ensure it consistently opens and closes the garage door.
- Consider Security: For added security, regularly clear and reprogram your HomeLink system, especially if you sell your vehicle or move to a new home.
By following these steps and understanding the underlying technology, you can successfully program your Chevy's garage door opener and enjoy the convenience of this feature.