How To Program Compustar Remote
Compustar is a leading name in vehicle security and remote start systems. Programming a Compustar remote, while seemingly daunting, is a straightforward process that can be accomplished with the right information. This guide provides a comprehensive walkthrough for programming various Compustar remote models.
Understanding Compustar Remote Programming
Before diving into the specifics, it's crucial to understand the underlying principles of remote programming. The process essentially involves synchronizing the remote's unique identification code with the vehicle's control module. This allows the remote to send commands that the module recognizes and executes. Most Compustar systems utilize a valet/override button or a programming mode accessible via the ignition switch.
Identifying Your Compustar System
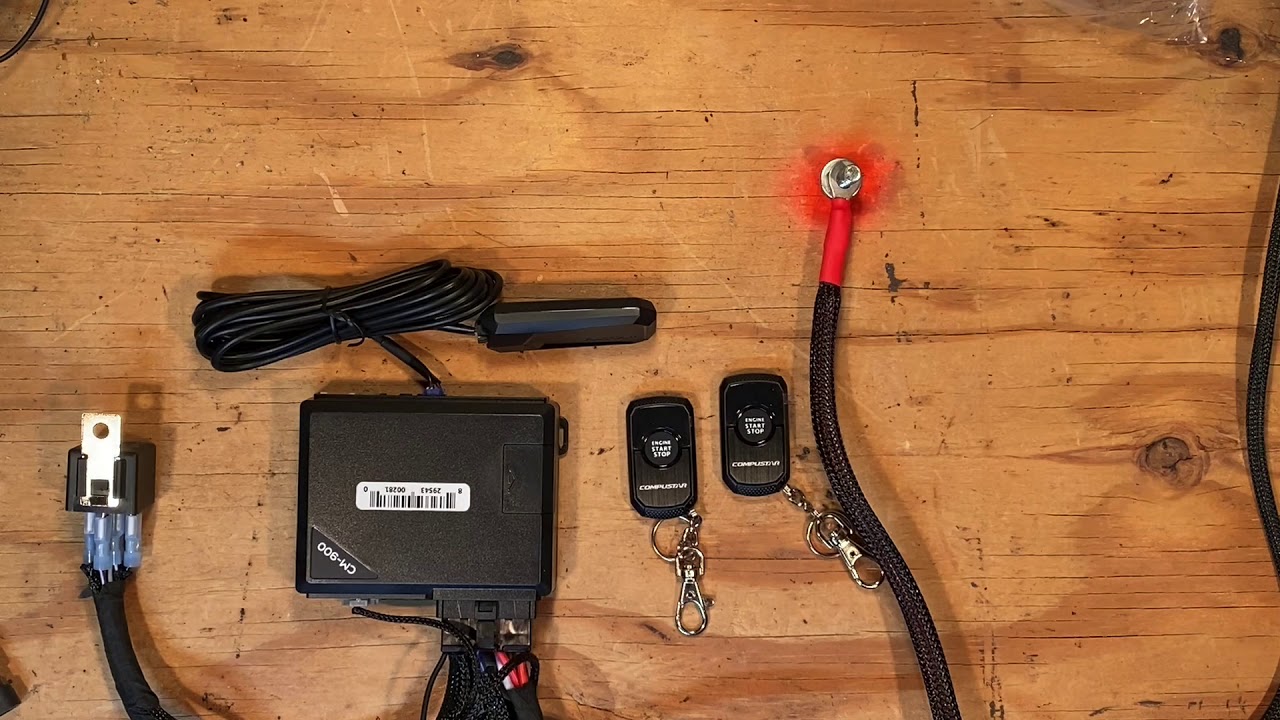
The first step is to identify the specific Compustar system installed in your vehicle. This information is usually found in the owner's manual provided with the system. If the manual is unavailable, look for a sticker or label on the control module itself, typically located under the dashboard. Common Compustar systems include the CSX, CM6XXX, and FT- series. Knowing your system will ensure you use the correct programming procedure.
General Programming Procedure (Valet/Override Button)
This method applies to many Compustar systems that utilize a physical valet/override button. Note that this is a generalized procedure, and specific steps may vary depending on the model. Always consult your owner's manual for the most accurate instructions.
- Enter Valet/Override Mode: Turn the ignition key to the "ON" position. Within 5 seconds, press and release the valet/override button a specific number of times, as determined by your system's manual. For example, some systems require 5 presses. The system will typically provide an audible confirmation, such as a chirp from the siren.
- Initiate Programming: After the specified number of presses, hold down the valet/override button until the system provides another audible confirmation. This indicates that the system is now in programming mode.
- Program the Remote: Press and hold both the Lock and Unlock buttons on the remote simultaneously until the system chirps again. This confirms that the remote's code has been learned.
- Test the Remote: Release the buttons and test the remote's functionality by pressing the Lock, Unlock, and Remote Start buttons.
- Exit Programming Mode: Turn the ignition key to the "OFF" position to exit programming mode. The system should now respond to the newly programmed remote.
Example: Imagine you have a Compustar CSX system. Your manual states that to enter programming mode, you need to press the valet button 5 times. You turn the key to "ON", press the button 5 times, and then hold it down until you hear a chirp. You then proceed to program your remote by pressing Lock and Unlock.
Programming with the Ignition Switch (Without Valet Button)
Some older Compustar systems or systems installed without a physical valet button rely on specific ignition key sequences to enter programming mode. These sequences are typically more complex and require precise timing.
- Locate Programming Sequence: Consult your system's manual or online resources to find the correct ignition key sequence for your specific model. This sequence usually involves turning the ignition key "ON" and "OFF" a certain number of times within a specific timeframe.
- Execute the Sequence: Perform the ignition key sequence precisely as described in the manual. The system should provide an audible confirmation when it enters programming mode (e.g., a siren chirp or parking light flash).
- Program the Remote: Once in programming mode, press and hold both the Lock and Unlock buttons on the remote simultaneously until the system provides another audible confirmation.
- Test the Remote: Release the buttons and test the remote's functionality.
- Exit Programming Mode: Turn the ignition key to the "OFF" position to exit programming mode.
Important Note: The timing and number of key turns are critical for this method. If you don't perform the sequence correctly, the system will not enter programming mode.
Specific System Programming Examples
Compustar CM6XXX Series
The CM6XXX series is a common platform. Programming typically involves the valet/override button method described earlier. However, some models may require a slightly different button press sequence. Always refer to the specific CM6XXX model's manual for accurate instructions.
For instance, some CM6XXX systems require the valet button to be pressed and held while turning the ignition to the "ON" position.
Compustar FT-Series (Blade Compatible)
The FT-Series often integrates with the Compustar Blade immobilizer bypass module. This module simplifies installation and provides enhanced security. Programming the remote on an FT-Series system with a Blade module may involve a slightly modified procedure. The Blade module itself might need to be programmed separately before programming the remotes.
Often, the Blade requires a download from the iDatalink website and requires a Weblink updater tool. Consult the Blade module's instructions for detailed programming steps.
Programming Additional Remotes
Most Compustar systems can store multiple remote codes. To program additional remotes, simply repeat the programming procedure while the system is in programming mode. The system will typically overwrite the oldest stored code if it reaches its memory limit.
Pro-Tip: When programming multiple remotes, have all remotes ready before entering programming mode. This will save time and prevent the system from timing out.
Troubleshooting Common Programming Issues
Remote programming can sometimes be problematic. Here are some common issues and their solutions:
- System Not Entering Programming Mode: Ensure you are following the correct procedure for your specific system. Double-check the timing and button press sequences. A weak battery in the remote or vehicle can also cause issues.
- Remote Not Responding After Programming: Verify that the remote's battery is good. If the remote still doesn't respond, try reprogramming it again. The system may not have properly learned the remote's code.
- Valet/Override Button Not Working: Check the wiring connection to the valet/override button. The button may be faulty and require replacement.
- System Chirping Continuously: This usually indicates a problem with the system or an error during programming. Disconnect the vehicle's battery for a few minutes to reset the system.
Warning: Tampering with the immobilizer bypass module can cause the vehicle not to start. If you are unsure about any step, it's always best to consult a professional installer.
Advanced Programming Options
Some Compustar systems offer advanced programming options, such as configuring remote start run time, enabling/disabling certain features, and adjusting sensitivity settings. These options are typically accessed through a separate programming menu or via a PC-based programming tool. Refer to your system's manual for detailed instructions on accessing and using these advanced features.
Security Considerations
When programming remotes, be mindful of security. Avoid programming remotes in public places where unauthorized individuals could potentially learn your remote's code. Never share your valet/override button location or programming procedure with anyone you don't trust. Consider enabling the "anti-code grabbing" feature, if available, to further enhance security.
Professional Installation and Support
While this guide provides comprehensive instructions, professional installation and programming are recommended for optimal performance and security. A qualified installer has the expertise and tools to ensure that your Compustar system is properly installed and configured. Additionally, a professional can provide ongoing support and troubleshooting assistance.
Disclaimer: This information is for educational purposes only. Automotive systems can be complex. Always consult your vehicle's service manual and follow all safety precautions when working on your vehicle. The author and publisher are not responsible for any damage or injury resulting from the use of this information.