How To Read Obd2 Codes Without Scanner Gm
Alright, so your check engine light is on in your GM vehicle, and you're trying to avoid a trip to the shop. You're a capable DIYer, and you're thinking, "There *has* to be a way to read these OBD2 codes without a dedicated scanner." Well, you're in luck! While a scanner is the ideal and often easiest method, many older GM vehicles offer a trick to retrieve codes directly from the instrument cluster or through other onboard systems. Let's dive in and explore these methods, bearing in mind that these techniques are generally applicable to older GM models (typically pre-2005 or so) and may not work on newer vehicles which rely heavily on CAN bus systems accessible only via a dedicated scanner.
Method 1: The Key Cycling Trick (Older GM Models)
This is the most common and widely documented method for retrieving OBD2 codes without a scanner on older GM vehicles. It leverages the vehicle's built-in diagnostic capabilities.
How it Works:
This method uses a specific sequence of key turns (cycling the ignition) to put the vehicle into diagnostic mode. When in diagnostic mode, the check engine light (or, in some cases, the security light) will flash a sequence that represents the Diagnostic Trouble Codes (DTCs).
Step-by-Step Instructions:
- Ensure the Vehicle is Off: Turn off the ignition and make sure all accessories are off.
- Locate the Diagnostic Connector: Most commonly, this is under the dash, often near the steering column or in the glove box. Some older models might have it under the hood.
- The Key Cycling Sequence: This is the critical part. The exact sequence can vary slightly depending on the year and model of your GM vehicle, but the most common is:
- Turn the ignition key to the ON position (but do not start the engine).
- Turn the key OFF.
- Turn the key ON.
- Turn the key OFF.
- Turn the key ON.
This effectively turns the key ON-OFF-ON-OFF-ON. This sequence should be performed fairly quickly, within a few seconds.
- Observe the Check Engine Light: If the sequence was performed correctly, the check engine light will begin to flash a sequence of blinks.
- Deciphering the Flashes: The flashes are broken down into a pattern that represents the DTC.
- The first flash sequence is typically "12," which repeats three times. This indicates that the diagnostic mode is active and the system is ready to display codes. This "12" code may also be used to signal that there are no stored codes.
- After the "12" sequence (or lack thereof), the system will display any stored DTCs. Each DTC will be flashed in a sequence, also followed by a pause. For example, if the code is "43," the light will flash four times, pause, then flash three times. This sequence will repeat three times for each code before moving on to the next.
- Record the Codes: Carefully record each flashed code. It's best to write them down.
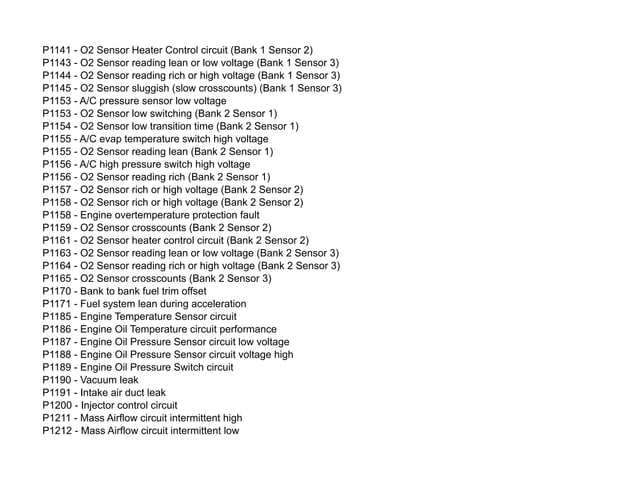
- Interpret the Codes: Once you have all the codes, you'll need to look them up in a GM-specific OBD2 code list. Many resources are available online, or you can consult a repair manual for your specific vehicle. For example, a code of "P0300" (which is not shown by flashing sequences like described above, but it is an example of an OBD2 code), would indicate a random/multiple cylinder misfire.
Important Considerations:
- Timing is Crucial: The key cycling sequence must be performed relatively quickly and accurately. If it doesn't work the first time, try again.
- Code 12: If all you see is the repeating "12" code, it generally means there are no stored DTCs. However, it doesn't necessarily mean there isn't a problem. Some issues might not trigger a code right away, or the code might have been cleared recently.
- Not All Codes: This method might not retrieve all possible codes. Some more advanced systems or manufacturer-specific codes may only be accessible via a scanner.
- Model Specificity: Always check resources specific to your year and model of GM vehicle to confirm the correct procedure and code list.
Method 2: Using the Instrument Cluster (Some Specific Models)
Certain GM vehicles, particularly those from the late 90s and early 2000s, have a built-in diagnostic display within the instrument cluster. This usually involves pressing a combination of buttons to enter a diagnostic mode where codes can be read directly on the digital display.
Examples (These vary greatly by model - check your owner's manual!):
- C5 Corvette (1997-2004): Often involves pressing and holding the "OPTIONS" button while starting the car, then using the "FUEL" button to scroll through the various diagnostic menus until you find the DTC section.
- Some Buick Models: Could involve holding down the "INFO" button or a similar button on the instrument cluster while turning the ignition to the "ON" position.
- Other Models: Could use a combination of buttons like "TRIP RESET," "ODOMETER," or similar buttons in conjunction with the ignition key.
Finding the Correct Procedure:
The procedure for accessing the instrument cluster diagnostic mode varies dramatically depending on the specific GM vehicle. The *best* resource is your vehicle's owner's manual. If you don't have the manual, search online forums specific to your model. For example, search "C5 Corvette DTC without scanner" or "Buick Century OBD2 codes instrument cluster."
Reading the Codes:
Once in diagnostic mode, the instrument cluster display will typically show codes in a format similar to standard OBD2 codes (e.g., "P0171," "C1234," etc.). Record these codes and look them up in a GM-specific OBD2 code list.
Understanding OBD2 Codes and Terminology
Before you start troubleshooting, it's helpful to understand some basic OBD2 terminology:
- OBD2 (On-Board Diagnostics II): A standardized system for monitoring and diagnosing vehicle systems.
- DTC (Diagnostic Trouble Code): A code stored in the vehicle's computer that indicates a problem with a specific system or component.
- P-Codes (Powertrain Codes): Relate to the engine and transmission (e.g., P0300 - Random/Multiple Cylinder Misfire).
- B-Codes (Body Codes): Relate to body-related systems like airbags, power windows, and door locks.
- C-Codes (Chassis Codes): Relate to chassis systems like ABS, traction control, and suspension.
- U-Codes (Network Communication Codes): Relate to communication issues between different control modules in the vehicle.
Clearing the Codes
While reading the codes is important, you might also want to clear them after you've addressed the problem. With a scanner, this is a simple button press. Without one, it's a bit more involved. The most common method is disconnecting the negative battery cable for a period of time (typically 15-30 minutes). This will reset the vehicle's computer and clear the stored codes. However, be aware that this will also reset other settings, such as radio presets and trip odometers.
Important Note: Clearing the codes without fixing the underlying problem will only result in the check engine light coming back on. It's essential to diagnose and repair the issue before clearing the codes.
When a Scanner is Necessary
While these methods can be helpful, they have limitations. Modern vehicles with complex CAN bus systems often require a dedicated OBD2 scanner to access all DTCs, especially manufacturer-specific codes. A scanner also provides live data, allowing you to monitor various engine parameters in real-time, which is invaluable for diagnosing intermittent or complex issues. Furthermore, a good scanner can often perform advanced functions like resetting service lights, performing system tests, and reprogramming certain components.
If you find yourself frequently dealing with check engine lights or want more in-depth diagnostic capabilities, investing in a quality OBD2 scanner is highly recommended. They range from inexpensive handheld models to more advanced professional-grade tools.
In conclusion, while reading OBD2 codes without a scanner is possible on some older GM vehicles, it's not always the most reliable or comprehensive method. These techniques are valuable for basic troubleshooting and can save you a trip to the shop in some cases, but be aware of their limitations and consider investing in a scanner for more advanced diagnostics.