
How To Remove Locking Wheel Nuts From Car
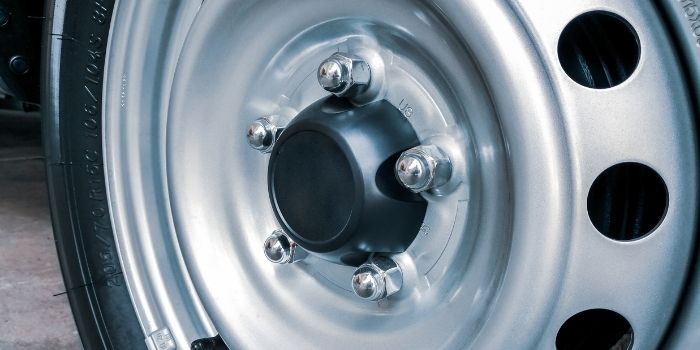
Locking wheel nuts, those seemingly insignificant security measures, stand as the last line of defense against opportunistic wheel theft. While effective in deterring casual pilfering, they can become a significant headache when you need to change a tire, perform brake work, or simply remove the wheel for any maintenance. Losing the key or encountering a stripped locking nut renders the standard socket useless, demanding alternative approaches. This guide dissects the problem and provides a comprehensive overview of various methods, ranging from the minimally invasive to the more forceful, to remove stubborn locking wheel nuts.
Understanding the Locking Wheel Nut Mechanism
Before diving into removal techniques, it's crucial to understand how these nuts function. Most locking wheel nuts feature a unique, irregular pattern on their outer surface. This pattern corresponds to a matching pattern inside the specialized key that comes with the set. When the key is engaged and turned with a lug wrench, it allows the nut to be tightened or loosened like any other. The security stems from the vast number of possible key combinations, making it improbable for a thief to possess the correct one. Some designs also incorporate a rotating collar around the nut body, making it difficult to grip with conventional tools.
Different manufacturers employ varying locking mechanisms. Some utilize external patterns, as described above, while others feature internal patterns or even magnetic properties. The specific design will influence the most effective removal method. It’s also important to acknowledge that attempting to remove a locking wheel nut without the key will likely damage the nut itself, and potentially the surrounding wheel. Therefore, proceed with caution and choose the least destructive method possible.
Methods for Removing Locking Wheel Nuts Without the Key
Several methods exist for removing locking wheel nuts when the key is unavailable. These methods vary in their invasiveness, risk of damage, and required tools. We'll explore each, outlining their strengths, weaknesses, and necessary precautions.
1. The Wheel Nut Extractor Socket
This is often the first line of attack and the least destructive. Wheel nut extractor sockets are specifically designed to grip damaged or rounded nuts. They feature a reverse spiral flute that bites into the outer surface of the locking nut as you turn it counter-clockwise. The tighter you turn, the stronger the grip becomes.
How it Works: The extractor socket is hammered onto the locking nut, ensuring a tight fit. Then, a lug wrench is attached to the extractor socket, and force is applied to loosen the nut. The spiral flutes dig into the locking nut's surface, providing the necessary grip to break it free.
Pros: Relatively inexpensive, readily available, and minimizes damage to the wheel compared to more aggressive methods. It's effective on nuts that aren't severely damaged or excessively tightened.
Cons: May not work on hardened locking nuts or those with rotating collars. It also requires enough exposed surface on the locking nut to allow the extractor socket to grip effectively. Incorrectly sized sockets can damage the wheel.
2. Impact Socket Set Method
This method is similar to the wheel nut extractor, but it relies on an impact socket set and an impact wrench for increased power. Select a socket that is slightly smaller than the locking nut. Hammer the socket onto the nut to create a tight, forceful fit. Then, use the impact wrench to apply a strong rotational force.
How it Works: The impact wrench delivers rapid bursts of torque, helping to break the nut free from its seated position. The hammering action before using the wrench helps to ensure a firm grip and minimizes slippage.
Pros: More powerful than the extractor socket alone and often successful on tighter or slightly damaged nuts. An impact wrench provides significantly more torque than manual lug wrench methods.
Cons: Increases the risk of damaging the wheel if the socket slips or if excessive force is applied. It's also less effective on locking nuts with rotating collars or those made from very hard materials. Requires access to an impact wrench, air compressor (if pneumatic), and impact socket set.
3. Welding a Nut Onto the Locking Nut
This is a more involved method that requires welding equipment and experience. A standard nut is welded directly onto the locking wheel nut, effectively creating a new, solid connection point that can be turned with a standard socket.
How it Works: A nut of appropriate size is positioned over the locking wheel nut and welded securely in place. The weld must be strong enough to withstand the torque required to remove the locking nut. Once cooled, a lug wrench or socket can be used to turn the welded nut, removing the locking wheel nut along with it.
Pros: Highly effective, especially on severely damaged or rounded locking nuts. It provides a very strong and reliable connection point for removal.
Cons: Requires welding equipment and expertise. There's a significant risk of damaging the wheel, hub, or surrounding components with heat from the welding process. It’s essential to protect the wheel and use appropriate welding techniques. The wheel needs to be properly grounded during welding to prevent electrical damage to the car's electronics. Not recommended for beginners. Requires extreme caution!
4. The Cold Chisel Method
This is a last resort method that involves using a cold chisel and hammer to forcefully turn the locking nut. It is highly destructive and should only be considered if all other options have failed and professional assistance is unavailable.
How it Works: The cold chisel is positioned at an angle on the outer edge of the locking nut, and hammered repeatedly to create a notch. The chisel is then used to lever the nut in a counter-clockwise direction. This process is repeated until the nut begins to loosen.
Pros: Can be effective in extreme situations where other methods fail. Requires minimal tools (cold chisel and hammer).
Cons: Very high risk of damaging the wheel, hub, and surrounding components. It’s a slow, arduous process and can be dangerous if the chisel slips. It's also ineffective on locking nuts with rotating collars. Often results in irreparable damage to the wheel. Use with extreme caution and only as a last resort.
Prevention is Key
The best way to avoid the hassle of removing locking wheel nuts without the key is to prevent the situation in the first place. Here are a few tips:
- Keep the Key Safe: Store the locking wheel nut key in a designated, easily accessible location in your vehicle. Many owners keep them with the jack and lug wrench.
- Note the Key Code: Record the key code in a safe place, separate from the key itself. This code can be used to order a replacement key from the manufacturer.
- Regularly Check the Nuts: Ensure the locking wheel nuts are properly tightened during routine maintenance. Over-tightening can damage the key and make removal more difficult.
- Consider Removing Them Altogether: If you live in an area with low risk of wheel theft, you might consider replacing the locking wheel nuts with standard lug nuts. This eliminates the risk of losing the key altogether.
When to Seek Professional Help
If you are uncomfortable with any of the above methods, or if you have attempted them and failed, it is best to seek professional help. A qualified mechanic or tire shop has the tools, experience, and expertise to safely remove locking wheel nuts without causing further damage. They may have specialized tools or techniques not available to the average DIYer. Do not hesitate to consult a professional if you are unsure of any step or if you are concerned about damaging your vehicle.
In conclusion, removing locking wheel nuts without the key requires a combination of understanding the locking mechanism, choosing the appropriate method, and exercising caution. Start with the least invasive techniques and progress to more aggressive methods only if necessary. Always prioritize the safety of yourself and your vehicle. And remember, prevention is always better than cure.