How To Repair A Cracked Coolant Reservoir
The coolant reservoir, often called an expansion tank or overflow tank, plays a vital, yet often overlooked, role in your vehicle's cooling system. It's the plastic container, usually transparent or translucent, that sits near the radiator and houses the excess coolant forced out of the radiator when the engine heats up. When the engine cools, coolant is drawn back into the radiator, maintaining a consistent level and preventing air pockets that can lead to overheating. A cracked coolant reservoir, however, disrupts this carefully orchestrated system, potentially leading to coolant loss, overheating, and ultimately, engine damage. While a professional repair is always recommended, understanding the repair process, and even attempting a DIY fix in some cases, can be both educational and empowering. This guide delves into the mechanics of coolant reservoir repair, examining the principles involved, the potential pitfalls, and the appropriate techniques for achieving a durable and reliable solution.
Understanding the Problem: Crack Morphology and Material Science
Before diving into repair techniques, it’s crucial to understand the nature of the beast: the crack itself. Cracks in coolant reservoirs are rarely clean breaks. They're more often a complex network of micro-fractures radiating from a central point, usually located near a stress concentration area, such as a mounting point, a seam, or a location subjected to high thermal cycling. The material used in these reservoirs is typically polypropylene (PP) or a similar thermoplastic polymer. These materials are chosen for their chemical resistance to coolant, their ability to withstand moderate temperatures, and their relatively low cost. However, they are also susceptible to degradation from prolonged exposure to heat, UV radiation, and the constant pressure fluctuations within the cooling system. This degradation leads to embrittlement, making the plastic more prone to cracking.
Furthermore, the coefficient of thermal expansion of the plastic is significantly different from that of the surrounding metal components. This difference creates stress points, especially near connections and mounting hardware. Over time, these stresses, combined with the inherent brittleness of aged plastic, lead to crack formation. The morphology of the crack – its shape, size, and location – will significantly influence the repair strategy.
Assessing the Damage and Choosing the Right Repair Method
The first step in any coolant reservoir repair is a thorough assessment of the damage. This involves:
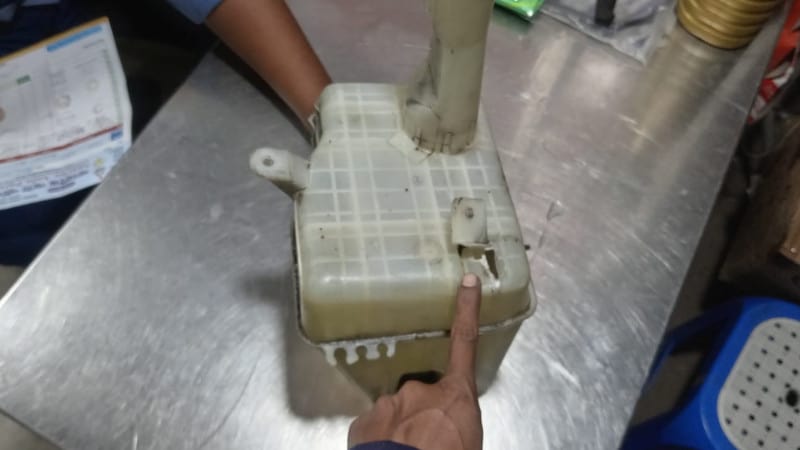
- Identifying the location and extent of the crack: Is it a hairline crack, a long fracture, or a shattered section?
- Determining the material: Identifying the type of plastic is crucial for selecting the appropriate adhesive or welding material. Many reservoirs have a recycling symbol (usually within a triangle) indicating the plastic type. PP is the most common.
- Evaluating the structural integrity: Is the surrounding plastic brittle and crumbling, or is it relatively flexible and strong?
Based on this assessment, you can choose the appropriate repair method. The three most common methods are:
1. Plastic Welding
Plastic welding is generally considered the most robust and reliable repair method, especially for larger cracks and structurally critical areas. It involves melting the plastic on both sides of the crack and fusing them together, creating a bond that is theoretically as strong as the original material. However, plastic welding requires specialized equipment – a plastic welder with different tip attachments suitable for the plastic type. The process involves carefully heating the plastic with the welder tip and adding filler rod (made of the same type of plastic as the reservoir) to fill the crack and reinforce the joint.
Procedure:
- Preparation: Thoroughly clean the area around the crack with soap and water, followed by a plastic cleaner or degreaser. Bevel the edges of the crack slightly with a sharp knife or a rotary tool to create a wider surface area for the weld.
- Welding: Select the appropriate welding tip and temperature setting for the plastic type. Begin by tack welding the crack at several points to hold the pieces together. Then, gradually weld along the entire length of the crack, using a back-and-forth motion to ensure proper fusion. Add filler rod as needed to fill any gaps or voids.
- Cooling and Finishing: Allow the weld to cool slowly. Avoid sudden cooling, which can cause stress cracks. Once cooled, use a file or sandpaper to smooth the weld and remove any excess material.
Advantages: Strongest and most durable repair, aesthetically pleasing if done correctly.
Disadvantages: Requires specialized equipment and skills, potential for damaging the plastic if overheated.
2. Epoxy Repair
Epoxy adhesives are a more accessible alternative to plastic welding. They provide a strong bond and are relatively easy to apply. However, the success of an epoxy repair depends heavily on the surface preparation and the quality of the epoxy. It's crucial to choose an epoxy specifically formulated for plastics and that is resistant to coolant and high temperatures. Avoid general-purpose epoxies, as they are unlikely to provide a durable bond in this application.
Procedure:
- Preparation: Thoroughly clean the area around the crack with soap and water, followed by a plastic cleaner or degreaser. Roughen the surface with sandpaper (80-grit is recommended) to provide a better key for the epoxy.
- Mixing: Carefully mix the epoxy according to the manufacturer's instructions. Ensure that the resin and hardener are thoroughly combined.
- Application: Apply the epoxy to the crack, ensuring that it penetrates all the crevices. Use a small brush or applicator to force the epoxy into the crack. Overlap the epoxy onto the surrounding plastic to create a strong bond.
- Reinforcement (Optional): For larger cracks, consider embedding a piece of fiberglass mesh or cloth into the epoxy to provide additional reinforcement.
- Curing: Allow the epoxy to cure completely according to the manufacturer's instructions. This may take several hours or even overnight.
- Finishing: Sand the epoxy smooth and remove any excess material.
Advantages: Relatively easy to apply, requires less specialized equipment than plastic welding.
Disadvantages: Less durable than plastic welding, susceptible to failure if the surface is not properly prepared or if the wrong epoxy is used.
3. Patching with a Plastic Repair Kit
Plastic repair kits, often advertised for bumper repairs, can be used for coolant reservoir repairs, particularly for smaller cracks and holes. These kits typically include a resin, a hardener, and a reinforcing mesh. The principle is similar to epoxy repair, but the resin is often designed to be more flexible and impact-resistant. These kits are often a good option for a quick and easy repair, but their long-term durability may be limited.
Procedure:
- Preparation: Clean the area around the crack thoroughly. Sand the surface to create a rough texture.
- Application: Mix the resin and hardener according to the kit's instructions. Apply the mixture to the damaged area, embedding the reinforcing mesh into the resin.
- Curing: Allow the resin to cure completely, following the instructions provided with the kit.
- Finishing: Sand the repaired area smooth.
Advantages: Easy to use, readily available.
Disadvantages: May not be as durable as plastic welding or epoxy repair, can be messy.
Testing and Post-Repair Considerations
After completing the repair, it's crucial to test the reservoir for leaks before reinstalling it in the vehicle. This can be done by filling the reservoir with water and inspecting it for any signs of leakage. Pay particular attention to the repaired area. If any leaks are detected, repeat the repair process or consider replacing the reservoir.
Once you are confident that the reservoir is leak-free, reinstall it in the vehicle. Top up the coolant level and bleed the cooling system to remove any air pockets. Monitor the coolant level closely for the next few days to ensure that the repair is holding and that there are no new leaks. Also, check the engine temperature gauge to ensure the engine is not overheating.
When to Replace, Not Repair
While repairing a cracked coolant reservoir can be a viable option, there are situations where replacement is the only sensible choice. These include:
- Extensive damage: If the reservoir is severely cracked or shattered, repair may not be possible or reliable.
- Brittleness: If the plastic is brittle and crumbling, any repair is likely to be short-lived.
- Multiple cracks: If there are numerous cracks throughout the reservoir, the structural integrity is compromised, and replacement is recommended.
- Inability to identify the plastic type: Without knowing the plastic type, it's impossible to select the appropriate repair materials.
In conclusion, repairing a cracked coolant reservoir can be a rewarding and cost-effective project, provided that you understand the principles involved, choose the right repair method, and execute the repair carefully. However, it's essential to recognize the limitations of DIY repairs and to replace the reservoir when necessary to ensure the long-term reliability of your vehicle's cooling system. Ultimately, safety and reliability should always be the top priorities.