
How To Replace A Throttle Position Sensor
The Throttle Position Sensor (TPS) is a critical component in your vehicle's fuel injection system. Its primary function is to monitor the throttle valve's position, relaying this information to the Engine Control Unit (ECU). The ECU then uses this data, along with inputs from other sensors, to determine the appropriate amount of fuel to inject, optimizing engine performance and fuel efficiency. A faulty TPS can lead to a range of drivability issues, from rough idling and hesitation during acceleration to stalling and poor fuel economy. Replacing a TPS is a relatively straightforward task for the experienced DIYer, and this guide will walk you through the process.
Identifying a Faulty TPS
Before diving into the replacement, it's crucial to accurately diagnose a faulty TPS. Common symptoms include:
- Erratic idling: The engine may idle too high or too low, or fluctuate irregularly.
- Hesitation during acceleration: The engine may stumble or hesitate when you press the accelerator pedal.
- Stalling: The engine may stall unexpectedly, especially at low speeds or when coming to a stop.
- Poor fuel economy: The engine may consume more fuel than usual.
- Check Engine Light: The Check Engine Light may illuminate, accompanied by diagnostic trouble codes (DTCs) related to the TPS. Commonly, codes like P0120, P0121, P0122, or P0123 are associated with TPS issues.
While these symptoms often point to a failing TPS, it's always best to confirm the diagnosis using a scan tool to read any stored DTCs and to monitor the TPS signal while manipulating the throttle. A smooth, linear change in voltage corresponds to a properly functioning TPS, while erratic voltage or dead spots indicate a problem.
Tools and Materials Required
To successfully replace your TPS, you'll need the following tools and materials:
- New Throttle Position Sensor: Ensure it's the correct part for your vehicle's make, model, and year.
- Socket set and wrench set: Metric or SAE, depending on your vehicle.
- Screwdrivers: Both Phillips head and flathead.
- Scan tool (optional, but recommended): For reading and clearing DTCs.
- Multimeter (optional, but helpful): For testing the new TPS.
- Throttle body cleaner: To clean the throttle body while it's accessible.
- Penetrating oil: To loosen any stubborn bolts or screws.
- Gloves and safety glasses: For protection.
Step-by-Step Replacement Procedure
- Disconnect the Negative Battery Terminal: This is a crucial safety step to prevent electrical shorts during the repair process.
- Locate the TPS: The TPS is typically mounted on the throttle body, near the throttle linkage. Consult your vehicle's repair manual if you're unsure of its location.
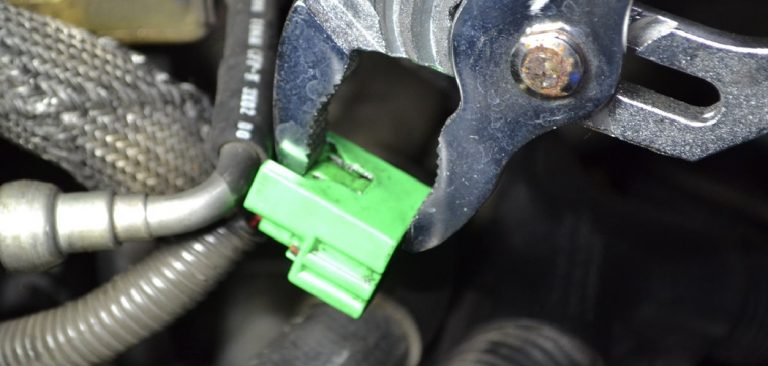
- Disconnect the Electrical Connector: Carefully disconnect the electrical connector from the TPS. You may need to press a release tab to disengage it. Inspect the connector for any signs of corrosion or damage.
- Remove the Old TPS: The TPS is usually secured to the throttle body with two or three screws or bolts. Use the appropriate socket, wrench, or screwdriver to remove them. You may need to apply penetrating oil if the fasteners are corroded. Note the orientation of the old TPS before removing it, as the new one will need to be installed in the same position.
- Clean the Throttle Body (Optional): Now is a good time to clean the throttle body using throttle body cleaner. This will remove any dirt or carbon buildup that could affect engine performance.
- Install the New TPS: Align the new TPS with the mounting holes on the throttle body and secure it with the screws or bolts. Tighten the fasteners to the manufacturer's specified torque. Some TPS units require precise adjustment. Consult your vehicle’s repair manual for proper adjustment procedures. Failure to properly adjust a TPS could lead to continued poor engine performance.
- Reconnect the Electrical Connector: Reconnect the electrical connector to the new TPS, ensuring it clicks securely into place.
- Reconnect the Negative Battery Terminal: Reconnect the negative battery terminal.
- Clear DTCs: Use a scan tool to clear any DTCs related to the TPS.
- Test the New TPS: Start the engine and let it idle. Monitor the TPS signal using a scan tool or multimeter to ensure it's operating correctly. Check for smooth acceleration and proper idle speed.
Final Thoughts
Replacing a Throttle Position Sensor is a manageable task for most experienced DIY mechanics. By following these steps and taking your time, you can restore your vehicle's engine performance and fuel efficiency. Remember to consult your vehicle's repair manual for specific instructions and torque specifications. If you're not comfortable performing this repair yourself, it's always best to seek the assistance of a qualified automotive technician.