How To Reset A Maintenance Required Light
So, your "Maintenance Required" light is on. It's a common sight for any seasoned DIY mechanic. While it can be triggered by several things, in many cases, it's simply a reminder that your scheduled oil change is due. This light isn't typically linked to any sophisticated sensor readings or underlying mechanical faults (although that *can* be the case with some vehicles and different warning lights). In most cars, it's just a mileage-based reminder programmed into the ECU (Engine Control Unit). Resetting it is usually a straightforward process you can handle at home.
Understanding the "Maintenance Required" Light
Before we dive into the how-to, let's clarify what the "Maintenance Required" light actually means. Unlike the "Check Engine" light, which signifies a potential issue with your engine, emissions system, or drivetrain, the "Maintenance Required" light is usually a timer. It's programmed to illuminate after a specific mileage interval, often 5,000 or 7,500 miles, depending on your vehicle's factory settings. This interval serves as a reminder to perform routine maintenance, like oil changes, tire rotations, and other scheduled services. The light is purely informational in the majority of cases.
It's crucial to differentiate this light from the "Check Engine" light. The "Check Engine" light often requires a diagnostic scan using an OBD-II (On-Board Diagnostics II) scanner to read the trouble codes and identify the specific problem. The "Maintenance Required" light rarely sets any codes and can typically be reset manually, as we'll describe below.
Why Reset the Light?
Obviously, you want to get rid of the annoying light on your dash. However, resetting the light is about more than just aesthetics. It ensures that the reminder system accurately tracks your mileage intervals for future maintenance. If you ignore the light and don't reset it after performing the service, the system won't remind you properly for the next scheduled maintenance, potentially leading to neglected service and reduced longevity of components like the engine.
Resetting the "Maintenance Required" Light: The Methods
The exact procedure for resetting the "Maintenance Required" light varies depending on the vehicle's make, model, and year. Here are a few common methods. Always consult your owner's manual for the precise instructions for your vehicle.
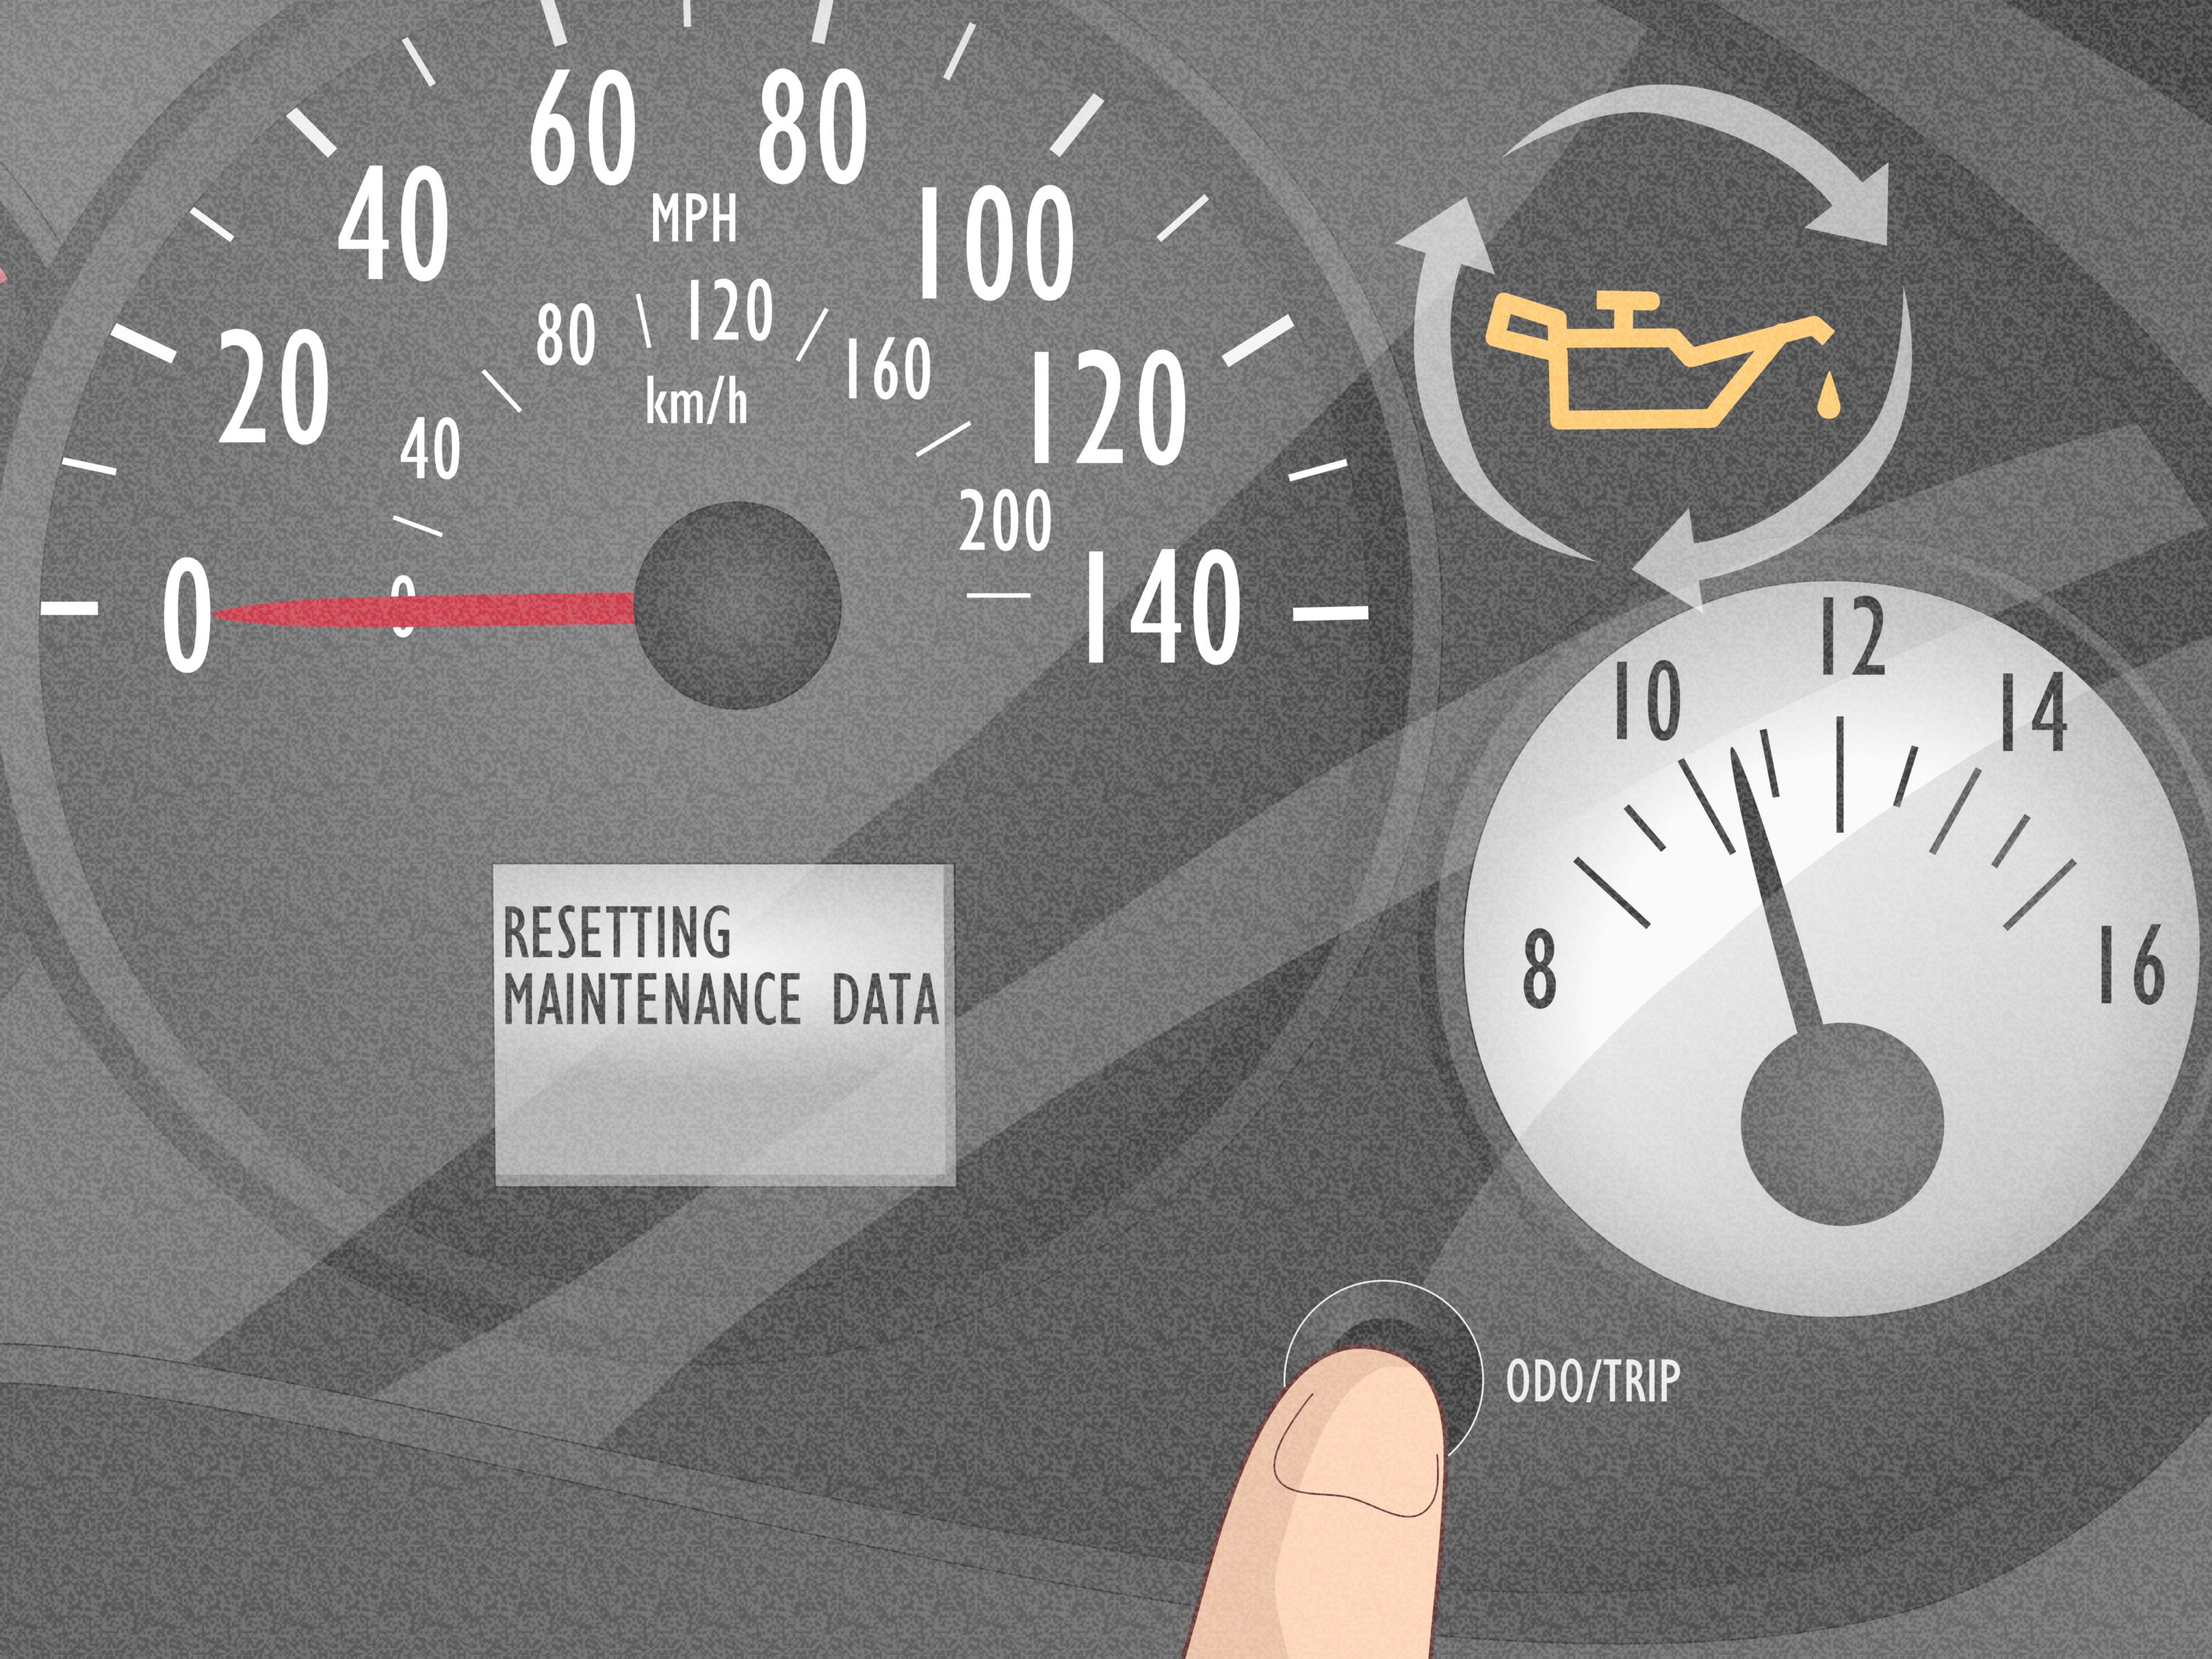
Method 1: The Ignition and Odometer Button Dance
This is perhaps the most common method, particularly for older vehicles or those with analog odometers. This method typically involves a specific sequence of ignition positions and pressing the odometer reset button.
- Turn the ignition off. Make sure the engine is *completely* off.
- Press and hold the odometer reset button. Locate the small button on your instrument cluster used to reset the trip odometer. Press and hold it down.
- Turn the ignition to the "ON" position (but do *not* start the engine). Keep holding the odometer reset button.
- Wait. Continue holding the button until the "Maintenance Required" light begins to flash or goes out entirely. This may take 5-10 seconds.
- Release the button.
- Turn the ignition off, then start the engine. The light should be gone.
If the light is still on, repeat the procedure carefully. Timing and precise execution are critical with this method. Variations exist, such as requiring the button to be pressed before turning the key to the "ON" position.
Method 2: Using the Trip A/B Odometer
Some vehicles utilize the trip odometers (Trip A and Trip B) in the reset procedure. This often involves navigating a menu within the instrument cluster display.
- Turn the ignition on (engine off).
- Scroll through the display using the "Trip" button or similar control until you see the Trip A or Trip B odometer displayed.
- Turn the ignition off.
- Press and hold the "Trip" button.
- Turn the ignition back on (engine off), continuing to hold the "Trip" button.
- Wait. The display will likely show a countdown or a confirmation message as the system resets. Release the button when the process completes.
- Start the engine to verify the light is off.
Method 3: Through the Infotainment System
Modern vehicles with more sophisticated infotainment systems sometimes offer a maintenance reset option within the system menus. This is becoming increasingly common.
- Turn the ignition on (engine off).
- Navigate to the "Settings" or "Maintenance" menu on your infotainment screen. Look for options related to vehicle settings, service intervals, or maintenance reminders.
- Select the "Maintenance Reset" option. You might need to confirm the reset by pressing another button or selecting "Yes".
- Follow the on-screen prompts. The system will guide you through the reset process.
- Start the engine to confirm the light is extinguished.
This method is often the easiest, but requires you to be familiar with your car's infotainment system. Consulting your owner's manual is highly recommended for navigating the menus.
Method 4: Scan Tool Reset
If all the above methods fail, and you have a decent OBD-II scan tool, there's a good chance you can reset the maintenance light using the tool. Many higher-end scan tools have advanced features allowing you to access and reset maintenance reminders. The steps are usually straightforward:
- Plug your OBD-II scan tool into the diagnostic port, usually located under the dashboard on the driver's side.
- Turn the ignition on (engine off).
- Power on your scan tool and navigate to the "Service Functions", "Maintenance Reset", or similar menu.
- Select your vehicle's make, model, and year if prompted.
- Look for the "Maintenance Light Reset", "Oil Life Reset" or similar option and select it.
- Follow the on-screen instructions on the scan tool. It will likely require you to confirm the reset.
- Once completed, turn the ignition off, then start the engine to verify the light is off.
Keep in mind that cheaper, basic OBD-II scan tools often lack this advanced functionality. You'll likely need a mid-range to professional grade scan tool to reset the maintenance light this way.
Troubleshooting: When the Light Won't Reset
If you've tried the methods above and the "Maintenance Required" light stubbornly refuses to go out, here are a few things to consider:
- Double-Check the Procedure: Ensure you're following the exact steps outlined in your owner's manual. Even slight deviations can prevent the reset from working.
- Oil Life Monitoring System: Some vehicles have an advanced Oil Life Monitoring System (OLMS) that takes into account driving conditions and adjusts the oil change interval accordingly. If the OLMS determines that the oil life is still low, the "Maintenance Required" light might stay on even after you've performed a reset. In these cases, you may need to reset the *oil life percentage* to 100% within the infotainment system.
- Underlying Issues: In rare cases, the "Maintenance Required" light can be triggered by a minor sensor fault or other non-critical issue. While not typical, it's worth connecting an OBD-II scanner to check for any stored trouble codes. If codes are present, address those underlying problems before attempting to reset the light.
- Faulty Instrument Cluster: Though uncommon, a faulty instrument cluster can cause the light to remain illuminated even after a successful reset. If you suspect this is the case, consult a qualified mechanic for diagnosis and repair.
- Consult a Professional: If you're still struggling to reset the light after trying all the above steps, it's best to seek assistance from a professional mechanic. They have the expertise and diagnostic tools to identify and resolve any underlying issues.
Resetting the "Maintenance Required" light is a common task for any car owner. Armed with the correct procedure and a little patience, you can usually handle this maintenance step yourself. Remember, always prioritize reading your owner's manual and, if in doubt, consult a professional.