How To Reset The Check Engine Light On A Nissan Murano?
The dreaded check engine light (CEL). Seeing that illuminated icon on your Nissan Murano's dashboard can trigger a wave of anxiety. While it might seem like a minor annoyance, ignoring it can lead to more significant problems down the road. This article will guide you through understanding why your check engine light might be on and how you can potentially reset it, or, more importantly, address the underlying issue.
Understanding the Problem: Why is Your Check Engine Light On?
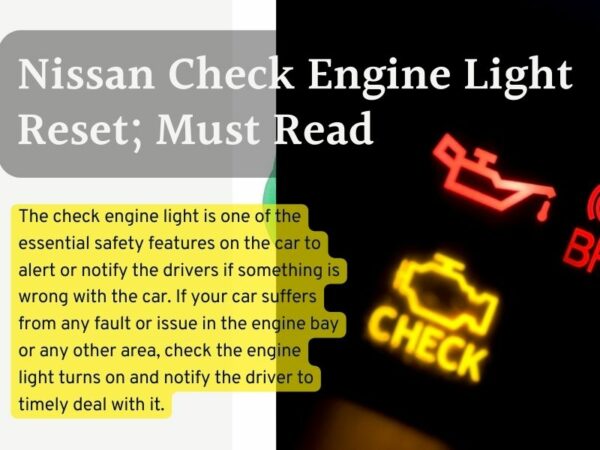
The check engine light, also known as the malfunction indicator lamp (MIL), is a critical component of your Murano's onboard diagnostics system (OBD). Its primary function is to alert you to a potential issue affecting your vehicle's engine, emissions control system, or other vital components. Think of it as your car's way of saying, "Hey, something's not quite right here, please investigate!"
Common Symptoms Associated with an Illuminated Check Engine Light
While the check engine light itself is a symptom, it's often accompanied by other noticeable issues. These symptoms can provide clues about the root cause of the problem:
- Reduced Engine Performance: You might notice a decrease in acceleration, sluggishness, or a general lack of power.
- Rough Idling: The engine may vibrate excessively or stall when idling at a stoplight.
- Poor Fuel Economy: You may find yourself filling up the gas tank more frequently than usual.
- Unusual Noises: Listen for hissing, knocking, or pinging sounds coming from the engine compartment.
- Difficulty Starting: The engine might take longer to start or fail to start altogether.
- Visible Smoke: Black, blue, or white smoke emanating from the exhaust pipe can indicate serious engine problems.
- Smell of Rotten Eggs: This is often a sign of a catalytic converter issue.
- Transmission Problems: Erratic shifting or slipping gears can sometimes trigger the check engine light.
Root Causes of a Check Engine Light on a Nissan Murano
The range of potential causes for a lit CEL is vast. Here are some of the most common culprits in Nissan Muranos:
- Loose or Damaged Gas Cap: This is often the simplest and most frequent cause. A loose gas cap can allow fuel vapors to escape, triggering the emissions control system.
- Faulty Oxygen Sensors: Oxygen sensors monitor the amount of oxygen in the exhaust stream. Malfunctioning sensors can provide inaccurate readings, leading to incorrect fuel-air mixtures. These sensors commonly fail around 80,000-100,000 miles.
- Catalytic Converter Failure: The catalytic converter reduces harmful emissions. If it fails, your Murano may not pass an emissions test. Problems are more common after 100,000 miles and can be accelerated by other engine issues.
- Mass Airflow Sensor (MAF) Issues: The MAF sensor measures the amount of air entering the engine. A dirty or failing MAF sensor can disrupt the air-fuel mixture, leading to performance problems.
- Spark Plug or Ignition Coil Problems: Worn spark plugs or faulty ignition coils can cause misfires, which can damage the catalytic converter and trigger the CEL.
- Vacuum Leaks: Leaks in the vacuum lines can disrupt the engine's air-fuel mixture.
- Evaporative Emission (EVAP) System Problems: The EVAP system prevents fuel vapors from escaping into the atmosphere. Leaks or malfunctions in the EVAP system are a common cause of CELs. TSBs related to EVAP system leaks are frequently issued by Nissan.
- Transmission Problems: Issues within the transmission, such as faulty sensors or internal damage, can sometimes trigger the check engine light.
Ignoring the Check Engine Light: Potential Consequences
It's tempting to ignore the check engine light, especially if your Murano seems to be running fine. However, delaying diagnosis and repair can have serious consequences:
- Worsening of the Underlying Problem: A minor issue can quickly escalate into a major repair if left unaddressed. For example, a misfire caused by a faulty spark plug can damage the catalytic converter, resulting in a much more expensive repair.
- Reduced Fuel Economy: Many engine problems that trigger the CEL can negatively impact fuel economy.
- Failed Emissions Test: Most states require vehicles to pass an emissions test. A lit CEL will automatically result in a failure.
- Potential for Further Damage: A malfunctioning engine component can cause damage to other parts of the vehicle.
- Safety Concerns: In some cases, a check engine light can indicate a safety issue, such as a problem with the braking system or power steering.
Recommended Fixes and Resetting the Check Engine Light
Before attempting to reset the check engine light, it's crucial to diagnose and address the underlying problem. Simply resetting the light without fixing the issue will only result in it coming back on.
- Diagnose the Problem: The first step is to determine the cause of the check engine light. The most reliable way to do this is by using an OBD-II scanner. These scanners can read the diagnostic trouble codes (DTCs) stored in your Murano's computer. You can purchase your own scanner (prices range from $30 to several hundred dollars) or take your vehicle to a trusted mechanic who has professional-grade diagnostic equipment. Many auto parts stores will also perform a basic OBD-II scan for free. Write down the DTC and research its meaning.
- Address the Underlying Issue: Once you know the DTC, you can begin troubleshooting the problem. Refer to your Murano's repair manual or consult with a qualified mechanic to determine the appropriate repair procedure.
- Loose Gas Cap: Tighten the gas cap and drive for a few days. The light may turn off on its own.
- Faulty Oxygen Sensor: Replace the faulty oxygen sensor.
- Catalytic Converter Failure: Replace the catalytic converter.
- MAF Sensor Issues: Clean the MAF sensor with a MAF sensor cleaner. If cleaning doesn't resolve the issue, replace the sensor.
- Spark Plug or Ignition Coil Problems: Replace the worn spark plugs or faulty ignition coil.
- Vacuum Leaks: Locate and repair the vacuum leak.
- EVAP System Problems: Diagnose and repair the EVAP system leak or malfunction. This may involve replacing components like the purge valve or vent valve.
- Resetting the Check Engine Light: After addressing the underlying issue, you can reset the check engine light. There are several ways to do this:
- Using an OBD-II Scanner: Most OBD-II scanners have a "clear codes" or "reset" function. Follow the scanner's instructions to clear the DTCs and reset the check engine light.
- Disconnecting the Battery: This is a less reliable method, but it can sometimes work. Disconnect the negative battery cable for 15-30 minutes. This will reset the Murano's computer and clear the DTCs. Important Note: Disconnecting the battery will also reset other settings, such as your radio presets and clock. This method is generally not recommended as it doesn't address the root cause and can create other inconveniences.
- Verify the Repair: After resetting the check engine light, drive your Murano for a few days to see if the light comes back on. If it does, the underlying problem has not been fully resolved. You may need to return to the mechanic for further diagnosis and repair.
Cost Estimates and Shop Advice
The cost to diagnose and repair a check engine light issue can vary widely depending on the problem. Here are some rough estimates:
- OBD-II Scan: Free (at many auto parts stores) to $100 (at a mechanic).
- Gas Cap Replacement: $10-$30
- Oxygen Sensor Replacement: $100-$300 per sensor (parts and labor).
- Catalytic Converter Replacement: $500-$1500 (parts and labor). This is a significant expense, so get multiple quotes.
- MAF Sensor Replacement: $100-$300 (parts and labor).
- Spark Plug Replacement: $80-$200 (parts and labor).
- Ignition Coil Replacement: $100-$400 per coil (parts and labor).
- Vacuum Leak Repair: $50-$300 (depending on the location and complexity of the leak).
- EVAP System Repair: $100-$500 (depending on the component that needs to be replaced).
Shop Advice:
- Get Multiple Quotes: Don't settle for the first estimate you receive. Contact several mechanics to compare prices and services.
- Read Reviews: Check online reviews to see what other customers have to say about the mechanic's reputation and quality of work.
- Ask Questions: Don't be afraid to ask the mechanic questions about the diagnosis, repair procedure, and warranty.
- Request a Written Estimate: Always get a written estimate before authorizing any repairs. The estimate should include a detailed breakdown of the costs for parts and labor.
- Consider a Nissan Specialist: If you suspect a complex issue, consider taking your Murano to a mechanic who specializes in Nissan vehicles. They will have a deeper understanding of the Murano's systems and common problems.
Technical Service Bulletins (TSBs): Nissan releases Technical Service Bulletins (TSBs) to address common issues and provide repair procedures. Check online resources, such as the National Highway Traffic Safety Administration (NHTSA) website, to see if there are any TSBs related to your Murano's check engine light issue. Knowing about relevant TSBs can help you communicate more effectively with your mechanic.
Addressing a check engine light promptly is essential for maintaining your Nissan Murano's performance, fuel efficiency, and longevity. By understanding the potential causes, taking steps to diagnose the problem, and performing the necessary repairs, you can keep your Murano running smoothly for years to come.