
How To Tell If My Starter Solenoid Is Bad
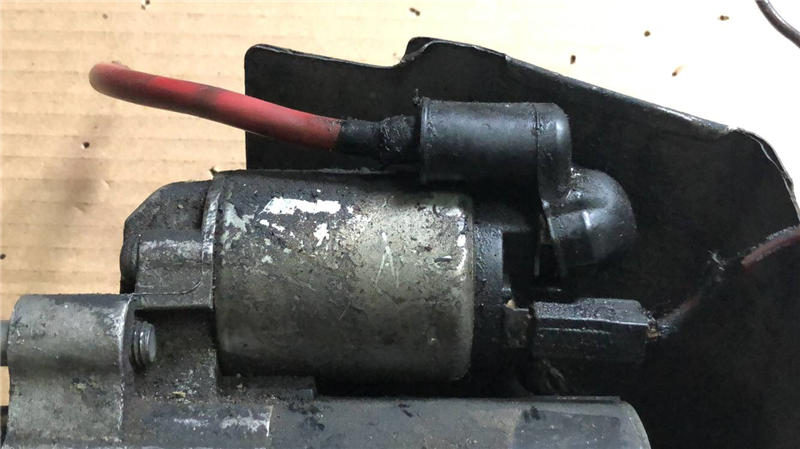
Alright, let's talk starter solenoids. They're a crucial part of your car's starting system, and when they go bad, it can leave you stranded. This guide is designed for the DIYer who's comfortable getting their hands dirty and has a basic understanding of automotive electrical systems. We'll cover how to diagnose a faulty starter solenoid, using a combination of observation, basic tools, and good old-fashioned troubleshooting.
Understanding the Starter Solenoid's Role
Before we dive into testing, let's quickly recap what the starter solenoid does. Think of it as a high-current switch. When you turn the ignition key, a small current flows from the ignition switch to the solenoid. The solenoid then uses this small current to do two key things:
- Engage the Starter Motor: It throws a mechanical lever (the bendix drive) that pushes the starter motor's pinion gear into mesh with the flywheel or flexplate (depending on whether you have a manual or automatic transmission).
- Supply High Current: It closes a heavy-duty electrical contact, allowing a large amount of current from the battery to flow directly to the starter motor, making it spin and, hopefully, start the engine.
Essentially, the solenoid acts as a relay, using a small signal to control a much larger current flow. It's a crucial component because your ignition switch and the wiring leading to it are not designed to handle the high amperage needed to power the starter motor directly. Without the solenoid, you'd likely burn out your ignition switch or wiring trying to start the car.
Common Symptoms of a Bad Starter Solenoid
Knowing the symptoms is half the battle. Here are some telltale signs that your starter solenoid might be on its way out:
- Clicking Sound: This is perhaps the most common symptom. You turn the key, and instead of the engine cranking, you hear a single click or a rapid series of clicks. This often indicates that the solenoid is engaging, but either the internal contacts are corroded and can't pass enough current, or the solenoid isn't strong enough to fully engage the starter motor.
- No Sound At All: Sometimes, the solenoid fails completely and you hear absolutely nothing when you turn the key. This could be due to a broken coil inside the solenoid, a short circuit, or a severed wire.
- Intermittent Starting: The car starts sometimes, but not others. This can be a sign of failing solenoid contacts that are making inconsistent connections.
- Starter Stays Engaged: In rare cases, the solenoid might stick in the engaged position, causing the starter motor to continue running even after you release the key. This is a dangerous situation and can quickly damage the starter motor and flywheel/flexplate. Immediately turn off the car and disconnect the battery if this happens.
- Dimming Lights: When you turn the key to start, the dashboard lights dim significantly, but the engine doesn't crank. This could indicate a high resistance connection in the solenoid preventing the starter motor from receiving enough power.
It's important to note that these symptoms can also be caused by other issues, such as a dead battery, loose connections, or a faulty starter motor itself. So, proper diagnosis is key before replacing the solenoid.
Tools You'll Need
Before we start testing, gather the following tools:
- Multimeter: A must-have for any DIY mechanic. You'll use it to check voltage and continuity.
- Jumper Cables or Jumper Wire: For bypassing the solenoid during testing.
- Socket Set and Wrenches: To remove the starter and solenoid (if necessary).
- Screwdrivers: Both flathead and Phillips.
- Safety Glasses: Always protect your eyes!
- Gloves: Protect your hands from grease and dirt.
Testing the Starter Solenoid: Step-by-Step
Here's a methodical approach to diagnosing your starter solenoid:
1. Preliminary Checks: Battery and Connections
Before focusing on the solenoid, rule out the most common culprits:
- Battery Voltage: Use your multimeter to check the battery voltage. It should be at least 12.6 volts with the engine off. If it's lower, charge the battery or replace it. A weak battery is the most common cause of starting problems.
- Battery Connections: Inspect the battery terminals and cable ends. Clean any corrosion with a wire brush. Make sure the connections are tight and secure.
- Starter Motor Connections: Locate the starter motor. There should be at least two wires connected to it: a thick cable coming directly from the battery (the B+ terminal) and a smaller wire coming from the solenoid (the S terminal, for "start"). Ensure these connections are clean and tight. Corrosion here can cause significant voltage drop.
- Ground Connections: Ensure the engine is properly grounded to the chassis. A poor ground connection can also prevent the starter from working correctly. Check the ground strap connecting the engine block to the chassis or frame.
2. Testing the Solenoid with a Multimeter
This test will help determine if the solenoid is receiving power and ground signals:
- Locate the Solenoid: The solenoid is typically mounted directly on the starter motor, but in some vehicles, it may be mounted remotely (often on the firewall).
- Voltage at the S Terminal: Turn the ignition key to the start position. Use your multimeter to check for voltage at the S terminal of the solenoid. You should see approximately 12 volts. If you don't, the problem lies in the ignition switch, wiring, or a safety switch (like a neutral safety switch on an automatic transmission).
- Continuity Test (If Possible): Some solenoids have a ground terminal. With the ignition off, use your multimeter to check for continuity between the solenoid's ground terminal and the vehicle's chassis. If there's no continuity, the solenoid isn't properly grounded.
3. Bypassing the Solenoid (The "Jumper Test")
Safety First! Make sure the vehicle is in Park (automatic) or Neutral (manual) with the parking brake engaged. Bypassing the solenoid can cause the starter to engage unexpectedly.
- Locate the B+ and S Terminals: Identify the thick B+ (battery positive) terminal on the solenoid and the smaller S (start) terminal.
- Jumper Connection: Using a jumper cable or a heavy-gauge wire, carefully connect the B+ terminal to the S terminal. This directly supplies power to the starter motor.
- Observe the Results:
- If the starter motor cranks: This strongly suggests that the solenoid is faulty and not properly activating the starter motor when you turn the key.
- If the starter motor still doesn't crank: The problem likely lies with the starter motor itself (brushes worn, armature damaged, etc.) or with the high-current wiring between the battery and the starter.
4. Testing a Remote Solenoid (If Applicable)
If your solenoid is mounted remotely, you can test it similarly:
- Voltage at the Activation Terminal: Have someone turn the ignition key to the start position. Use your multimeter to check for voltage at the small activation terminal on the solenoid (the one connected to the ignition switch). You should see approximately 12 volts.
- Output Voltage: With the key in the start position, check for voltage at the solenoid's output terminal (the one that connects to the starter motor). You should also see approximately 12 volts. If you have voltage at the activation terminal but no voltage at the output terminal, the solenoid is likely faulty.
- Continuity Check: As with the direct-mount solenoid, check the solenoid's grounding point for good continuity to the chassis.
Interpreting the Results and Next Steps
Based on the tests above, you should be able to narrow down the problem:
- No Voltage at S Terminal: The issue is upstream of the solenoid, likely in the ignition switch, wiring, or a safety switch. Trace the wiring diagram for your vehicle to identify the faulty component.
- Voltage at S Terminal, Clicking Sound, but No Cranking: The solenoid is likely engaging mechanically but failing to pass sufficient current to the starter motor. Replace the solenoid.
- Jumper Test Cranks the Engine: Definitive proof that the solenoid is bad. Replace the solenoid.
- No Cranking Even with the Jumper Test: The starter motor itself is likely faulty. Consider replacing the entire starter motor assembly (solenoid and motor).
Replacing the Starter Solenoid
If you've determined that the solenoid is bad, replacement is usually a straightforward process:
- Disconnect the Battery: Always disconnect the negative battery cable before working on any electrical components.
- Locate the Solenoid: If it's mounted on the starter, you may need to remove the entire starter assembly from the vehicle.
- Disconnect Wiring: Carefully disconnect all wires connected to the solenoid, noting their positions for reinstallation. Take pictures if necessary.
- Remove the Solenoid: The solenoid is typically held in place with screws or bolts. Remove these and detach the solenoid from the starter motor.
- Install the New Solenoid: Reattach the new solenoid to the starter motor, ensuring it's properly seated and secured.
- Reconnect Wiring: Reconnect all wires to the solenoid, ensuring they are connected to the correct terminals. Refer to your notes or photos.
- Reinstall the Starter (If Removed): Reinstall the starter assembly back into the vehicle.
- Reconnect the Battery: Reconnect the negative battery cable.
- Test the System: Turn the ignition key and verify that the engine starts properly.
Pro Tip: Consider replacing the entire starter motor assembly (solenoid and motor) if your starter motor is old or has a lot of mileage on it. It can save you time and labor in the long run.
By following these steps, you can confidently diagnose and replace a faulty starter solenoid, saving yourself money and gaining a deeper understanding of your car's starting system. Good luck!