Inner And Outer Tie Rods Replacement Cost
So, you're tackling tie rod replacement – a crucial part of your steering system! Good on you for taking on the task. It's a job that requires precision and attention to detail, but with the right tools and knowledge, it's definitely achievable for the experienced DIYer. In this guide, we’ll break down the costs involved in replacing both inner and outer tie rods, the factors influencing those costs, and some pro tips to ensure a successful replacement.
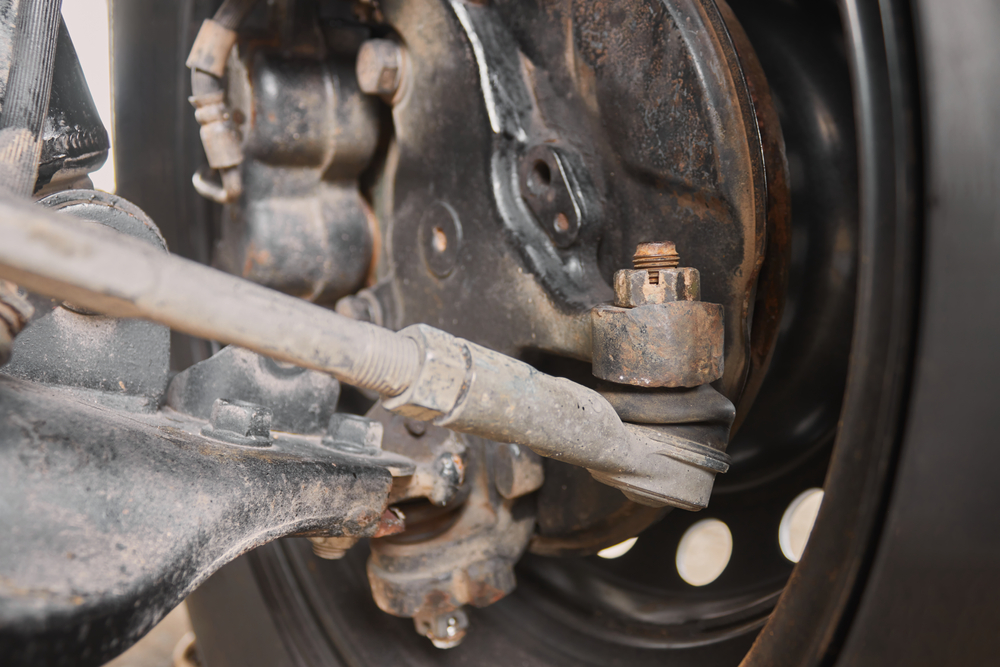
Understanding Tie Rods and Their Function
Before diving into cost, let's quickly recap what tie rods actually do. Tie rods are a critical part of your vehicle's steering linkage. They connect the steering rack (or steering box in older vehicles) to the steering knuckles, which hold the wheel hubs. Think of them as the messengers translating the rotational movement of your steering wheel into the lateral movement that turns your wheels.
- Outer Tie Rods: These connect directly to the steering knuckle. They typically have a ball joint end, allowing for movement and articulation as the suspension travels. The ball joint is a wear item and a common cause for replacement.
- Inner Tie Rods: These connect to the steering rack itself. They’re often concealed by a rubber boot, and their connection to the rack is also a ball-and-socket type joint, but often a different design than the outer.
Worn tie rods result in sloppy steering, uneven tire wear (often feathering), and can even cause a dangerous loss of control. It's not something to ignore!
Factors Influencing Tie Rod Replacement Cost
Okay, let’s get down to brass tacks: what's this going to cost you? The overall cost of replacing inner and outer tie rods breaks down into parts and labor. Since you're a DIYer, you'll primarily be concerned with parts costs, but understanding labor costs (even if you're not paying them) provides valuable context.
Parts Costs
The cost of the tie rods themselves can vary significantly based on several factors:
- Vehicle Make and Model: This is the biggest driver. Tie rods for a Honda Civic will be significantly cheaper than those for a Porsche Cayenne. Certain specialty vehicles may also require unique parts, which are often more expensive.
- Brand: Aftermarket options are plentiful. Brands like Moog, Mevotech, TRW, and Delphi are common choices, offering varying levels of quality and price. OEM (Original Equipment Manufacturer) parts from your vehicle's manufacturer will generally be the most expensive but are often considered to be of the highest quality. Off-brand or no-name options are tempting due to their low price, but often come with significant risk in terms of durability and performance. It's generally wise to avoid these.
- Quality/Grade: Tie rods are made from steel, and the quality of the steel and the precision of the manufacturing processes affect their durability. High-performance or heavy-duty tie rods, often used in off-roading or performance applications, will be more expensive.
- Inner vs. Outer: Typically, inner tie rods are slightly more expensive than outer tie rods, although this is not always the case.
- Kit vs. Individual: You can often buy tie rods as part of a kit that includes both inner and outer tie rods for both sides of the vehicle. These kits can sometimes be more cost-effective than buying individual components.
Cost Estimates (Parts Only):
- Outer Tie Rod (Each): $20 - $100+
- Inner Tie Rod (Each): $30 - $120+
- Complete Kit (Both Sides, Inner & Outer): $100 - $400+
These are just estimates. Always check with reputable online retailers or your local auto parts store for accurate pricing for your specific vehicle.
Labor Costs (Context for the DIYer)
Even though you're doing the work yourself, understanding what a shop would charge gives you a good baseline for the complexity of the job. Labor costs are heavily influenced by:
- Shop Rate: Labor rates vary significantly based on location. Big city shops will generally charge more than those in rural areas. Dealerships typically have the highest labor rates.
- Vehicle Complexity: Some vehicles are simply more difficult to work on than others. Access to the tie rods might be obstructed, or special tools might be required.
- "While You're In There": Shops often recommend replacing other components (like ball joints or control arm bushings) at the same time, which increases the labor cost.
Typical Labor Time Estimates (Per Side):
- Outer Tie Rod: 0.5 - 1 hour
- Inner Tie Rod: 1 - 2 hours (Often includes outer tie rod replacement as part of the process)
So, if a shop charges $100/hour and replaces both inner and outer tie rods on one side, you might be looking at a labor cost of $150 - $300 per side. Again, these are estimates.
Tools and Materials You'll Need
Before you start ordering parts, make sure you have the necessary tools. This is crucial! Attempting this job with the wrong tools can lead to frustration, damaged parts, and even injury.
- Jack and Jack Stands: Safety first! Never work under a vehicle supported only by a jack.
- Wheel Chocks: Prevent the vehicle from rolling.
- Socket Set and Wrenches: Metric sizes are the most common. You'll need a variety of sizes to remove nuts and bolts.
- Torque Wrench: Critical for tightening fasteners to the correct specifications.
- Tie Rod Separator Tool (Pickle Fork or Ball Joint Separator): This is used to separate the outer tie rod from the steering knuckle. A pickle fork is cheaper but can damage the ball joint boot. A ball joint separator is generally preferred.
- Inner Tie Rod Tool: A specialized tool for removing and installing the inner tie rod from the steering rack. Rental programs are available at most auto parts stores.
- Penetrating Oil (e.g., PB Blaster): To help loosen rusted or corroded fasteners.
- Hammer: For tapping (not beating!) stubborn parts.
- Alignment Tool (Measuring Tape): To get a rough alignment after the replacement. You'll still need a professional alignment, but this helps prevent excessive tire wear in the meantime.
- Grease Gun: For lubricating the new tie rod end (if applicable).
- Gloves and Safety Glasses: Protect yourself!
- New Cotter Pins or Lock Nuts: Always use new cotter pins and lock nuts to ensure proper fastening.
Step-by-Step (Simplified) Replacement Process
This is a highly simplified overview. Consult your vehicle's repair manual for detailed instructions specific to your make and model.
- Loosen Lug Nuts: Before lifting the vehicle, loosen the lug nuts on the wheels you'll be working on.
- Lift and Support the Vehicle: Jack up the vehicle and securely support it with jack stands. Remove the wheels.
- Disconnect the Outer Tie Rod: Use the tie rod separator tool to separate the outer tie rod from the steering knuckle. Spray with penetrating oil first to help loosen the connection.
- Remove the Outer Tie Rod: Loosen the jam nut on the outer tie rod and unscrew the outer tie rod from the inner tie rod. Important: Count the number of turns it takes to remove the outer tie rod. This will help you get a rough alignment after installation.
- Remove the Inner Tie Rod Boot: Cut or remove the clamp holding the inner tie rod boot in place and slide the boot back to expose the inner tie rod.
- Remove the Inner Tie Rod: Use the inner tie rod tool to remove the inner tie rod from the steering rack.
- Install the New Inner Tie Rod: Apply thread locker to the threads of the new inner tie rod and install it onto the steering rack using the inner tie rod tool. Torque to the manufacturer's specifications.
- Install the New Inner Tie Rod Boot: Install the new inner tie rod boot and secure it with new clamps.
- Install the New Outer Tie Rod: Screw the new outer tie rod onto the inner tie rod, using the number of turns you counted during removal as a starting point. Tighten the jam nut.
- Connect the Outer Tie Rod to the Steering Knuckle: Install the outer tie rod end into the steering knuckle and secure it with a new cotter pin or lock nut. Torque to the manufacturer's specifications.
- Reinstall the Wheels: Reinstall the wheels and tighten the lug nuts to the correct torque.
- Lower the Vehicle: Lower the vehicle to the ground.
- Final Torque: Double-check the lug nuts after driving a short distance.
- Get a Professional Alignment: This is non-negotiable! A professional alignment is essential to ensure proper steering and tire wear.
Pro Tips for a Successful Tie Rod Replacement
- Soak with Penetrating Oil: Spray all fasteners with penetrating oil several hours (or even the day before) before starting the job. This can save you a lot of headaches.
- Take Pictures: Take pictures of everything before you disassemble it. This can be helpful if you get confused during reassembly.
- Use a Marking Pen: Use a marking pen to mark the position of the tie rod relative to the steering knuckle. This will help you get a rough alignment.
- Don't Over-Tighten: Over-tightening fasteners can damage them or the components they're holding together. Use a torque wrench and follow the manufacturer's specifications.
- Inspect Other Components: While you're in there, inspect other steering and suspension components for wear or damage. This is a good opportunity to replace anything that's starting to wear out. Ball joints, control arm bushings, and sway bar links are common culprits.
- Don't Skip the Alignment: Seriously, don't! A proper alignment will save you money on tires and improve the handling of your vehicle.
- Consider a Full Kit: Replacing both inner and outer tie rods at the same time is often recommended, as they tend to wear out together. Replacing both also ensures that all components are new and working properly.
- Clean Threads: Clean the threads on the steering rack and tie rods before installing the new components. A wire brush can be helpful for this.
Final Thoughts
Replacing inner and outer tie rods is a manageable task for the experienced DIYer. By carefully considering the costs of parts, gathering the necessary tools, and following a detailed repair manual, you can save money and gain valuable experience working on your vehicle. Remember to prioritize safety and always get a professional alignment after completing the job. Good luck!