
Installing A Tow Hitch On A Jeep Wrangler
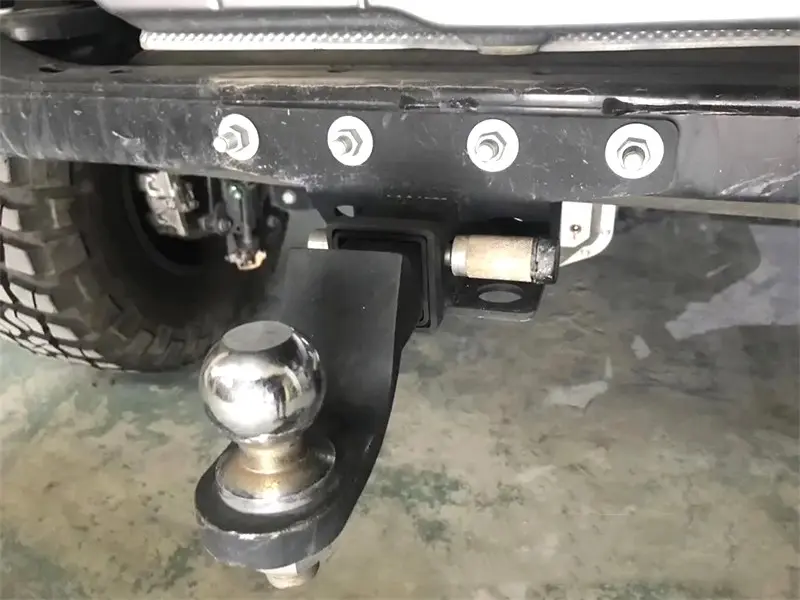
The Jeep Wrangler. A name synonymous with off-road prowess, open-air freedom, and undeniable ruggedness. But beyond its rock-crawling capabilities, the Wrangler also boasts surprising versatility. One key to unlocking that versatility is a tow hitch, allowing you to haul trailers, campers, or even just a bike rack for weekend adventures. While professional installation is always an option, fitting a tow hitch on a Wrangler is a surprisingly straightforward DIY project, even for those with moderate mechanical skills. This guide provides a detailed walkthrough, suitable for both seasoned mechanics and enthusiastic owners looking to expand their wrenching horizons.
Why Install a Tow Hitch on Your Wrangler?
Before diving into the how-to, let's explore the "why." The benefits of adding a tow hitch to your Jeep Wrangler extend far beyond simply pulling a trailer. Consider these advantages:
- Expanded Utility: Tow campers, boats, utility trailers, or even small race cars.
- Cargo Carrier Capability: Free up interior space by using a hitch-mounted cargo carrier for luggage, camping gear, or coolers.
- Bike Rack Mounting: Easily transport bicycles without scratching your paint or struggling with roof racks.
- Increased Resale Value: A well-installed tow hitch can add value to your Wrangler when it's time to sell.
Furthermore, consider the cost savings. A professional installation can easily run several hundred dollars, while a DIY install, including the hitch and necessary tools, can often be completed for significantly less.
Choosing the Right Tow Hitch
Not all tow hitches are created equal. Selecting the correct hitch for your specific Wrangler model and intended use is crucial. Tow hitches are classified by class, which dictates their maximum towing capacity. Consult your Wrangler's owner's manual for the maximum towing capacity of your specific model and engine configuration. Exceeding this limit is extremely dangerous and can damage your vehicle's drivetrain.
Generally, Wranglers typically use Class III or Class IV hitches. A Class III hitch is suitable for towing smaller trailers and cargo carriers, while a Class IV hitch offers a higher weight capacity for larger trailers. Pay close attention to the hitch's weight rating (Gross Trailer Weight - GTW) and tongue weight rating (Tongue Weight - TW). These ratings should always meet or exceed your intended towing needs. Brands like Curt, Draw-Tite, and Reese are known for their quality and durability.
Tools and Materials Needed
Before you begin, gather the necessary tools and materials:
- Tow hitch (appropriate class and rating for your Wrangler)
- Socket set (metric)
- Torque wrench
- Wrench set (metric)
- Safety glasses
- Gloves
- Penetrating oil (such as WD-40)
- Jack stands (optional, but highly recommended for added safety)
- Wiring harness (if connecting trailer lights)
- Drill with metal drill bits (may be required for some hitch installations)
Step-by-Step Installation Guide
Safety First: Disconnect the negative battery terminal before beginning any electrical work. Always wear safety glasses and gloves.
- Preparation: Park your Wrangler on a level surface, engage the parking brake, and chock the rear wheels. Use jack stands to securely support the vehicle if needed.
- Locate Mounting Points: Identify the factory mounting points on your Wrangler's frame. These are typically pre-drilled holes. Spray the area with penetrating oil to loosen any rust or debris.
- Hitch Installation: Position the tow hitch under the vehicle and align the mounting holes with the corresponding holes on the frame. Some hitches require slight maneuvering to fit properly.
- Secure the Hitch: Insert the provided bolts, washers, and nuts into the mounting holes. Hand-tighten all hardware initially.
- Torque to Specification: Using a torque wrench, tighten all bolts to the manufacturer's specified torque value. This is crucial for ensuring a secure and safe connection. Consult the hitch's instructions for the correct torque specifications.
- Wiring Harness Installation (if applicable): If you plan to tow a trailer with lights, install a wiring harness. These harnesses typically plug directly into your Wrangler's existing taillight wiring. Follow the harness manufacturer's instructions carefully.
- Final Inspection: Double-check all bolts and connections. Ensure the hitch is securely mounted and the wiring harness is properly connected.
Common Problems and Solutions
While generally straightforward, some common challenges may arise:
- Rusty Bolts: Stubborn, rusted bolts can be difficult to remove. Use penetrating oil and a breaker bar for added leverage.
- Misaligned Holes: Slight misalignment can occur. Loosening the bolts on the opposite side of the hitch can sometimes provide enough wiggle room.
- Wiring Issues: Incorrect wiring can cause trailer lights to malfunction. Double-check all connections and use a multimeter to test the wiring.
Maintenance and Care
To ensure the longevity of your tow hitch, regularly inspect it for signs of rust, damage, or loose bolts. Clean the hitch periodically and apply a rust preventative coating. Regularly check and tighten the mounting bolts to maintain a secure connection.
By following these steps, you can confidently install a tow hitch on your Jeep Wrangler and unlock its full potential, transforming it from a capable off-roader into a versatile adventure vehicle.