
Program A Genie Remote Garage Door Opener
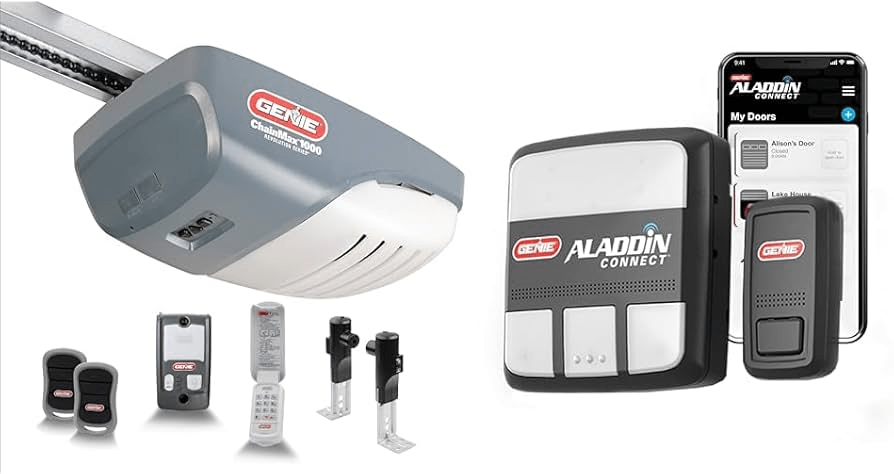
The humble garage door opener, a modern convenience we often take for granted, relies on a fascinating interplay of radio frequencies, digital encoding, and electromechanical engineering. Programming a Genie remote to control your garage door is a more complex process than simply pointing and clicking; it involves synchronizing the remote's transmitter with the receiver unit located within the garage door opener motor housing. This guide will delve into the technical aspects of this process, providing insights into the underlying principles and troubleshooting tips.
Understanding the Components
Before we dive into the programming procedures, it's crucial to understand the key components involved:
- Genie Remote: This handheld device houses a small radio transmitter. When you press a button, it sends a unique radio frequency (RF) signal. Modern Genie remotes typically operate in the 315 MHz or 390 MHz range. The signal is digitally encoded with a security code to prevent unauthorized access.
- Garage Door Opener Receiver: Located inside the garage door opener motor unit, the receiver is responsible for listening for the RF signal transmitted by the remote. It contains an antenna to capture the signal, a decoder to interpret the digital code, and a relay that ultimately triggers the motor to open or close the door.
- Learn Button (also known as a Smart Button): This button, typically found on the garage door opener motor housing, initiates the learning mode. When pressed, the receiver enters a state where it's actively listening for a new remote code. The location and color of this button varies depending on the Genie model. Common colors are yellow, red, orange, and purple.
- Safety Sensors: While not directly involved in the remote programming process, the safety sensors play a critical role in the overall operation. These sensors, located near the bottom of the garage door tracks, use an infrared beam to detect obstructions. If the beam is interrupted, the door will not close, preventing potential injury or damage. Many Genie openers will refuse to accept new remote codes if the safety sensors are malfunctioning, presenting a common troubleshooting hurdle.
The Programming Process: A Step-by-Step Analysis
Programming a Genie remote generally involves the following steps. Note that specific instructions may vary depending on your Genie model; always consult your owner's manual for the most accurate information.
- Identify the Learn Button: Locate the learn button on your garage door opener motor housing. As mentioned earlier, its color and location will vary. The owner's manual is invaluable for this step.
- Enter Learning Mode: Press and release the learn button. Immediately after pressing the button, an LED indicator light next to the button will typically illuminate, signifying that the receiver is in learning mode. This mode usually only lasts for a limited time, typically 30 seconds.
- Transmit the Remote Code: Within the 30-second window, press and hold the button on your Genie remote that you wish to program. Continue holding the button until the garage door opener lights flash, or you hear a clicking sound from the motor unit. This indicates that the receiver has successfully learned the remote's code. Some models require you to press the remote button two or three times during this step, so refer to the manual.
- Test the Remote: Release the remote button and test the newly programmed remote. If the garage door opens or closes, the programming was successful. If not, repeat steps 2 and 3.
- Multiple Remotes: To program additional remotes, repeat steps 2-4 for each remote.
Understanding Rolling Code Technology
Most modern garage door openers, including Genie models, utilize rolling code technology. This is a security feature designed to prevent code theft and replay attacks. With rolling code, the remote and the receiver use a complex algorithm to generate a new, unique code each time the remote button is pressed. This means that even if someone were to intercept the RF signal, they would only capture a single, one-time-use code, rendering it useless for future unauthorized access.
The learning process essentially synchronizes the remote and the receiver to the same point within the rolling code sequence. When you press the learn button, the receiver effectively says, "Okay, I'm ready to start listening for a new remote that's also starting (or has restarted) its rolling code sequence." By pressing the remote button during the learning window, you are transmitting the remote's current code, which the receiver validates and then uses to establish a synchronized rolling code pattern.
Troubleshooting Common Issues
Sometimes, the programming process doesn't go as smoothly as planned. Here are some common issues and potential solutions:
- Remote Not Responding:
- Battery Issues: The most common culprit is a weak or dead battery in the remote. Replace the battery and try again.
- Range Issues: Obstructions between the remote and the receiver, such as thick walls or metal structures, can interfere with the RF signal. Try moving closer to the garage door opener when programming.
- Incorrect Frequency: Ensure that the remote and the receiver are operating on the same frequency. While most Genie remotes operate on 315 MHz or 390 MHz, older models might use different frequencies.
- Receiver Issues: In rare cases, the receiver in the garage door opener motor unit may be faulty. This would require professional repair or replacement.
- Safety Sensor Problems: If the safety sensors are misaligned, damaged, or obstructed, the garage door opener may refuse to enter learning mode. Ensure that the sensors are properly aligned and that the LED indicators on both sensors are lit and not blinking erratically. Clean the sensor lenses with a soft cloth.
- Learning Mode Timeout: The learning mode window is typically very short (30 seconds). If you take too long to press the remote button after pressing the learn button, the receiver will exit learning mode. Repeat the process quickly.
- Interference: Other electronic devices, such as wireless routers or fluorescent lights, can sometimes interfere with the RF signal. Try turning off these devices during the programming process.
- Memory Full: Some garage door openers have a limited number of remotes they can store in memory. If the memory is full, you may need to erase existing remotes before adding new ones. Consult your owner's manual for instructions on how to clear the memory.
Advanced Considerations
For the truly technically inclined, understanding the intricacies of the digital encoding used in Genie remotes can be a rewarding pursuit. While the exact algorithms are proprietary, they generally involve a combination of pseudo-random number generation and encryption techniques to create a highly secure and unpredictable rolling code sequence. Furthermore, some newer Genie openers use more sophisticated security protocols, such as Intellicode 2, which offers enhanced encryption and protection against hacking.
Successfully programming a Genie remote requires a methodical approach, careful attention to detail, and a basic understanding of the underlying technology. By following the steps outlined in this guide and understanding the troubleshooting tips, you can confidently program your remote and enjoy the convenience of a reliable garage door opener.
Ultimately, the ability to program your own garage door opener remote empowers you with greater control over your home security and provides a valuable glimpse into the fascinating world of RF communication and digital encoding.