
Pulling A Steering Wheel Without A Puller
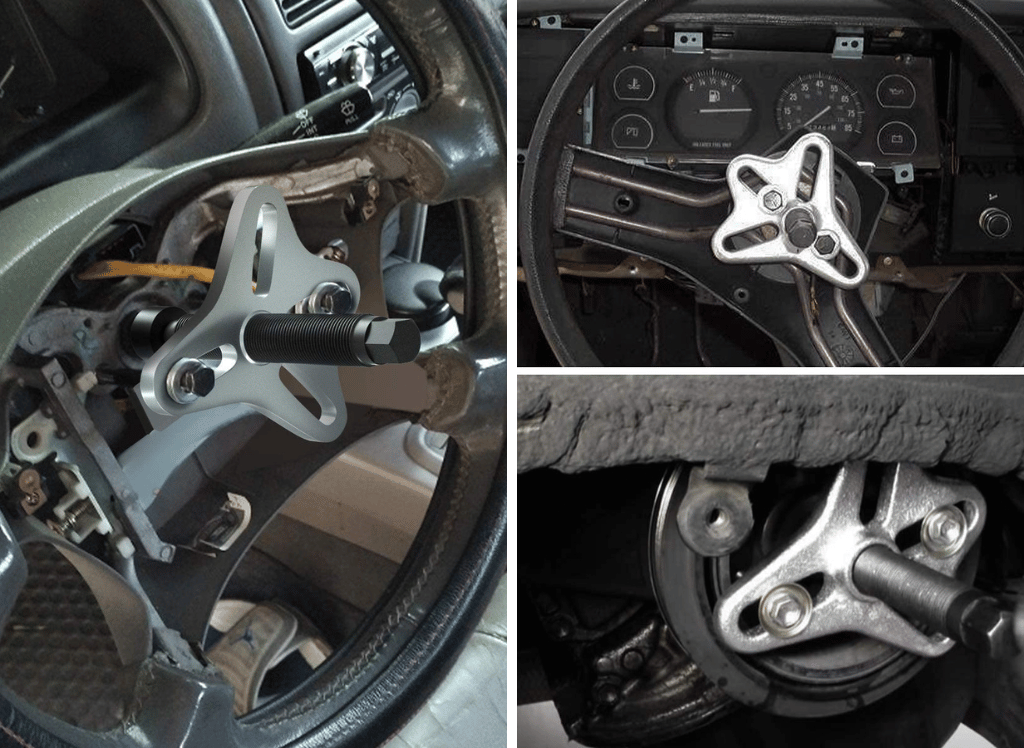
Removing a steering wheel is a task that might seem daunting, but it's often necessary for various maintenance and repair jobs. Whether you're replacing a worn-out steering wheel, accessing the clock spring for airbag or horn repairs, or troubleshooting issues within the steering column, sometimes you need to get that wheel off. While a steering wheel puller is the recommended tool for the job, it's not always readily available. This article explores safe and effective alternative methods for pulling a steering wheel without a dedicated puller, focusing on common problems, solutions, and preventative maintenance.
Problem: Steering Wheel Stuck Fast
The most common issue you'll face is a stubborn steering wheel. This usually manifests as the wheel refusing to budge, even after removing the retaining nut or bolt. Several factors contribute to this:
- Rust and Corrosion: Over time, rust can build up between the steering wheel hub and the steering column shaft, effectively welding them together.
- Tight Fit: Some steering wheels are designed with a very tight interference fit onto the splined shaft.
- Damage to Splines: If the steering column splines are damaged, the wheel can become jammed.
Solution 1: The "Gentle Persuasion" Method (With Caution)
This method is best attempted before trying more forceful approaches. It relies on a combination of loosening agents and controlled force. Safety First! Disconnect the negative battery terminal before starting to prevent accidental airbag deployment.
- Preparation: Remove the center horn button or airbag cover (refer to your vehicle's repair manual for specific instructions). Then, loosen the center retaining nut but *do not* remove it completely. Leaving it slightly threaded prevents the steering wheel from flying off unexpectedly and potentially causing injury.
- Penetrating Oil: Apply a generous amount of penetrating oil (like WD-40 Specialist Penetrant or PB Blaster) to the base of the steering wheel where it meets the steering column. Allow it to soak in for at least 30 minutes, preferably longer. Reapply the oil periodically during this time.
- The "Tap and Rock" Technique: With the nut still loosely in place, firmly grip the steering wheel at the 3 and 9 o'clock positions. Gently rock the wheel back and forth, and side to side, while simultaneously tapping (not hammering!) the center of the steering column with a rubber mallet. The vibrations and rocking motion, combined with the penetrating oil, can help break the bond.
- Increase the Force (Gradually): If the "tap and rock" method doesn't work, you can slightly increase the force of your rocking motion. Be careful not to exert excessive force, as you could damage the steering column or the steering wheel itself. Keep the retaining nut loosely in place!
- Patience is Key: This method often requires multiple attempts. Reapply penetrating oil and repeat the "tap and rock" technique several times.
Example: This method is often successful on older Honda Civics or Toyota Corollas where corrosion is a common issue. However, vehicles with airbags require extra caution when disconnecting components.
Solution 2: The "Knee Method" (For the Cautious and Strong)
This method is more aggressive and carries a higher risk of injury or damage if not performed carefully. Again, ensure the battery is disconnected and the retaining nut is loosened but not removed.
- Secure Footing: Sit comfortably in the driver's seat with your knees slightly bent.
- Position Your Hands: Grip the steering wheel firmly at the 3 and 9 o'clock positions.
- The Knee Thrust: Position your knees behind the steering wheel, applying gentle but firm pressure against the back of the wheel. Simultaneously, use your hands to pull the steering wheel towards you. The combination of pushing with your knees and pulling with your hands can create enough force to dislodge the wheel.
- Controlled Release: Once the steering wheel starts to move, be prepared to control its movement. The loosened nut will prevent it from flying off completely.
Warning: This method can be dangerous if you apply too much force or lose control of the steering wheel. Proceed with extreme caution. Never use this method on vehicles with active airbags without properly disabling the system according to the manufacturer's instructions.
Example: This method is sometimes used on Ford trucks or SUVs where the steering wheel is tightly fitted but not heavily corroded.
What to Do If Nothing Works?
If neither of these methods works, it's time to reconsider. You may have a particularly stubborn steering wheel, or there might be underlying damage. Here are your options:
- Purchase a Steering Wheel Puller: The best solution is always to use the proper tool. Steering wheel pullers are relatively inexpensive and can be purchased at most auto parts stores.
- Seek Professional Help: If you're uncomfortable with these methods or are concerned about damaging your vehicle, take it to a qualified mechanic. They have the tools and expertise to safely remove the steering wheel.
Preventative Maintenance: Keeping Your Steering Wheel Trouble-Free
While you can't completely prevent a steering wheel from becoming stuck, regular maintenance can help minimize the risk:
- Avoid Excessive Force: When tightening the steering wheel retaining nut or bolt, avoid over-tightening. This can damage the splines and make removal more difficult in the future.
- Regular Inspection: Periodically inspect the steering wheel hub and shaft for signs of rust or corrosion. Clean any rust promptly with a wire brush and apply a thin layer of grease.
- Lubricate the Splines: When replacing the steering wheel or accessing the steering column, apply a thin layer of grease to the splines before reassembly. This will help prevent corrosion and make future removal easier.
Real-World Issues and Troubleshooting
Problem: Airbag Light After Steering Wheel Removal.
Cause: This is almost always due to a problem with the clock spring (also known as the spiral cable). The clock spring allows the steering wheel to rotate while maintaining electrical connections to the airbag, horn, and other steering wheel-mounted controls.
Solution: Carefully inspect the clock spring for damage. If it's damaged, it must be replaced. Replacing the clock spring requires specialized knowledge and care. Ensure the steering wheel is properly aligned during reinstallation to prevent damage to the new clock spring.
Problem: Steering Wheel Off-Center After Reinstallation.
Cause: The steering wheel was not properly aligned on the splined shaft during reinstallation.
Solution: Loosen the steering wheel retaining nut and carefully reposition the steering wheel on the splined shaft until it is centered. Tighten the nut to the manufacturer's specifications.
Removing a steering wheel without a puller can be a challenging task, but it is possible with the right techniques and precautions. Remember to prioritize safety, be patient, and consider seeking professional help if you're not comfortable with the process. By following these tips and performing regular maintenance, you can keep your steering wheel in top condition and avoid costly repairs.