
Rear Drum Brake Conversion Kit
Rear drum brakes, while reliable in many older vehicles, often lag behind the performance and maintenance ease of disc brakes. A rear drum brake conversion kit offers a way to upgrade your vehicle's braking system, providing potentially better stopping power and reduced maintenance hassles. This article delves into the practical aspects of maintaining, troubleshooting, and addressing real-world issues associated with these kits.
Understanding Rear Drum Brake Conversion Kits
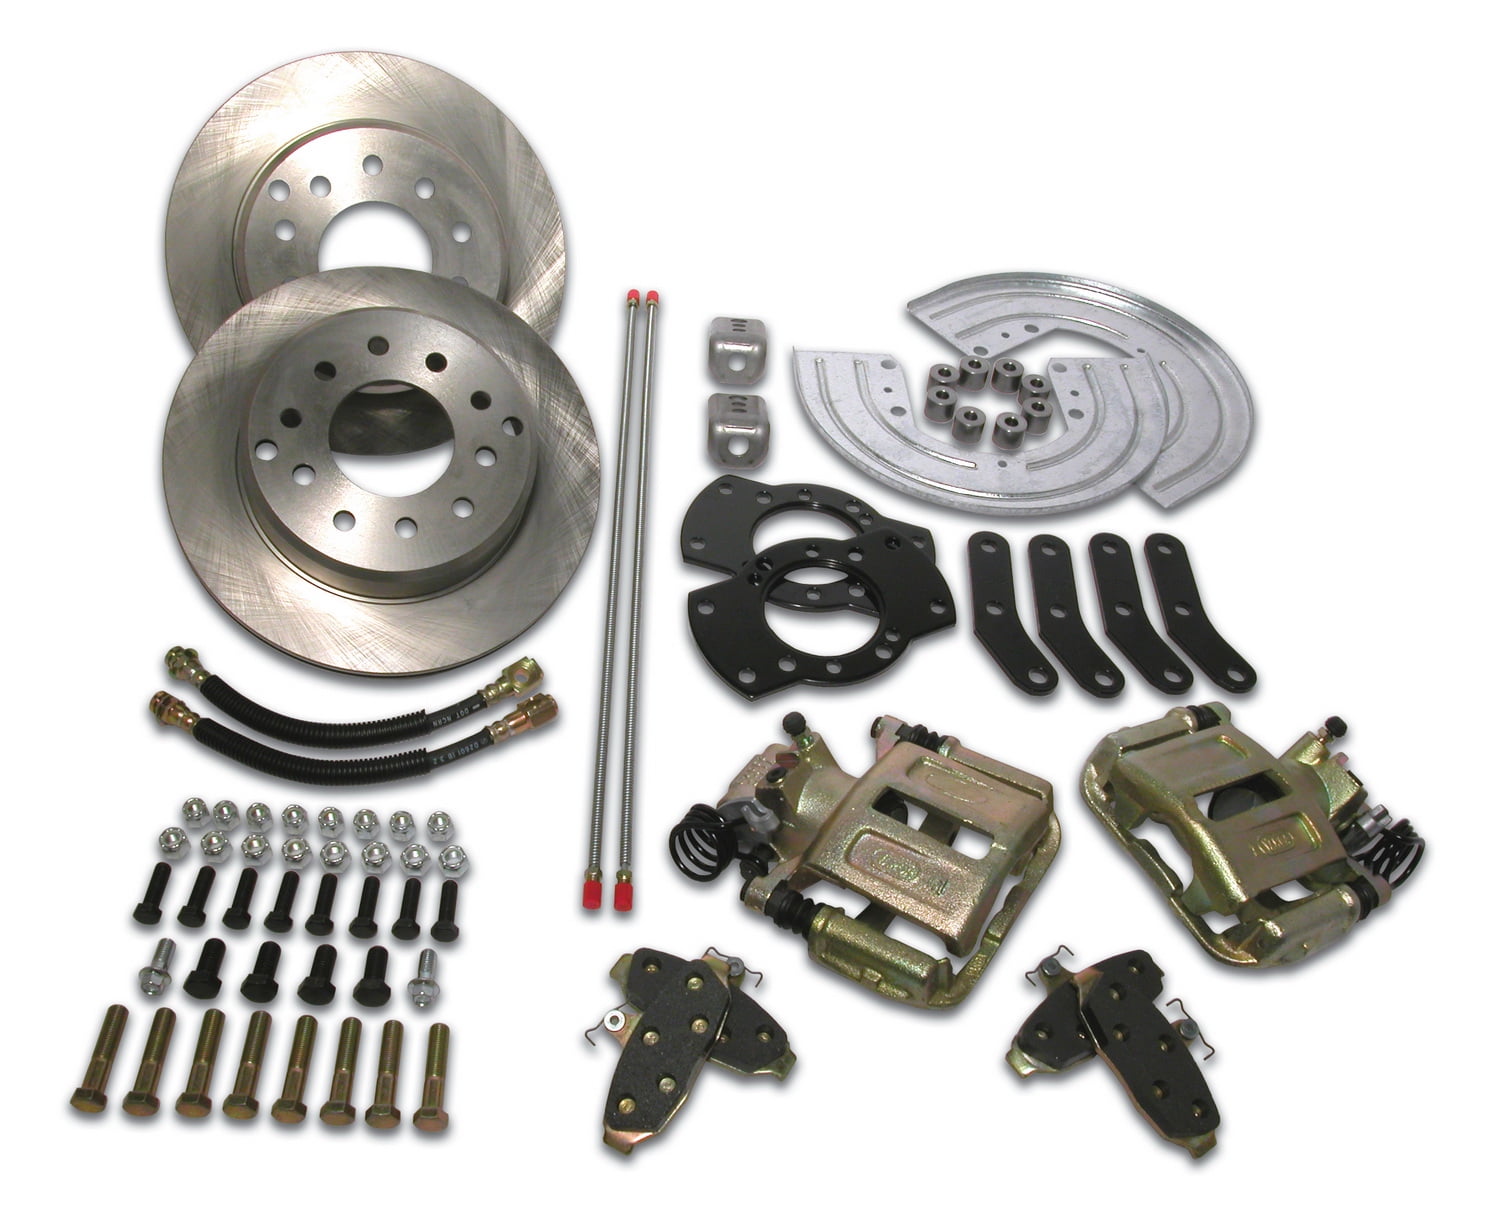
A rear drum brake conversion kit typically includes all the necessary components to replace your existing drum brakes with disc brakes. This includes:
- Disc brake rotors
- Brake calipers
- Brake pads
- Mounting brackets
- Brake hoses
- Emergency brake cables (often modified or replaced)
- Sometimes a new master cylinder or proportioning valve
The benefits of a conversion include improved braking performance, especially in wet conditions; better heat dissipation, reducing brake fade; easier pad replacement compared to drum brake shoes; and a more modern aesthetic. However, it's crucial to understand that not all kits are created equal. Compatibility with your specific vehicle model is paramount.
Maintenance Tips for Converted Rear Disc Brakes
Once your rear drum brakes are converted, maintenance becomes more akin to standard disc brake systems. Here's what to focus on:
Regular Inspection of Brake Pads and Rotors
Problem: Reduced braking efficiency, squealing noises, or a grinding sound when braking.
Cause: Worn brake pads or scored rotors.
Solution: Inspect brake pad thickness at every oil change (or about every 6,000 miles). Replace pads when they reach their minimum thickness (typically around 3mm). Check rotors for scoring, warping, or excessive wear. If rotors are excessively worn or scored, they should be resurfaced or replaced. On a Honda Civic, for example, a squealing noise often indicates worn pads triggering the wear indicator.
Preventive Measure: Use quality brake pads and rotors. Avoid aggressive braking habits that accelerate wear.
Brake Fluid Checks and Flushes
Problem: Spongy brake pedal feel, reduced braking performance, or ABS malfunction.
Cause: Contaminated or old brake fluid. Brake fluid is hygroscopic, meaning it absorbs moisture from the air. This moisture reduces the fluid's boiling point and can lead to corrosion within the brake system.
Solution: Check the brake fluid level regularly and ensure it's within the specified range. Test the brake fluid for moisture content using a brake fluid tester. Flush the brake fluid every 2-3 years, or as recommended by the vehicle manufacturer or kit instructions. For a Ford Mustang with a rear disc conversion, contaminated fluid can lead to a soft pedal and reduced stopping power, especially on the track.
Preventive Measure: Use the correct type of brake fluid specified for your vehicle (DOT 3, DOT 4, etc.). Store brake fluid in a sealed container to prevent moisture absorption.
Caliper Maintenance
Problem: Brakes dragging, uneven brake pad wear, or a stuck caliper.
Cause: Corrosion or damage to the caliper pistons or slides. This can prevent the caliper from retracting properly, causing the brakes to drag.
Solution: Inspect calipers for signs of leaks or corrosion. Clean and lubricate caliper slides regularly (typically during brake pad replacement). If a caliper is stuck, it may need to be rebuilt or replaced. On a Toyota Tacoma with a rear disc conversion, a common issue is rust forming on the caliper slides due to exposure to the elements, causing the caliper to stick. Using a high-temperature brake grease during installation and maintenance can help prevent this.
Preventive Measure: Use high-quality brake grease on caliper slides. Inspect and clean calipers during brake pad replacement. Consider using stainless steel brake lines to reduce corrosion.
Emergency Brake Cable Adjustment and Maintenance
Problem: Emergency brake not holding the vehicle properly, or difficult to engage/disengage.
Cause: Stretched or corroded emergency brake cables, or improper adjustment.
Solution: Inspect emergency brake cables for signs of damage or corrosion. Adjust the emergency brake cable tension as needed. Some conversion kits require specific emergency brake cable adjustments or modifications. The Jeep Wrangler, a popular candidate for rear disc conversions, often requires careful adjustment of the emergency brake cable to ensure proper function after the conversion. Refer to the kit's instructions for the correct adjustment procedure.
Preventive Measure: Lubricate emergency brake cables periodically. Use high-quality emergency brake cables designed for the conversion kit.
Troubleshooting Common Issues After Conversion
Brake Pedal Feel
Problem: Soft or spongy brake pedal feel.
Cause: Air in the brake lines, incorrect master cylinder size, or a faulty proportioning valve.
Solution: Bleed the brake system thoroughly to remove any air. Ensure the master cylinder is properly sized for the disc brake conversion. If the master cylinder is too small, it may not provide enough fluid volume to actuate the calipers effectively. Consider upgrading to a larger master cylinder or adjusting the proportioning valve. Some kits require a specific proportioning valve setting to balance the front and rear braking forces correctly. On a classic Chevrolet Camaro conversion, the original master cylinder may not be adequate and an upgrade is often necessary.
Brake Noise
Problem: Squealing, grinding, or clicking noises when braking.
Cause: Worn brake pads, scored rotors, loose hardware, or improper brake pad installation.
Solution: Inspect brake pads and rotors for wear. Ensure all hardware is properly tightened. Apply a thin layer of brake grease to the back of the brake pads to dampen vibrations. If the noise persists, consider replacing the brake pads or rotors. A clicking noise can sometimes indicate loose caliper hardware or a worn caliper slide. Ensure the brake pads are properly seated in the caliper. Sometimes the brand of pads can make a difference, some are just naturally noisy.
Uneven Brake Wear
Problem: One side of the vehicle's brakes wearing out faster than the other.
Cause: Sticking caliper, restricted brake hose, or a faulty proportioning valve.
Solution: Inspect calipers for sticking or binding. Check brake hoses for kinks or restrictions. A restricted brake hose can prevent the caliper from releasing properly, causing excessive wear. Ensure the proportioning valve is properly adjusted to balance the braking forces. A faulty proportioning valve can send too much braking force to one side of the vehicle.
ABS Issues
Problem: ABS light illuminated, ABS system not functioning correctly.
Cause: Damaged ABS sensors, incorrect ABS sensor gap, or compatibility issues between the conversion kit and the ABS system.
Solution: Inspect ABS sensors for damage or contamination. Ensure the ABS sensor gap is within the specified range. Some conversion kits may require modifications to the ABS system or the use of aftermarket ABS controllers to ensure compatibility. A Nissan 240SX with a rear disc conversion might experience ABS issues if the wheel speed sensors are not properly calibrated or if the conversion interferes with the ABS sensor readings.
Choosing the Right Conversion Kit
Selecting the appropriate rear drum brake conversion kit is crucial for a successful and trouble-free upgrade. Consider the following factors:
- Vehicle Compatibility: Ensure the kit is specifically designed for your vehicle make, model, and year.
- Quality of Components: Opt for kits that use high-quality brake pads, rotors, and calipers.
- Ease of Installation: Choose a kit that includes detailed instructions and all necessary hardware.
- Emergency Brake Functionality: Verify that the kit provides a functional and reliable emergency brake system.
- Master Cylinder and Proportioning Valve: Determine if the kit requires a master cylinder upgrade or proportioning valve adjustment.
- Reputation of the Manufacturer: Research the manufacturer's reputation and read reviews from other users.
A well-researched and properly installed kit will significantly improve your vehicle's braking performance and safety.
Keeping Your Converted Brakes in Top Condition
Maintaining your rear disc brakes after conversion is key to ensuring long-term reliability and optimal performance. Here are some final tips:
- Regular Inspections: Regularly inspect brake pads, rotors, calipers, and brake lines for wear, damage, or leaks.
- Proper Lubrication: Lubricate caliper slides and emergency brake cables periodically to prevent corrosion and binding.
- Timely Replacements: Replace worn brake pads and rotors promptly to avoid further damage to the brake system.
- Quality Brake Fluid: Use the correct type of brake fluid and flush the system every 2-3 years.
- Professional Installation: If you are not comfortable performing the conversion yourself, seek the help of a qualified mechanic.
By following these maintenance tips and addressing any issues promptly, you can enjoy the benefits of your rear drum brake conversion for years to come. A properly maintained brake system is crucial for your safety and the safety of others on the road.