Replace Side Mirror Nissan Sentra
The side mirror, a seemingly simple component, is a critical safety feature on any vehicle. From lane changes to parking maneuvers, it provides a vital rearward view, minimizing blind spots and preventing accidents. While modern vehicles often boast advanced features like blind-spot monitoring, the traditional side mirror remains a fundamental and reliable tool for situational awareness. This guide delves into the replacement of a side mirror on a Nissan Sentra, offering a detailed, step-by-step walkthrough accompanied by technical insights into the components and processes involved.
Understanding the Anatomy of a Nissan Sentra Side Mirror
Before embarking on the replacement process, it's beneficial to understand the components that constitute a typical Nissan Sentra side mirror assembly. Understanding the parts helps in troubleshooting issues and performing the replacement effectively.
Key Components:
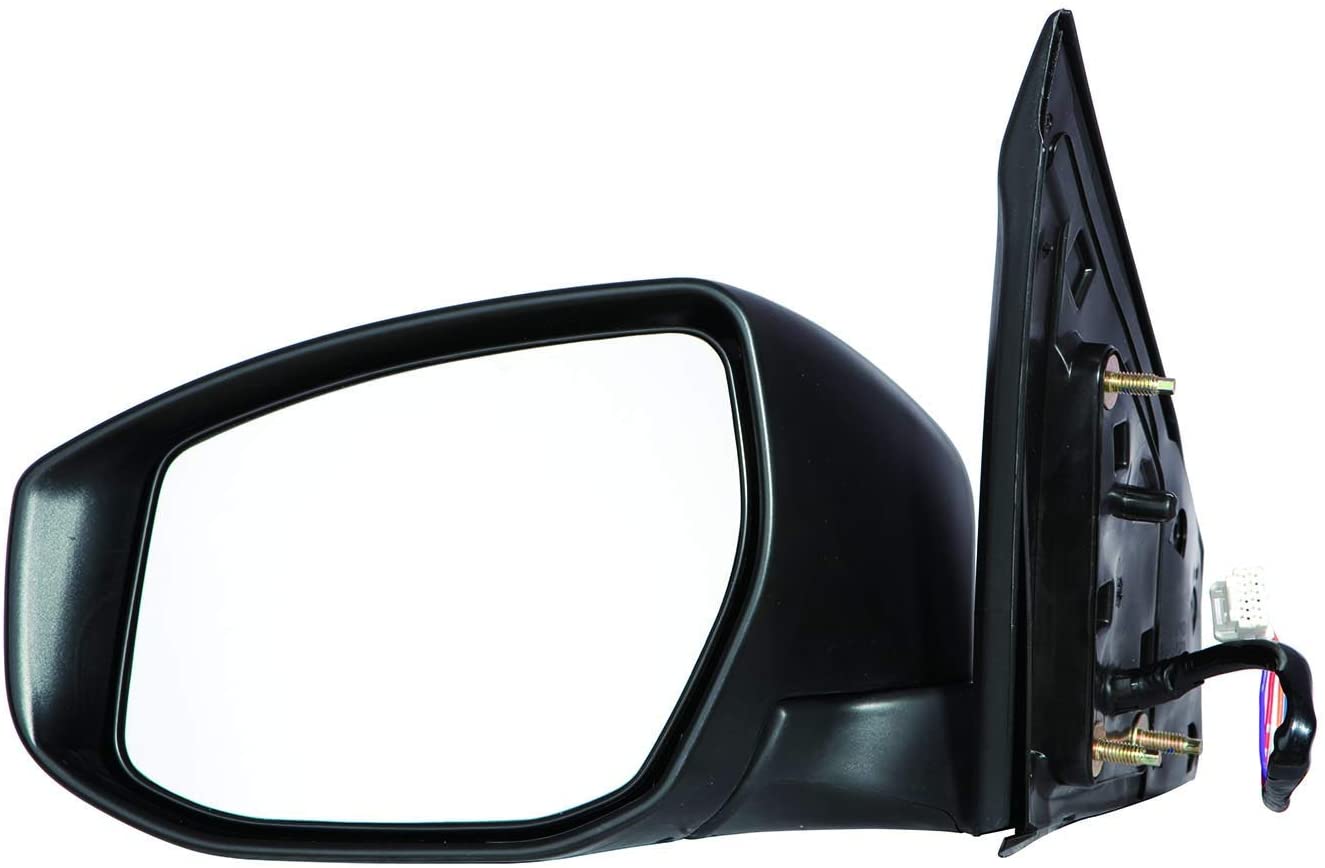
- Mirror Glass: This is the reflective surface itself, usually made of coated glass. In many modern Sentras, this glass is heated to defrost ice and prevent fogging. Some also have integrated turn signal indicators.
- Mirror Housing: This is the plastic shell that encases and protects the internal mechanisms. It's typically painted to match the vehicle's color.
- Actuator Motor(s): For power mirrors, these small electric motors control the horizontal and vertical movement of the mirror glass, allowing the driver to adjust the view from inside the vehicle.
- Pivot Mechanism: This allows the entire mirror assembly to fold inwards, protecting it from damage in tight spaces or during minor impacts.
- Mounting Bracket: This secures the mirror assembly to the vehicle's door. It's usually made of metal for strength and durability.
- Wiring Harness: This connects the actuator motors (if applicable), heated mirror element (if applicable), and turn signal (if applicable) to the vehicle's electrical system.
Tools and Materials Required
Having the right tools and materials on hand is crucial for a smooth and efficient side mirror replacement. Preparation is key to avoiding frustration and potential damage to your vehicle.
- New Side Mirror Assembly: Ensure you purchase the correct part for your specific year and trim level of Nissan Sentra. Check the features (power, heated, turn signal) to match your existing mirror.
- Screwdrivers: A Phillips head and a flathead screwdriver are essential. The size of the Phillips head will likely be determined by the screws holding the interior door panel in place.
- Socket Set or Nut Driver: You'll need a socket set or nut driver to remove the bolts or nuts securing the mirror assembly to the door. The size will vary depending on the specific model.
- Panel Removal Tool (Optional): This plastic tool helps to remove interior door panels without scratching or damaging the paint. A flathead screwdriver wrapped in tape can be used as a substitute, but be careful.
- Pliers: May be needed to disconnect electrical connectors.
- Protective Gloves: To protect your hands from sharp edges and grime.
- Shop Towels: For cleaning and wiping up spills.
- Safety Glasses: To protect your eyes from debris.
Step-by-Step Side Mirror Replacement Guide
This section provides a detailed walkthrough of the side mirror replacement process. Always disconnect the negative terminal of the battery before working on any electrical components to prevent short circuits and potential damage.
Step 1: Disconnecting the Battery (Important Safety Precaution)
Locate the negative terminal on your car battery (usually marked with a "-" symbol). Use a wrench to loosen the nut securing the cable to the terminal. Carefully remove the cable and tuck it away from the terminal to prevent accidental contact. This step is crucial for preventing electrical shocks and damage to the vehicle's electrical system.
Step 2: Removing the Interior Door Panel
The side mirror is typically attached to the door frame from the inside. Therefore, you'll need to remove the interior door panel to access the mounting bolts or nuts.
- Locate and remove any screws: Examine the door panel for screws, usually located around the perimeter, in the door handle recess, and near the armrest. Use a Phillips head screwdriver to remove these screws and store them in a safe place to prevent losing them.
- Use a panel removal tool (or carefully wrapped flathead screwdriver) to pry the panel away from the door: Start at the bottom edge of the panel and gently work your way around the perimeter. The panel is held in place by plastic clips, which will pop out as you pry. Avoid using excessive force, as this can damage the clips or the panel itself.
- Lift the door panel upwards and away from the door: Once all the clips are disengaged, lift the panel vertically to clear the window ledge.
- Disconnect any electrical connectors: Be careful. There may be electrical connectors attached to the door panel for the power windows, door lock, and speakers. Disconnect these connectors by pressing the release tabs and gently pulling them apart. Note the orientation of each connector so you can reconnect them correctly later.
- Set the door panel aside: Place the door panel in a safe location where it won't be damaged.
Step 3: Accessing the Mirror Mounting Area
With the door panel removed, you should now have access to the inner door frame and the mounting area for the side mirror.
- Locate the access cover (if applicable): Some Nissan Sentra models have a small plastic cover that conceals the mirror mounting bolts or nuts. Remove this cover to expose the mounting hardware.
- If no cover exists, the mirror mounting area is usually visible directly through a hole in the inner door frame.
Step 4: Disconnecting the Electrical Connector (if applicable)
If your Sentra has power mirrors, heated mirrors, or turn signals in the mirror, you'll need to disconnect the electrical connector before removing the mirror assembly. If it's just a manual mirror, skip this step. This connector supplies power to the mirror's electrical components.
- Locate the electrical connector: Trace the wiring harness from the mirror assembly to the connector. It is usually clipped or taped to the inside of the door.
- Disconnect the connector: Press the release tab on the connector and gently pull it apart. Do not pull on the wires themselves.
Step 5: Removing the Old Side Mirror Assembly
This is the crucial step where you detach the old mirror from the vehicle. This process requires patience and caution to avoid damaging the surrounding paint or the vehicle's structure.
- Loosen the mounting bolts or nuts: Use a socket set or nut driver to loosen the bolts or nuts that secure the mirror assembly to the door. Note the number and arrangement of these fasteners.
- Support the mirror assembly: As you loosen the final bolt or nut, support the mirror assembly with your hand to prevent it from falling and potentially damaging the paint.
- Remove the mirror assembly: Once all the fasteners are removed, carefully remove the old mirror assembly from the door.
Step 6: Installing the New Side Mirror Assembly
Now, carefully install the new side mirror assembly, reversing the removal process. Take care aligning parts and connecting electricals.
- Position the new mirror assembly: Align the new mirror assembly with the mounting holes on the door.
- Install the mounting bolts or nuts: Secure the mirror assembly to the door using the bolts or nuts you removed earlier. Tighten the fasteners to the proper torque specification. Do not overtighten them, as this can damage the mounting bracket or the door.
- Connect the electrical connector (if applicable): Reconnect the electrical connector to the mirror assembly, ensuring it clicks into place securely.
Step 7: Reinstalling the Interior Door Panel
Reinstall the interior door panel, reversing the removal process. This step is important for restoring the vehicle's interior appearance and functionality.
- Connect any electrical connectors: Reconnect any electrical connectors you disconnected earlier for the power windows, door lock, and speakers.
- Align the door panel with the door: Align the door panel with the door and press it into place, ensuring the plastic clips engage securely.
- Reinstall any screws: Reinstall any screws you removed earlier to secure the door panel to the door.
Step 8: Reconnecting the Battery
Reconnect the negative terminal to the car battery. Tighten the nut securely.
Step 9: Testing the New Side Mirror
After completing the installation, test the new side mirror to ensure it functions properly.
- Start the engine.
- If the mirror is power-operated, adjust the mirror glass using the control switch to verify horizontal and vertical movement.
- If the mirror is heated, turn on the rear defroster and check if the mirror glass warms up.
- If the mirror has a turn signal, activate the turn signal and check if the turn signal indicator on the mirror is working.
If any of these functions are not working correctly, double-check the electrical connections and the wiring harness.
Troubleshooting Common Issues
Even with careful execution, issues may arise during or after the side mirror replacement. Here are some common problems and their potential solutions:
- Mirror not adjusting (power mirrors): Check the fuse for the power mirrors. If the fuse is blown, replace it with a new one of the same amperage. Also, inspect the wiring harness and connector for any damage.
- Heated mirror not working: Check the fuse for the heated mirrors (often the same fuse as the rear defroster). Inspect the wiring harness and connector for any damage. A faulty heating element may also be the cause, requiring mirror glass replacement.
- Door panel not fitting correctly: Ensure all the plastic clips are properly aligned and engaged. Check for any obstructions that may be preventing the panel from seating correctly.
- Loose mirror assembly: Double-check the tightness of the mounting bolts or nuts. If the mounting holes are damaged, you may need to use a larger washer or a thread repair kit.
Conclusion
Replacing a side mirror on a Nissan Sentra is a manageable task for the average DIY enthusiast. By carefully following these steps and taking the necessary precautions, you can save money on labor costs and gain a deeper understanding of your vehicle's mechanics. Remember to prioritize safety, use the correct tools, and take your time to avoid mistakes. A functioning side mirror is crucial for safe driving, so ensuring its proper installation is paramount.